How to Screen Record on Chromebook
Updated on October 23, 2023

As our lives become more digital and remote work becomes more common, we need to be able to communicate with those around us in a dynamic yet online method. And one of them is capturing screenshots, both as pictures and as videos.
Nowadays, screen recording has become a crucial tool for teachers, students, and professionals of many types. You can make videos on your computer that demonstrate how to accomplish something step-by-step as they are quite easy to follow. With screen recordings, the person watching the video content is welcome to pause at any time to comprehend what is happening.
If you are looking for methods on how to screen record on Chromebook, then you are in the right place. This material will provide you with resourceful information on screen recordings in general, as well as with valuable tips and tricks on how to record your Chromebook screen.
Fasten your seatbelt and let’s start with the basics!
How to Screen Record on Chromebook
Now that you know more about screen recordings and Chromebooks in general, the next natural question that comes to your mind is: can you screen record on Chromebook?
And the answer is yes. Then, what is the best screen recorder for Chromebook? In the following part of the material, we will introduce you to two various methods of recording your screen, both through the built-in tool and with an online screen recorder.
Are you ready to find out how to take a video on a Chromebook?
Screen Recording with the Built-In Tool
Did you know that you can screen record only by using your Chromebook’s settings? The Chromebook screen recorder tool, which Google added in Chrome OS 89, is now available in the Quick Settings panel. The tool may capture static screenshots as well as record video.
Let’s see how you can start recording with the built-in tool!
Open the Snipping Tool
So, how do you access the Chrome OS snipping tool? To begin the process and access the built-in screen recorder, open the Quick Settings panel by clicking the clock on the Shelf in the bottom-right corner.
Start the Screen Capture
If the menu isn't fully enlarged when you start, click the arrow in the top-right corner. Then, press the "Screen Capture" button, which can be found at the bottom of the screen.
When you select “Screen Capture”, make sure the video icon for screen recording is chosen. On your Chromebook, the camera icon will only take screenshots.
Choose the type of Screen Recording
With the built-in tool, you can record the entire screen, a portion of the screen, or a single window. To proceed, pick one of these types. Up next, click the gear icon. During the screen recording, you can select to capture audio with the onboard microphone and turn your finished recording into a screencast.
Depending on the type of recording, the process differs slightly. Here are the specific manners in which you can start recording:
- Full Screen: To begin recording, click anywhere on the screen.
- Partial: Drag to pick the area to be recorded, then click the "Record" button.
- Window: To begin recording, click the window or part of the screen you want to record.
A three-second countdown will appear on the screen before the recording begins. When you're done, press the red stop button on the Shelf.
Download your video
Following the moment when you stop recording, a message will pop up with the message "Screen Recording Taken”. This will take you to the video file in your "Downloads" folder if you click it. The folder will open, and you may choose a video file to watch, share, save to Google Drive, or delete.
The built-in screen recording tool can be a terrific, easy method to create screen recordings on your Chromebook. Yet, the main drawback is that the videos are saved as WEBM files. To convert them to MP4, you'll need to use an internet converter.
Screen Recording with Flixier
Do you want to immediately upload the screen recording to Instagram or YouTube or do you want to quickly improve the video with some quick editing? Then, the built-in tool might, however, not be the best screen recorder for Chromebook. Especially as WEBM files tend quite a bit of time and effort to convert to MP4.
What should you go for in this scenario? The greatest online screen recorder is always the one that does just what you need. If you're looking for speed, simplicity, and the flexibility to simply edit your footage afterwards, then Flixier might be the one for you.
It allows you to record your screen, webcam, and microphone with a few clicks directly from your web browser while immediately uploading it to your platform of choice. You can record and edit your video in minutes, whether you're recording a screencast, an online course, a video tutorial, or a gaming video.
To record your screen on Chromebooks, you don't need to install or download anything. Simply launch Flixier in your web browser and press the Record button.
Therefore, why should you choose Flixier as a screen recording tool and Chromebook video editor? Because you can:
- Avoid headaches with a simple online video recorder
- Edit your screen recordings before publishing them
- Save money with a free online screen recorder
- Annotate your screen recording
- Add text to your video recordings
- Cut or Trim the video to remove parts that you don’t like
The Flixier screen recording process is simple, having three easy steps for you to follow: record, edit, and download or publish.
Record
To launch Flixier in your web browser, click the “Get Started” button. Then, click the blue Record button and choose your plan. And thankfully, Flixier is a screen recorder with audio and video options. You'll note that you can record your screen, your camera, and your microphone, or any combination of the three (webcam insert and split screen). Make sure that you have your microphone enabled if you want to start recording audio.
.png)
Edit
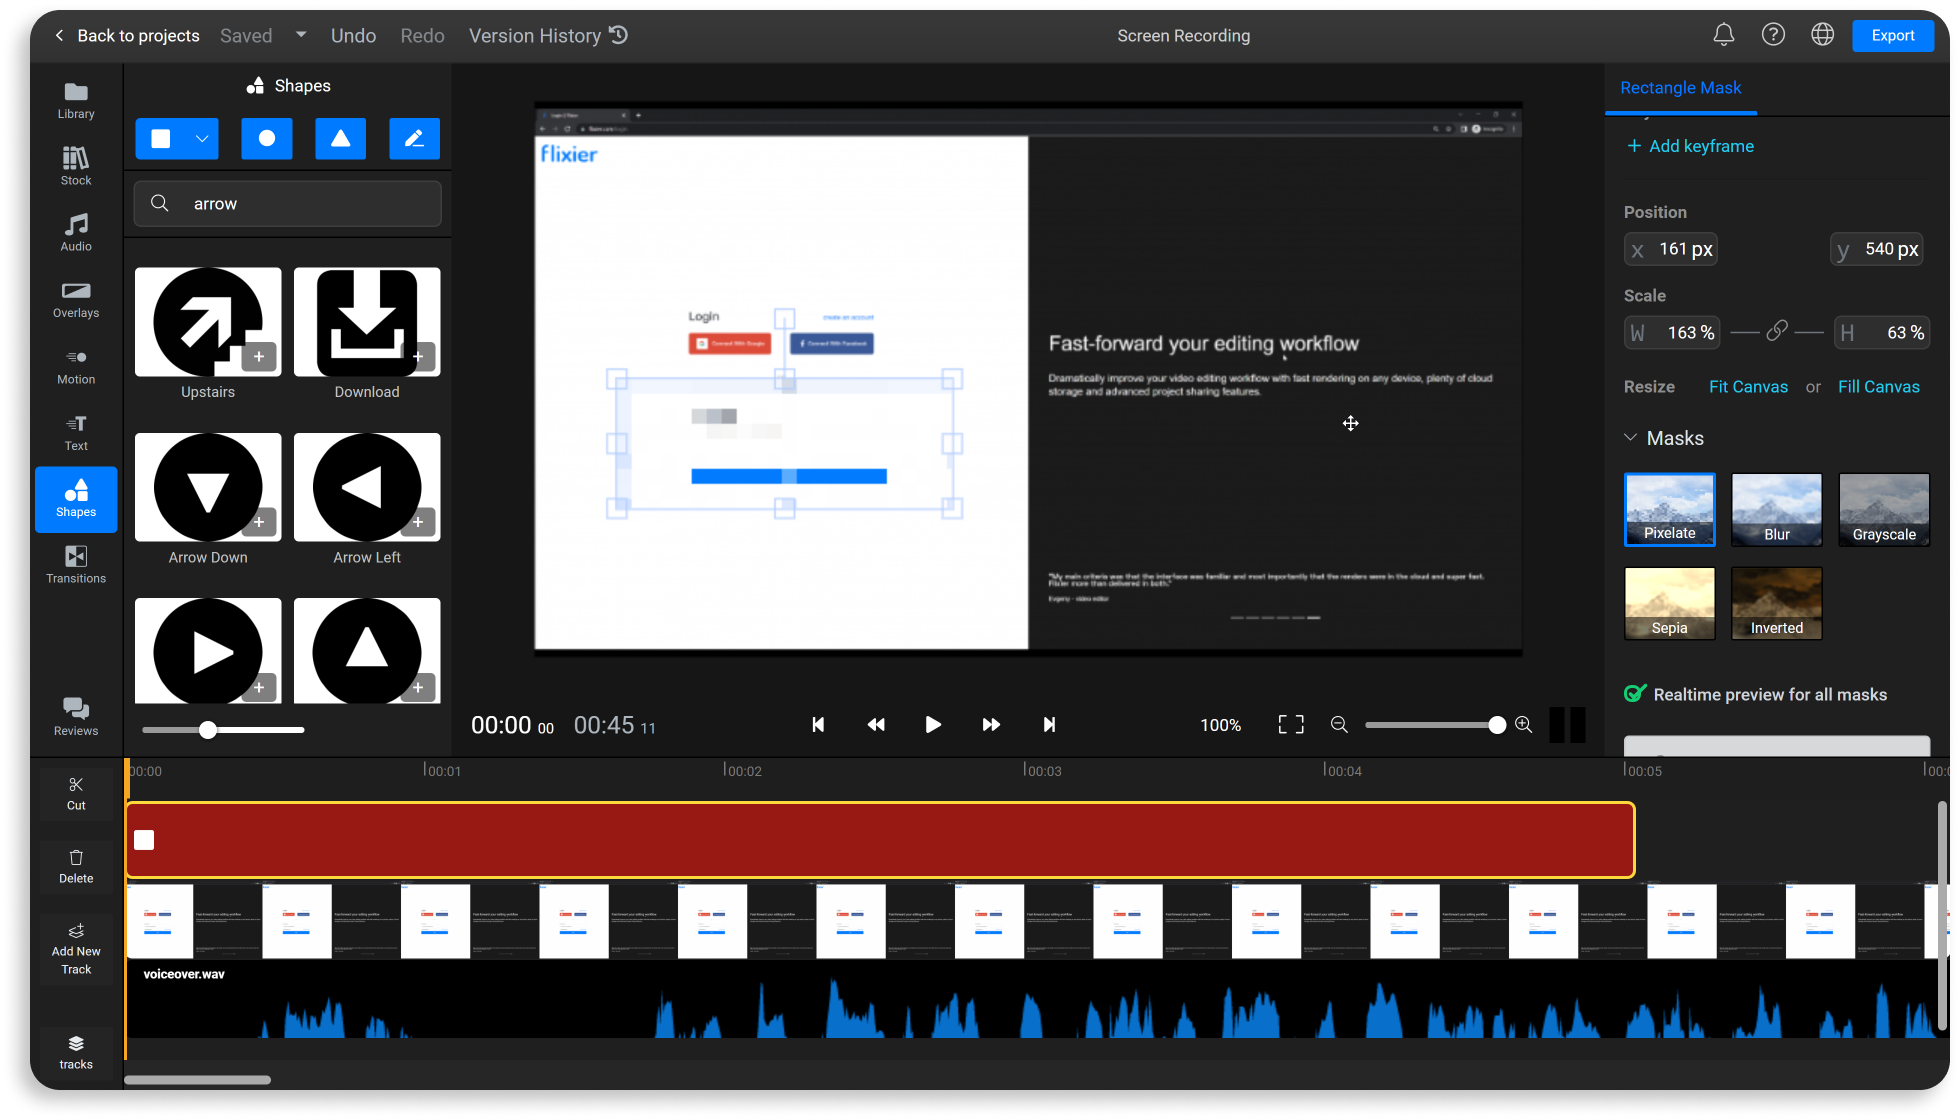
Once you have screen recorded all you needed, drag your video to the Flixier timeline. Cut, edit, or crop the video, add text and images, and highlight significant portions or censor any personal material using the “Shapes” menu on the left side of the screen.

Download or Publish
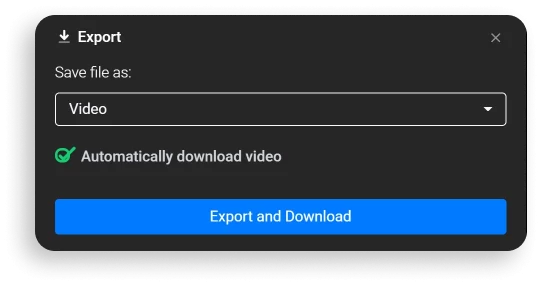
After you've completed editing your video, go to the upper right corner and click on Export and Download. Flixier will process your footage for a few moments before you may save the screen recording to your computer or publish it immediately to YouTube or Vimeo.

Following these three easy steps, you can quickly record your Chromebook’s screen without using your screen capture toolbar.
The Difference Between Screen Capture and Screen Record
The primary distinction between a screen recording and a screen capture is that the former is designed to record videos and the latter to take screen captures or screenshots (in the form of images).
However, the two characteristics are frequently included as standalone features in a variety of applications. Yet, “screen capture” is sometimes used interchangeably for both screenshots and screen recordings, however it is best used to describe the first one.
When it comes to screen recordings, the screen capture software effectively records every movement on your device.
You can use screen recordings to:
- Explain your employees how to use a specific piece of software
- Show the software development staff a website bug as soon as possible.
- Offer video and audio feedback on various pieces of content
- Turn a PowerPoint presentation into a video
- Offer instructions on job-related matters
Types of Screen Recording
How you choose to record your screen depends on your current needs. Is the video recorded for a professional purpose, or are you just explaining something to your friend? Do you need to record audio, or is showing off the Chromebook’s screen enough for the viewer to understand the message you are trying to convey?
There are various types of video recording, such as:
- Full screen recording
- Partial screen recording
- Window screen recording
- Screencasting
Learn more about each method to video record your screen and pick the one suitable to your needs!
Full Screen Recording
A full screen recording is a type of recording that allows the entire screen of the Chromebook to be part of the final video.
In this type of screen recording, you can see everything that’s on screen, including all the apps opened in the toolbar and any windows the recorder hasn’t closed beforehand.
Partial Screen Recording
You probably don't want your desktop icons and bookmarks to appear in your live-streaming, video call, or gaming recordings on your PC. As a result, recording a specific part of the screen is the best option.
This is the so-called partial screen recording.
Window Screen Recording
Similar to partial screen recordings, when you only want to record a specific window from your browsers, you can go for a window-type of screen recording.
This can be highly useful when you want to record a tutorial for your coworkers while still having your email or other messaging browsers open in another window.
Screencasting
A screencast is a digital video recording of your computer's screen with audio narration. Screencasts are an excellent way to teach or convey concepts, as you can record microphone audio and explain what is being shown at the same time. This type of capturing video screenshots is highly useful when you record lessons, training or any other type of instructional videos.
In fact, for a better video explanation, you can record screen and camera at the same time with the help of an online webcam recorder. This way, the person watching the screen recording will see both the full screen and the speaker’s notes.
Start Recording Your Chromebook’s Screen with Flixier!
Are you looking for a powerful video editor with a screen recording built-in tool that can be easily ruled on your Chromebook? Then, as you can see, Flixier might be just the right choice for you.
Whether you want to save time, energy, or money, you can easily edit your video with Flixier. Without any prior downloads or video editing skills, your content can be ready to publish with only a few clicks.
At Flixier, we have developed specialized video processing technologies that allow video editing to work seamlessly on old, low-powered machines or even Chromebooks, combined with real-time collaboration features to enable quick turnaround in team contexts. All of this is packed within a video tool that is simple enough for non-professionals to use while still retaining tremendous capabilities that can please even the most sophisticated users.
Try our free tool and make the most out of our screen recording and other editing features!
Andra is highly curious about the marketing field, but most of her experience lays in the content writing sphere, mainly in relation to social media marketing, social media automation, and video marketing.


