Announcements
Find out about our latest product changes as we continue improving Flixier to enable your team to make amazing videos
New & Improved Audio Enhancer
Our Audio Enhancer just got a massive update with better AI models for noise removal and entirely new features like reverb and breath removal.
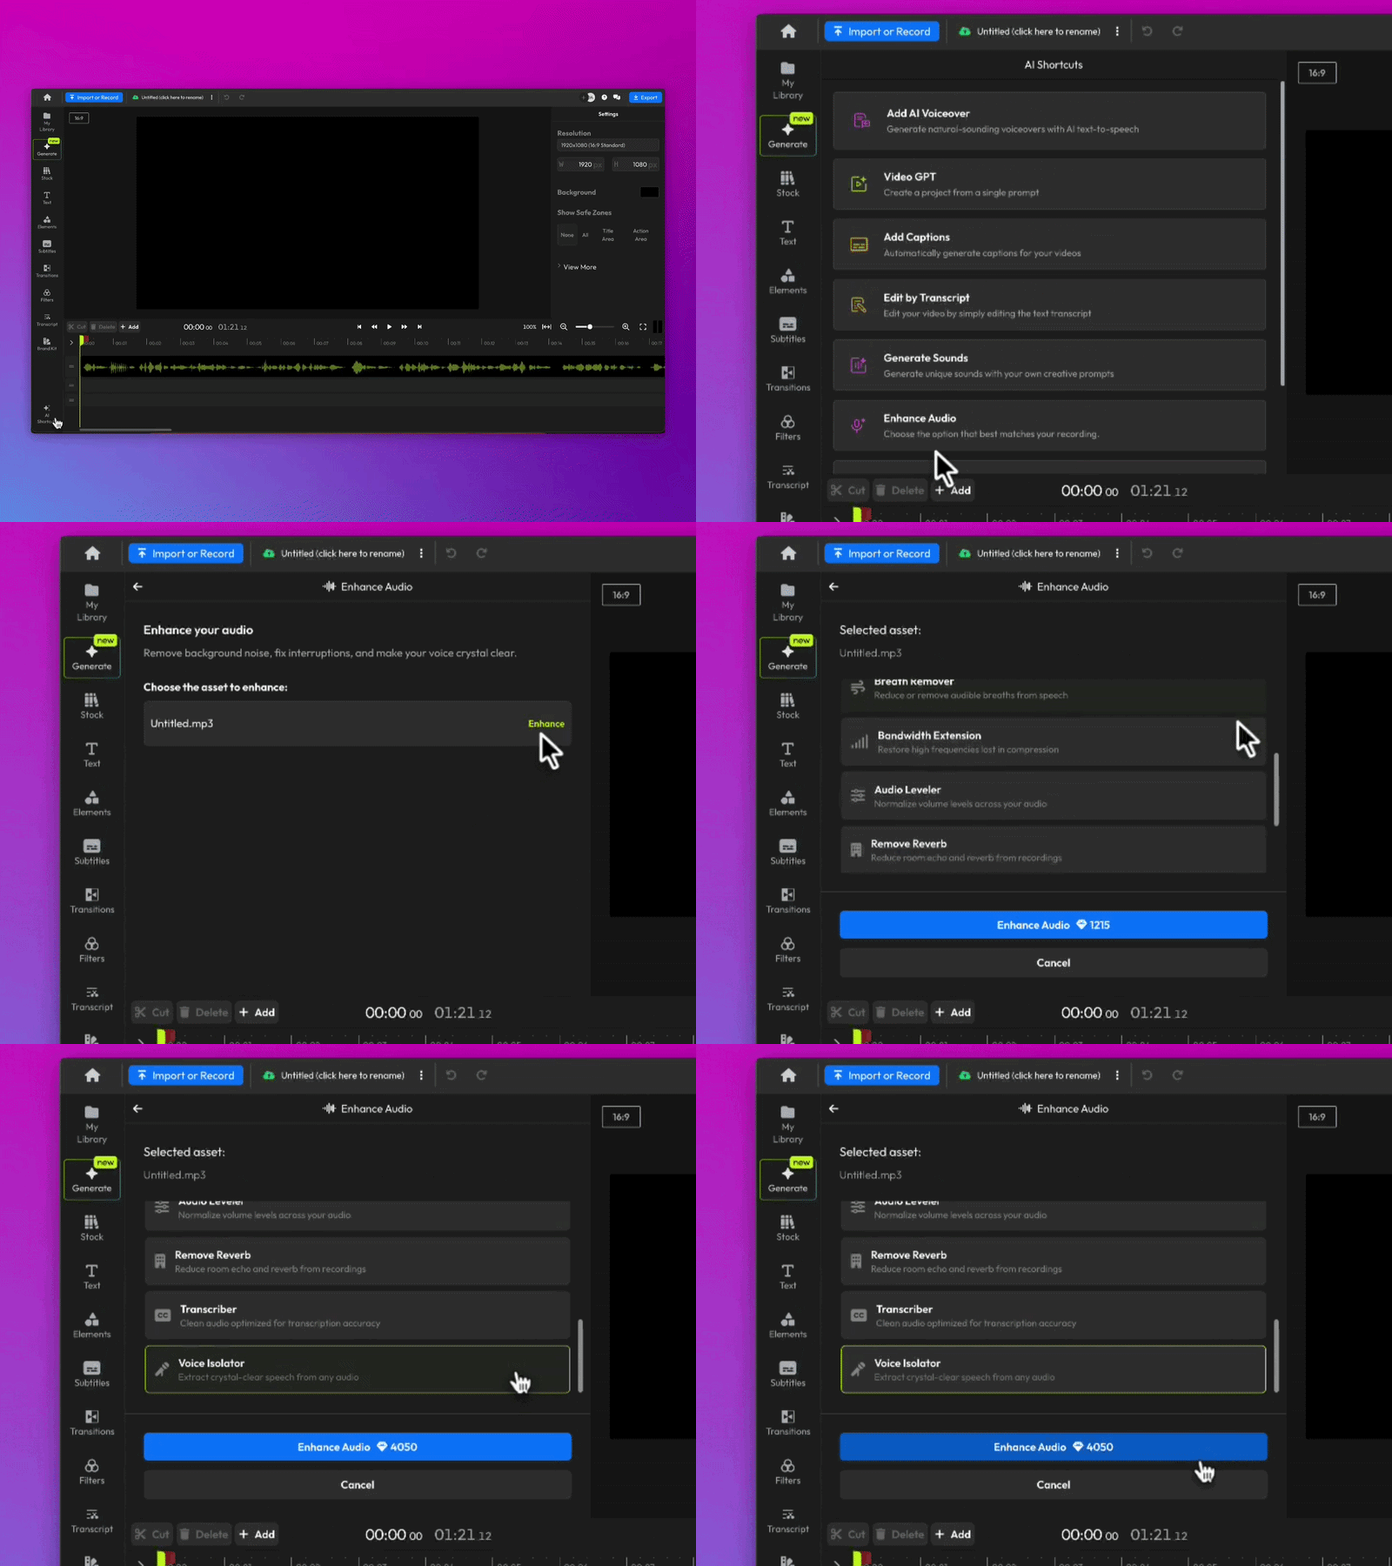
Here’s what’s new:
If you just want to make your audio sound better, the Audio Cleaner option combines noise reduction, audio leveling, and other enhancements into a single, convenient package.
For specialized enhancements, we have:
- Static Noise Removal gets rid of constant noise like fans, AC units, humming, or engine sounds.
- Speech Cleaner is optimized for voiceovers and podcasts.
- Voice Isolator is our supercharged model optimized for extracting crystal-clear voiceovers from recordings with loud ambient noises.
- Remove Reverb is perfect for lecture halls, speeches, and voiceovers recorded in untreated rooms.
- Breath Remover can help you save voiceovers that would otherwise have been ruined by breathing into the microphone.
- Bandwidth Expansion restores high frequencies lost during file compression.
- Audio Level keeps the volume constant. Perfect if you’re dealing with guests constantly moving away from the microphone.
New Audio Enhancer Pricing
The new Audio Enhancer will now consume AI credits depending on the model you use and the duration of the audio you’re trying to enhance.
Huge improvements to cropping, captioning, and brand kit
This latest update brings with it a large number of improvements to cropping, subtitles, and the Brand Kit! Here’s what’s new:
A more intuitive way to crop videos
We wanted to make cropping videos simpler, so we added the Easy Crop button. Select your video on the timeline, click Easy Crop in the right-hand menu, and a brand new crop interface will pop up!
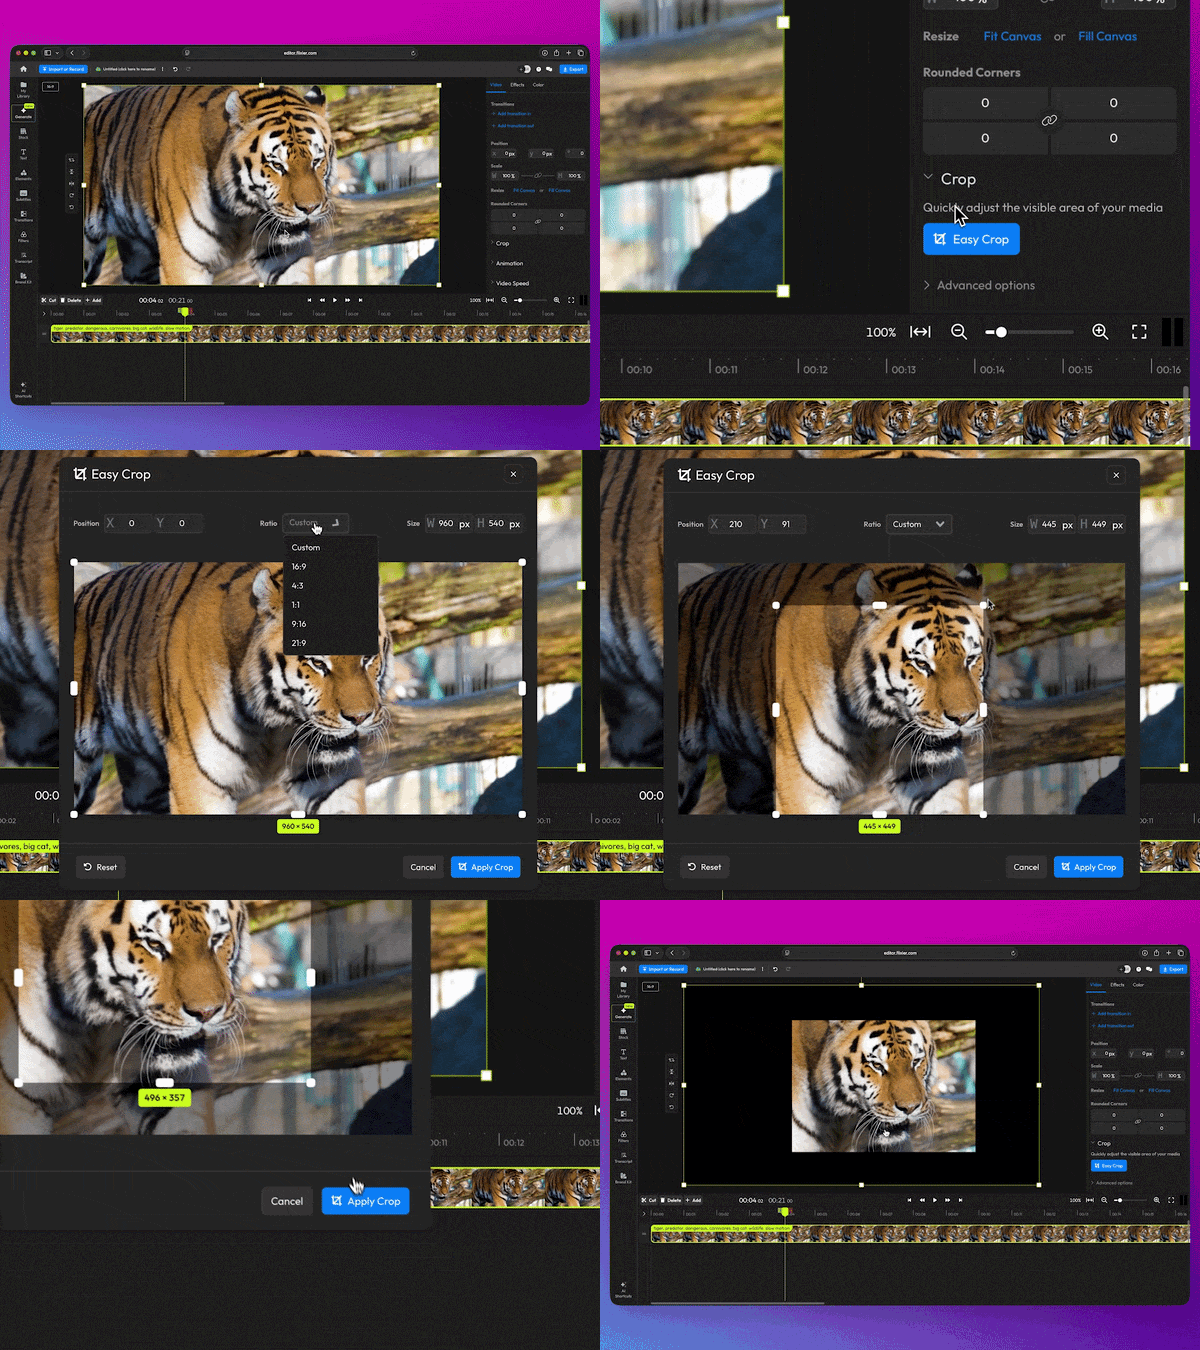
Here, you can crop your video to a custom size by dragging with your mouse, choose a preset Ratio, or enter a custom resolution!
And if you were a fan of the old cropping method, you can rest assured it’s still there; you’ll find it under Advanced Options in the Crop menu.
Save backgrounds to your Brand Kit
You can now add background images to your Brand Kit, then apply them to your videos using the editor!
To apply your backgrounds, open the canvas settings, click on the background color, then go to the Images tab!
Subtitle fixes and improvements
- We fixed a bug that caused text objects, including subtitles, to glitch out after being resized.
- Subtitle style changes apply to every subtitle object linked to your video. That means no more wasting time adjusting the color, size, or animation of each subtitle object individually!
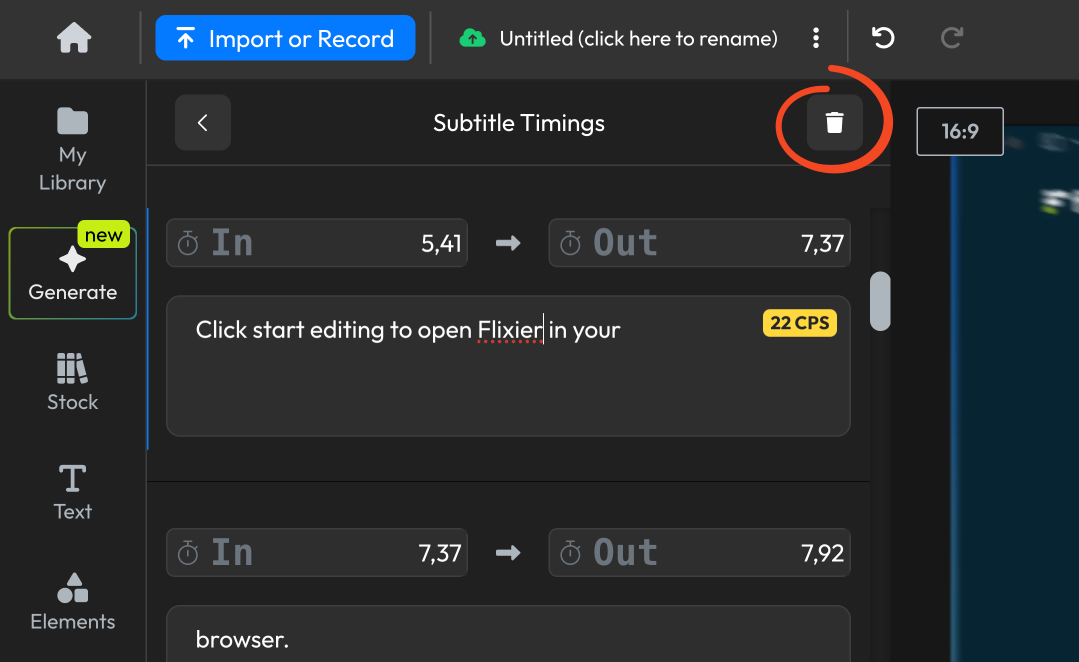
- You can now delete every subtitle object linked to your video in one click. You can find the new Delete button in the top right corner of the Subtitle Timings menu.
A new way to share your generated videos
We’ve added a new way to share the videos you generate in Flixier with your friends or your followers!
Instead of having to download your video or generate a review link, you can now copy the link to any generated video or image and share it online. Just click the link icon in the top right corner.
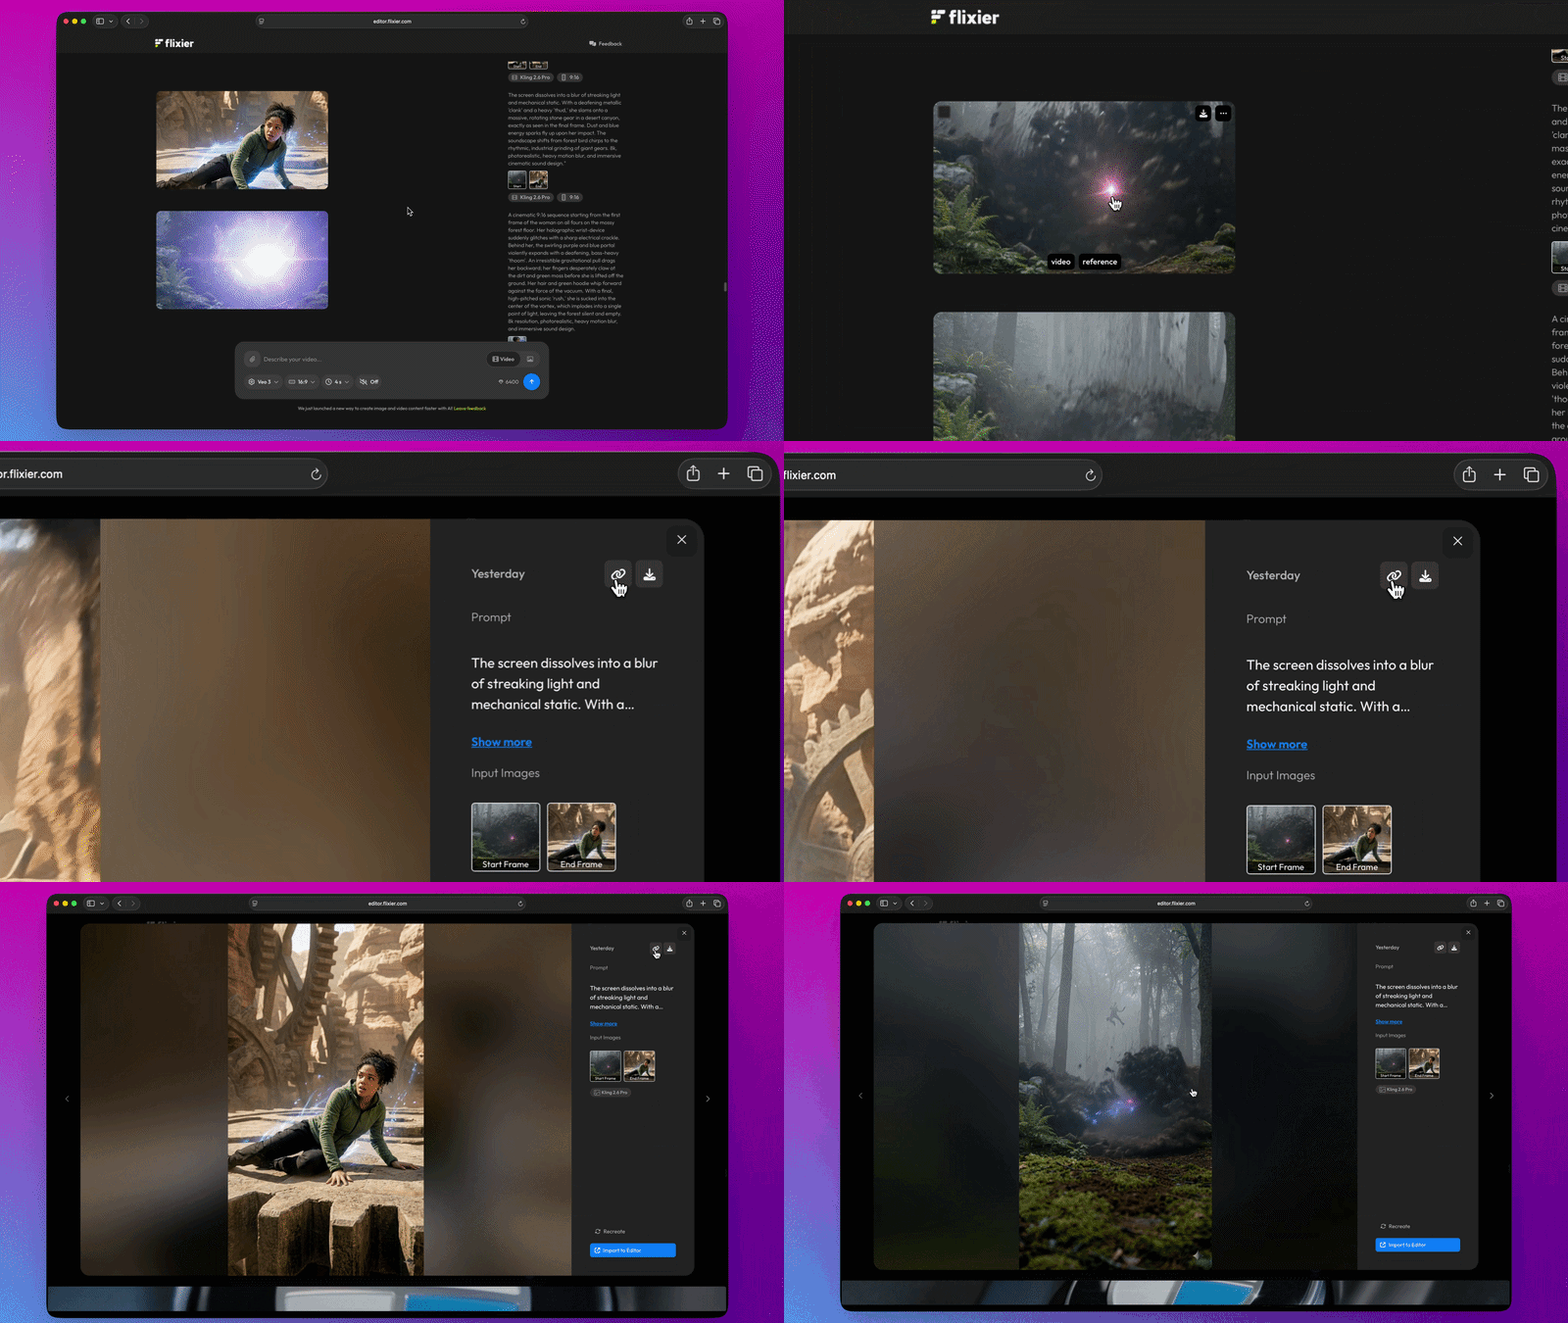
When someone clicks on your link, they’ll be able to watch your video and see the model, references, and prompt you used to create it.
If they’re signed in to their Flixier account, they can even tweak your prompt and re-generate the video to use in their own project.
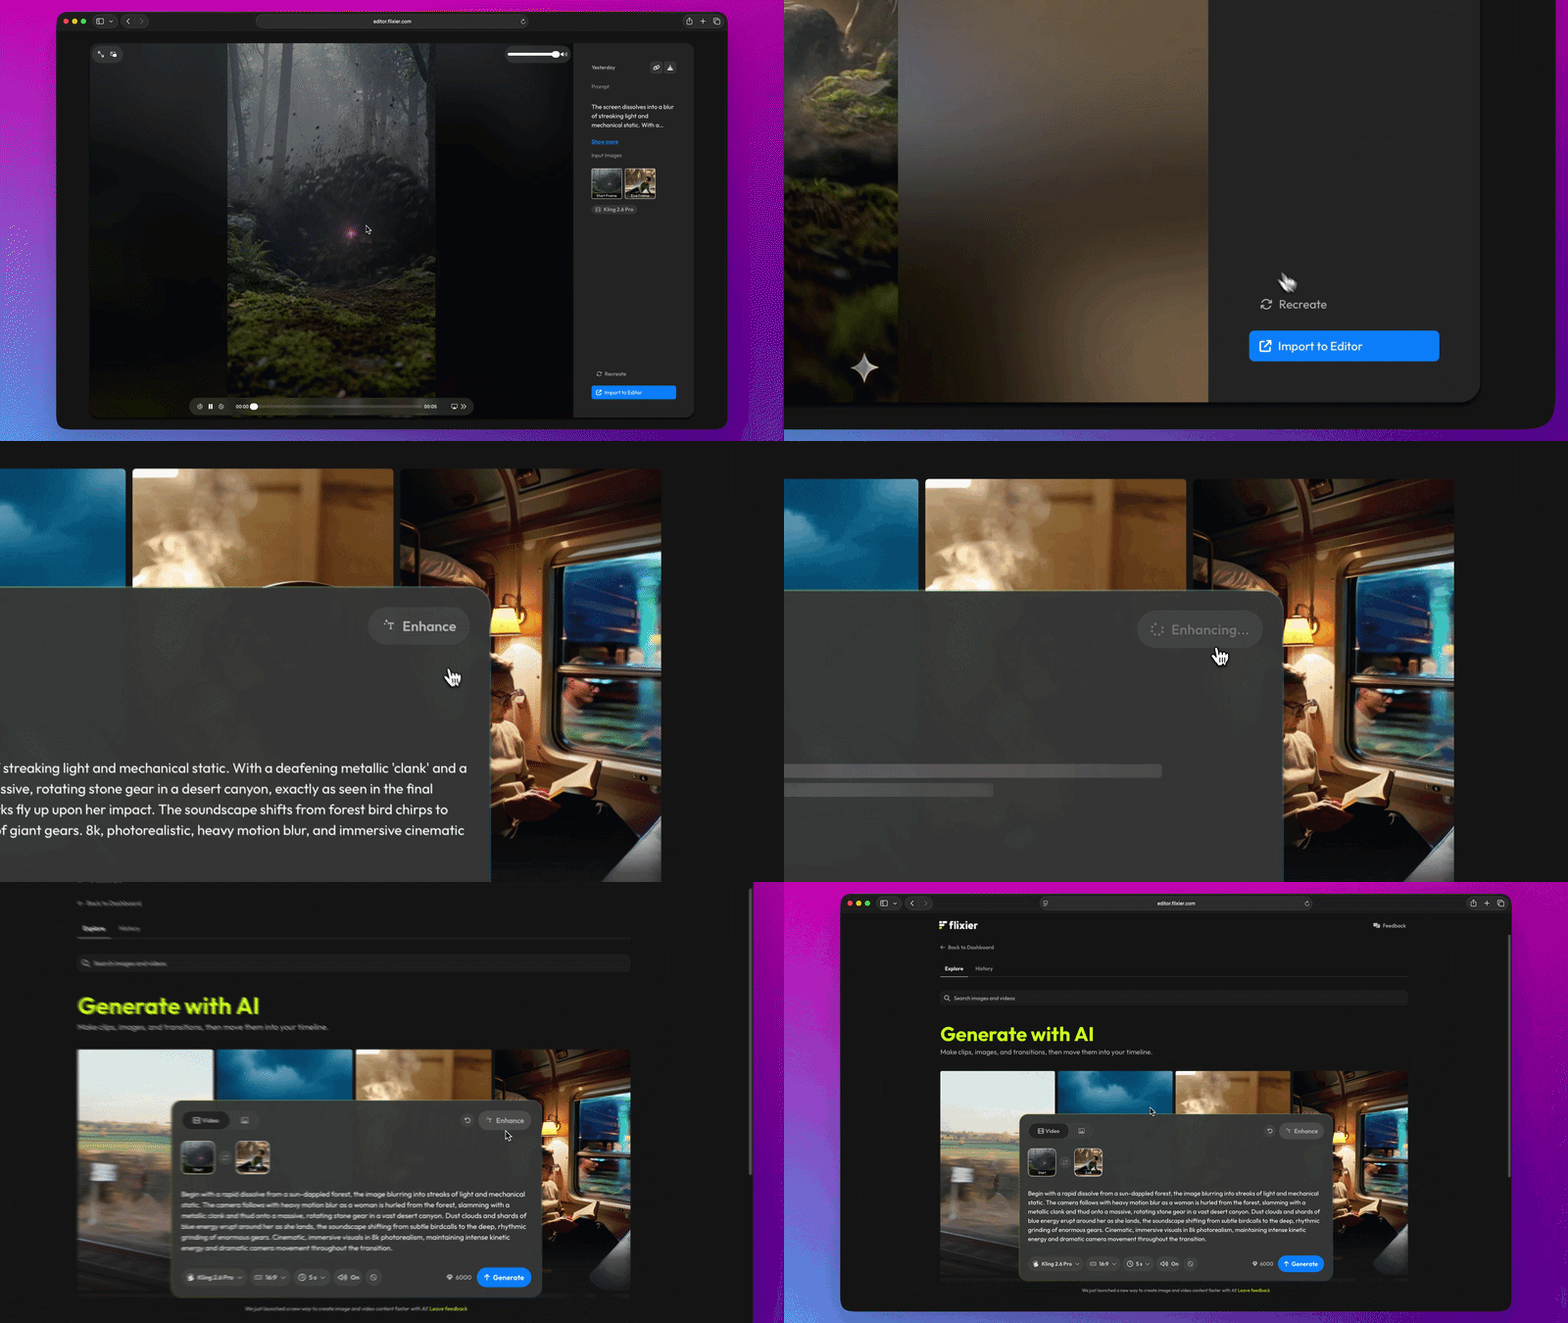
Generate videos using multiple reference images with Kling 3.0
We added Kling 3.0 Reference to Flixier, which means you can now generate multi-shot narratives and upload reference images for multiple elements in your video!
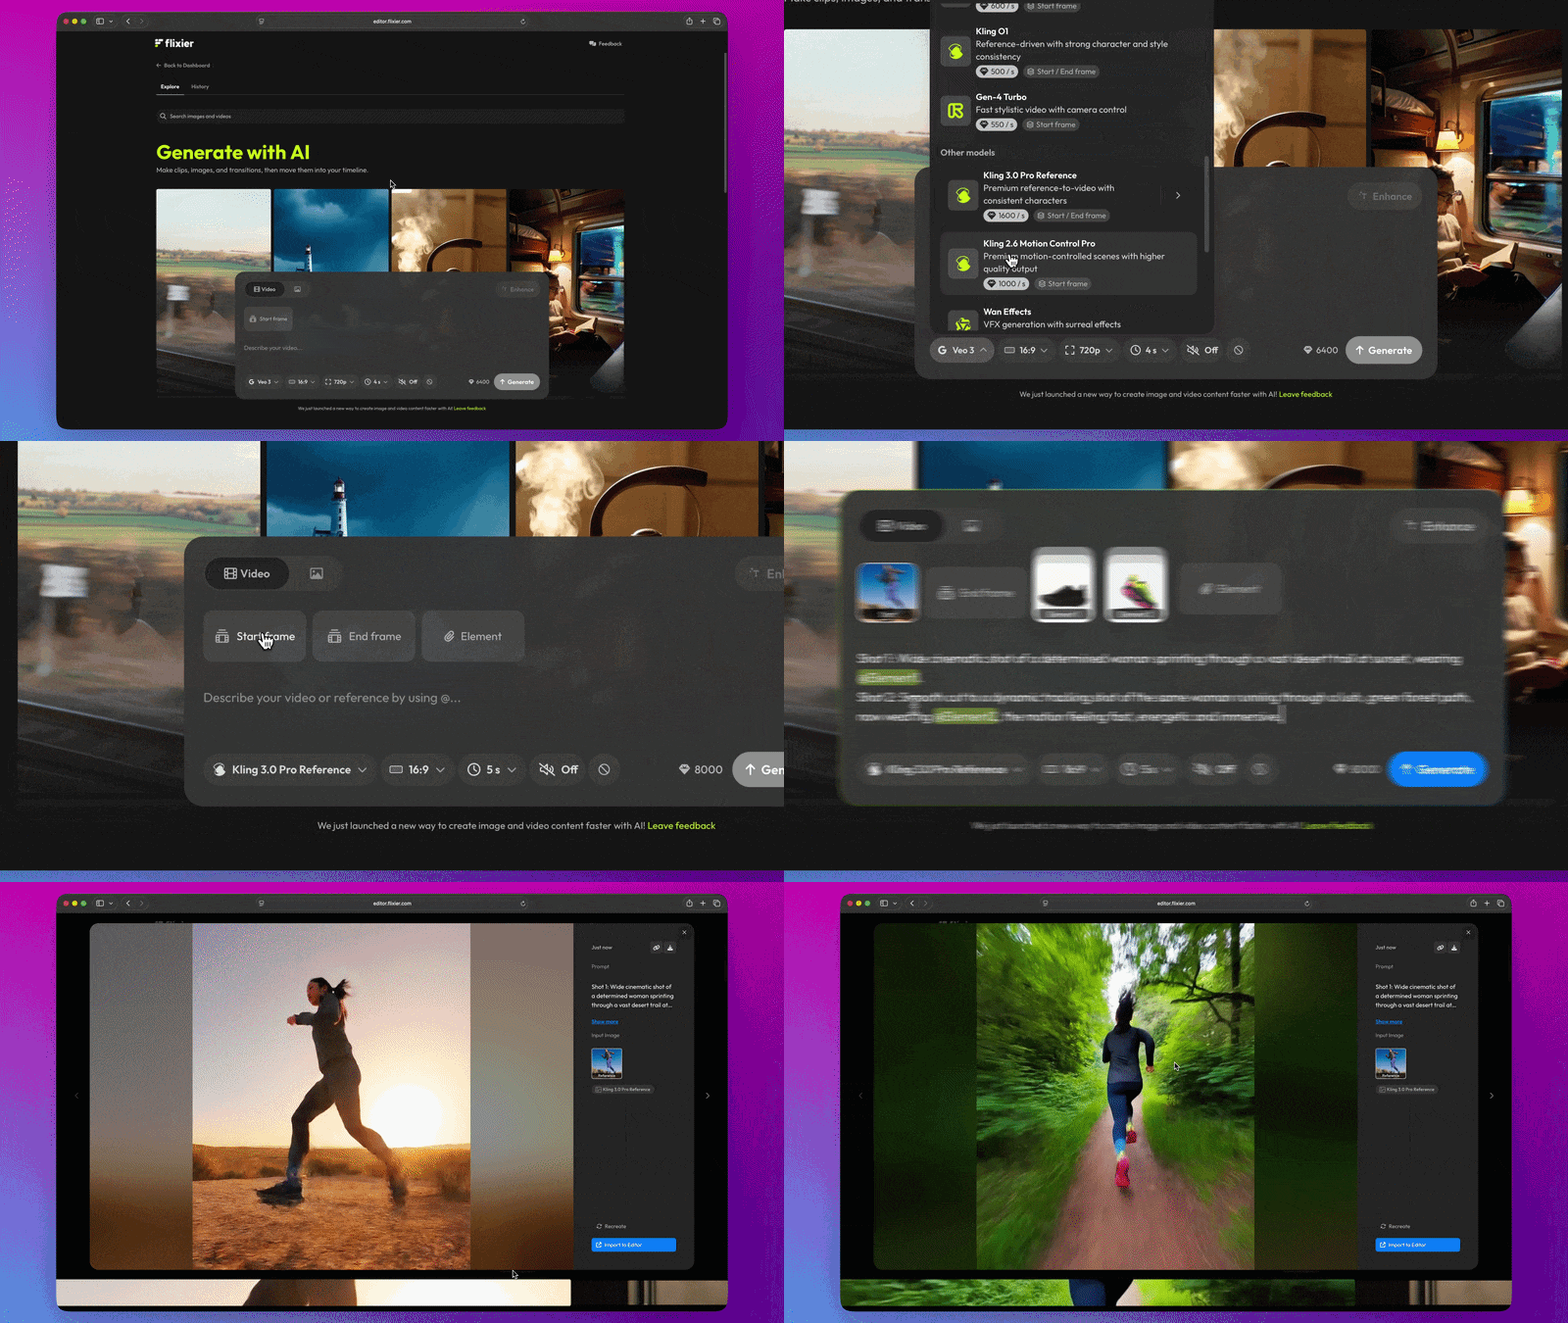
Here’s how it works:
Generate up to two distinct shots for each video
With Kling 3.0 Reference, you can now have two distinct shots in each video. Just make sure to specify “First shot:” and “Second shot:” when prompting.
Reference distinct elements in your prompts
On top of the start and and end frame references, this new model also allows you to upload reference images for up to three distinct elements you want generated. These ‘elements’ can be anything from characters, objects, or articles of clothing that appear in your video.
Click the Element button to create a new one, upload a photo for it, then reference it in your prompt with @Element1.
You can upload up to three distinct reference images for each element to ensure accurate generation from different angles!
You can try it out for yourself right now by selecting the Kling 3.0 Reference model when generating a video!
We added Nano Banana 2 to Flixier! [PROMO INSIDE]
We’re excited to announce that you can now use Nano Banana 2, Google’s latest AI image generation model, in Flixier!
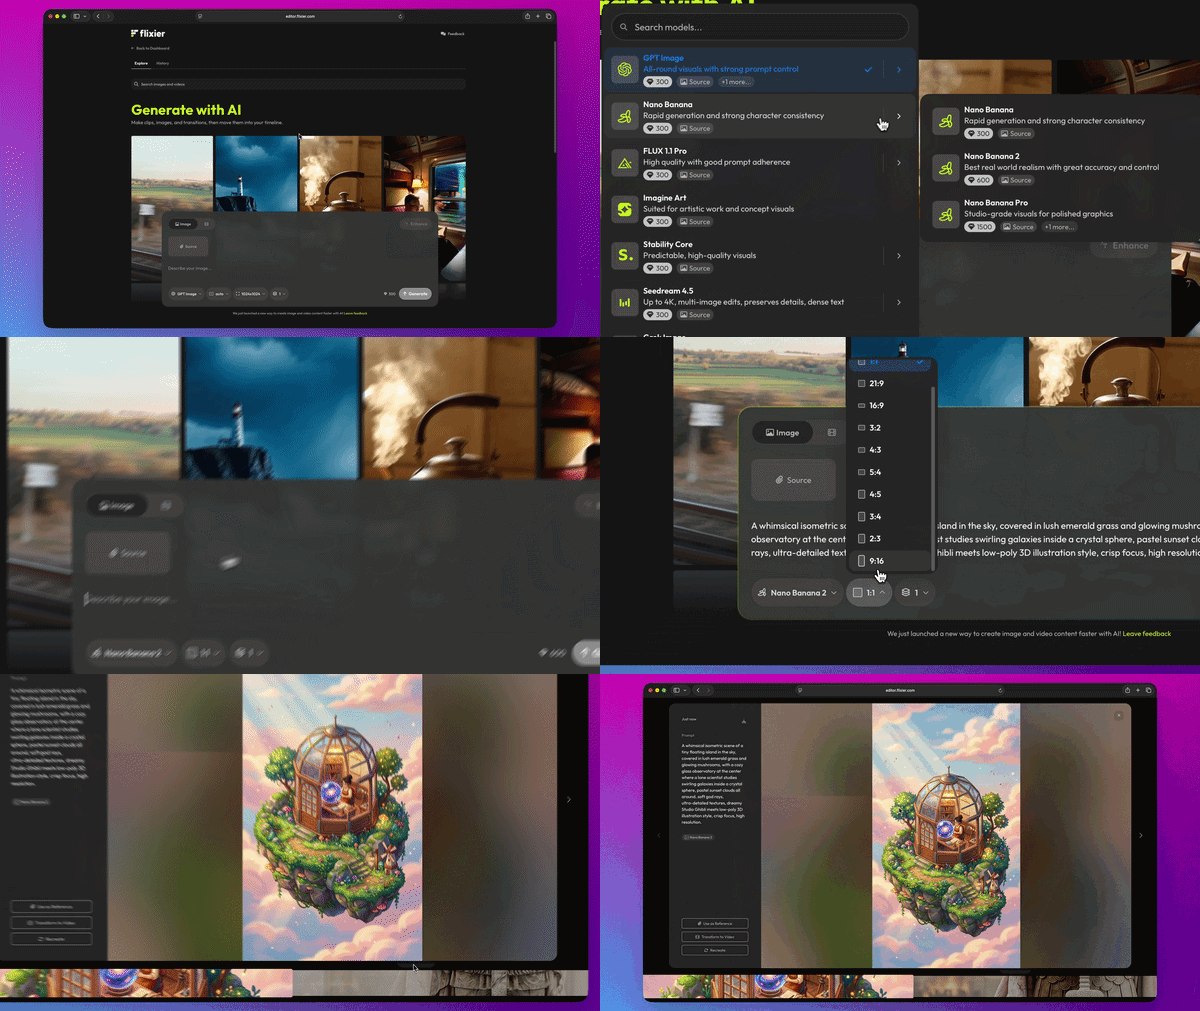
Here’s what you can expect:
- Improved speed: get all the power of Nano Banana Pro, at the speed of Gemini Flash!
- Enhanced realism: better skin texture, less artificial smoothing.
- Advanced world knowledge: this latest model uses Gemini’s knowledge base and can access real-time information and images from web search for enhanced accuracy.
- Better text rendering: perfect for infographics and marketing materials.
- Text translation: you’ll be able to use Nano Banana 2 to generate translated versions of reference images!
- Improved visual consistency: track up to five characters and 14 objects in one workflow.
- More aspect ratios and resolutions: go from 512px all the way up to 4K!
BONUS: Use code NANOBANANA80 to get 80% off when purchasing an AI Credits Add-on.
⏱️ Move quickly! The offer only applies to the first 20 people who redeem it!
Experiment with multi-model generation
Over the past week, we added more than 20 different AI video and image generation models to Flixier. This includes the latest top-of-the-line models like Nano Banana Pro, Veo 3.1, Wan, and Kling.
This is an exciting new step for us, and we wanted to make sure you can easily experiment with and compare results across all these new models. That’s why we developed a new workflow for generating AI videos (and images!) in Flixier.
Here’s how it works:
Generate
Generating videos here works the same way it does in the timeline. You start by picking a model, then you upload a reference photo, and enter your prompt.
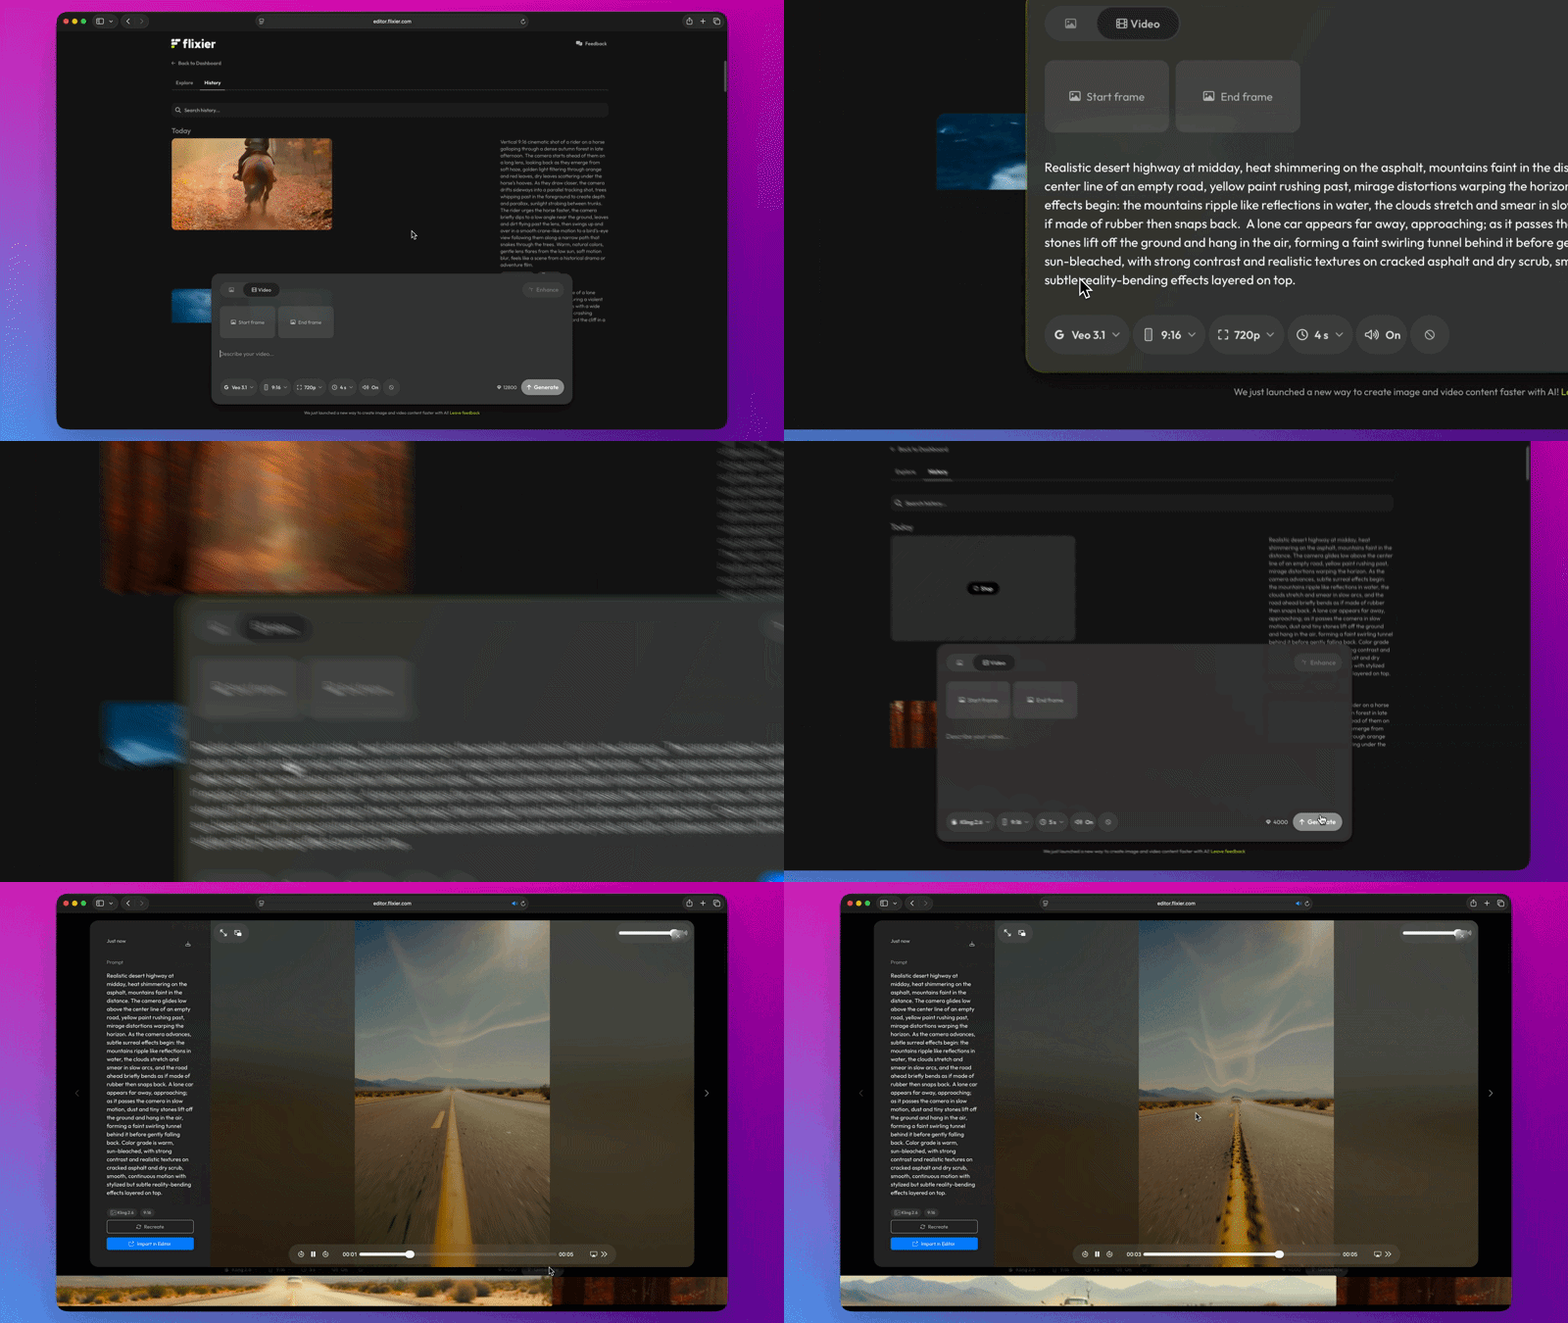
You’re also free to add a negative prompt and choose the aspect ratio, resolution, and length of the video, within the limits of each model. We wanted to make sure you have access to all the options you need to generate great videos without wasting your credits.
Explore
The Explore tab is there to provide inspiration and showcase the types of visual effects, transitions, and clips you can generate with Flixier.
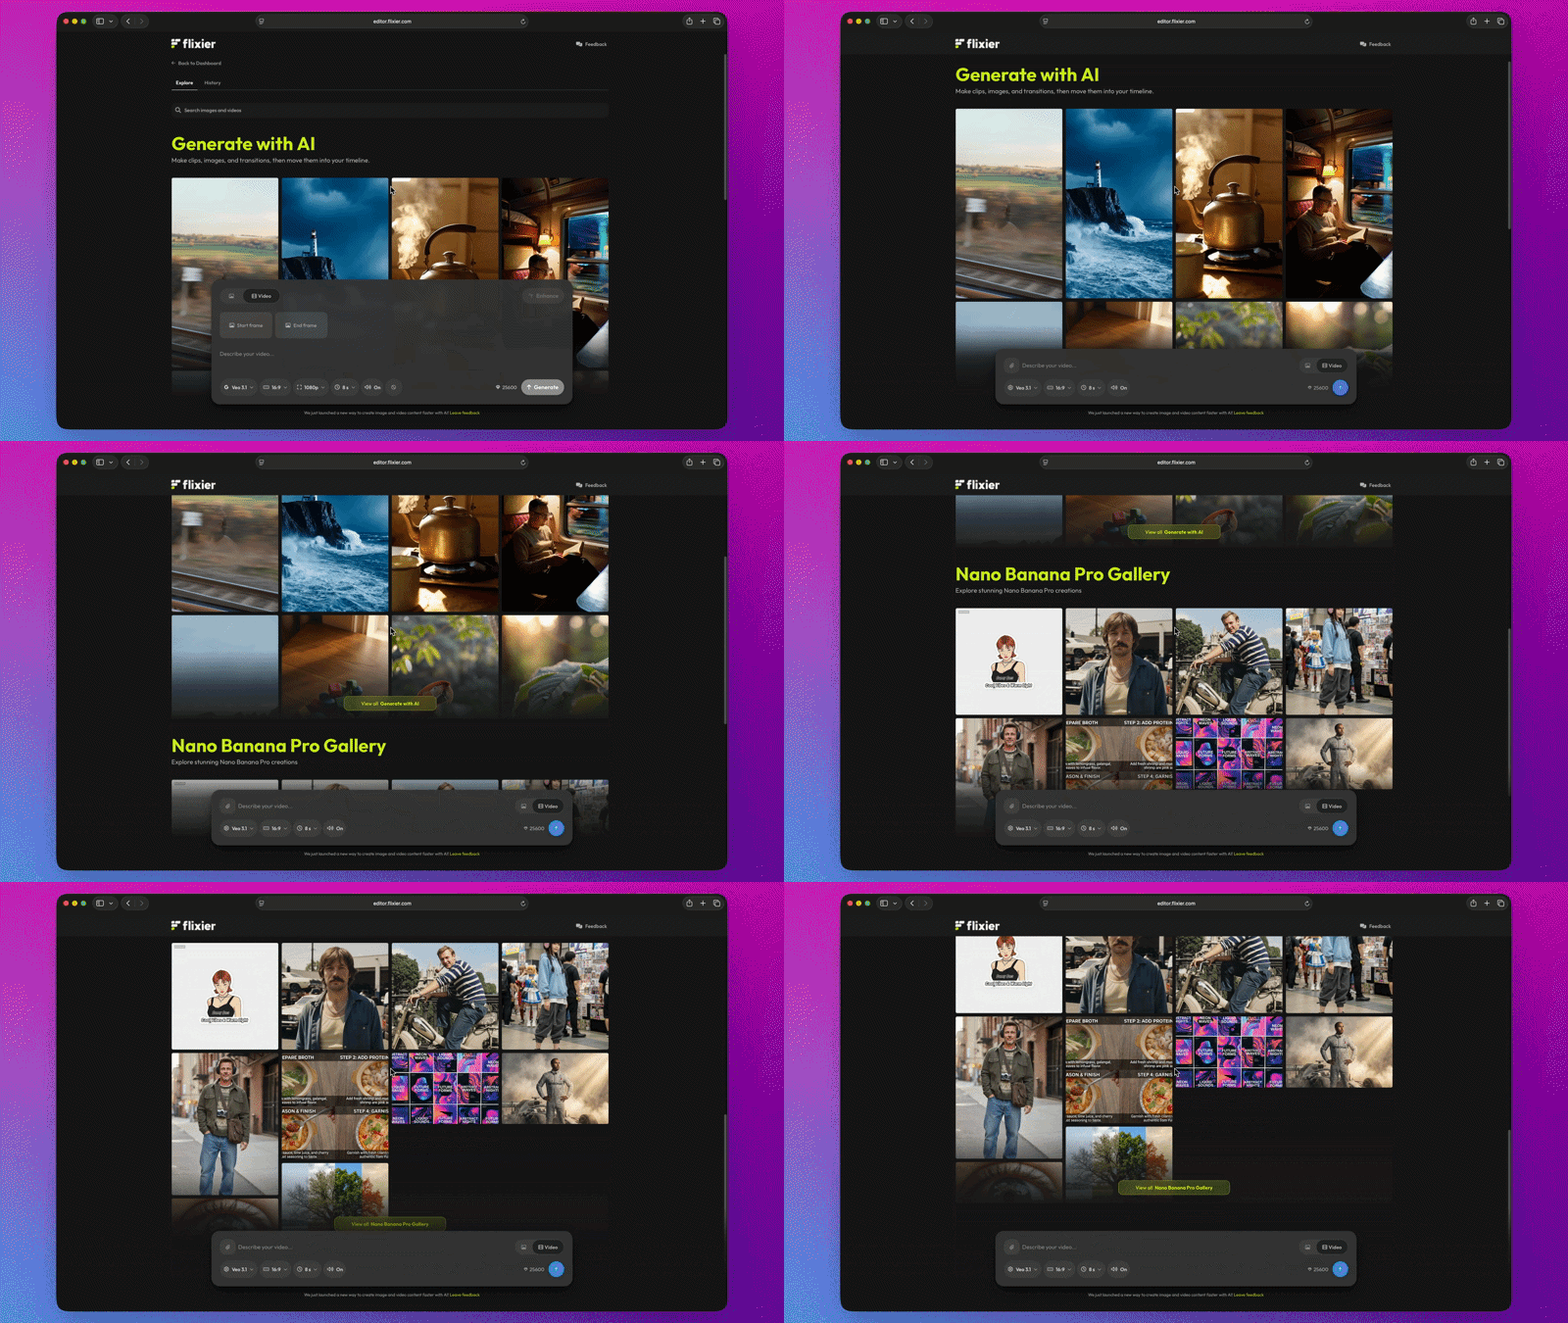
You can click on any of the examples here to see the prompt that we used to create it, as well as the reference photos. Feel free to copy or tweak the prompt, or click Import in Editor to add it to one of your projects!
History
The history tab helps you keep track of all the videos and images you generated. Use the search bar to easily find past work, take another shot at it by tweaking the prompt, or add it to one of your Flixier projects.
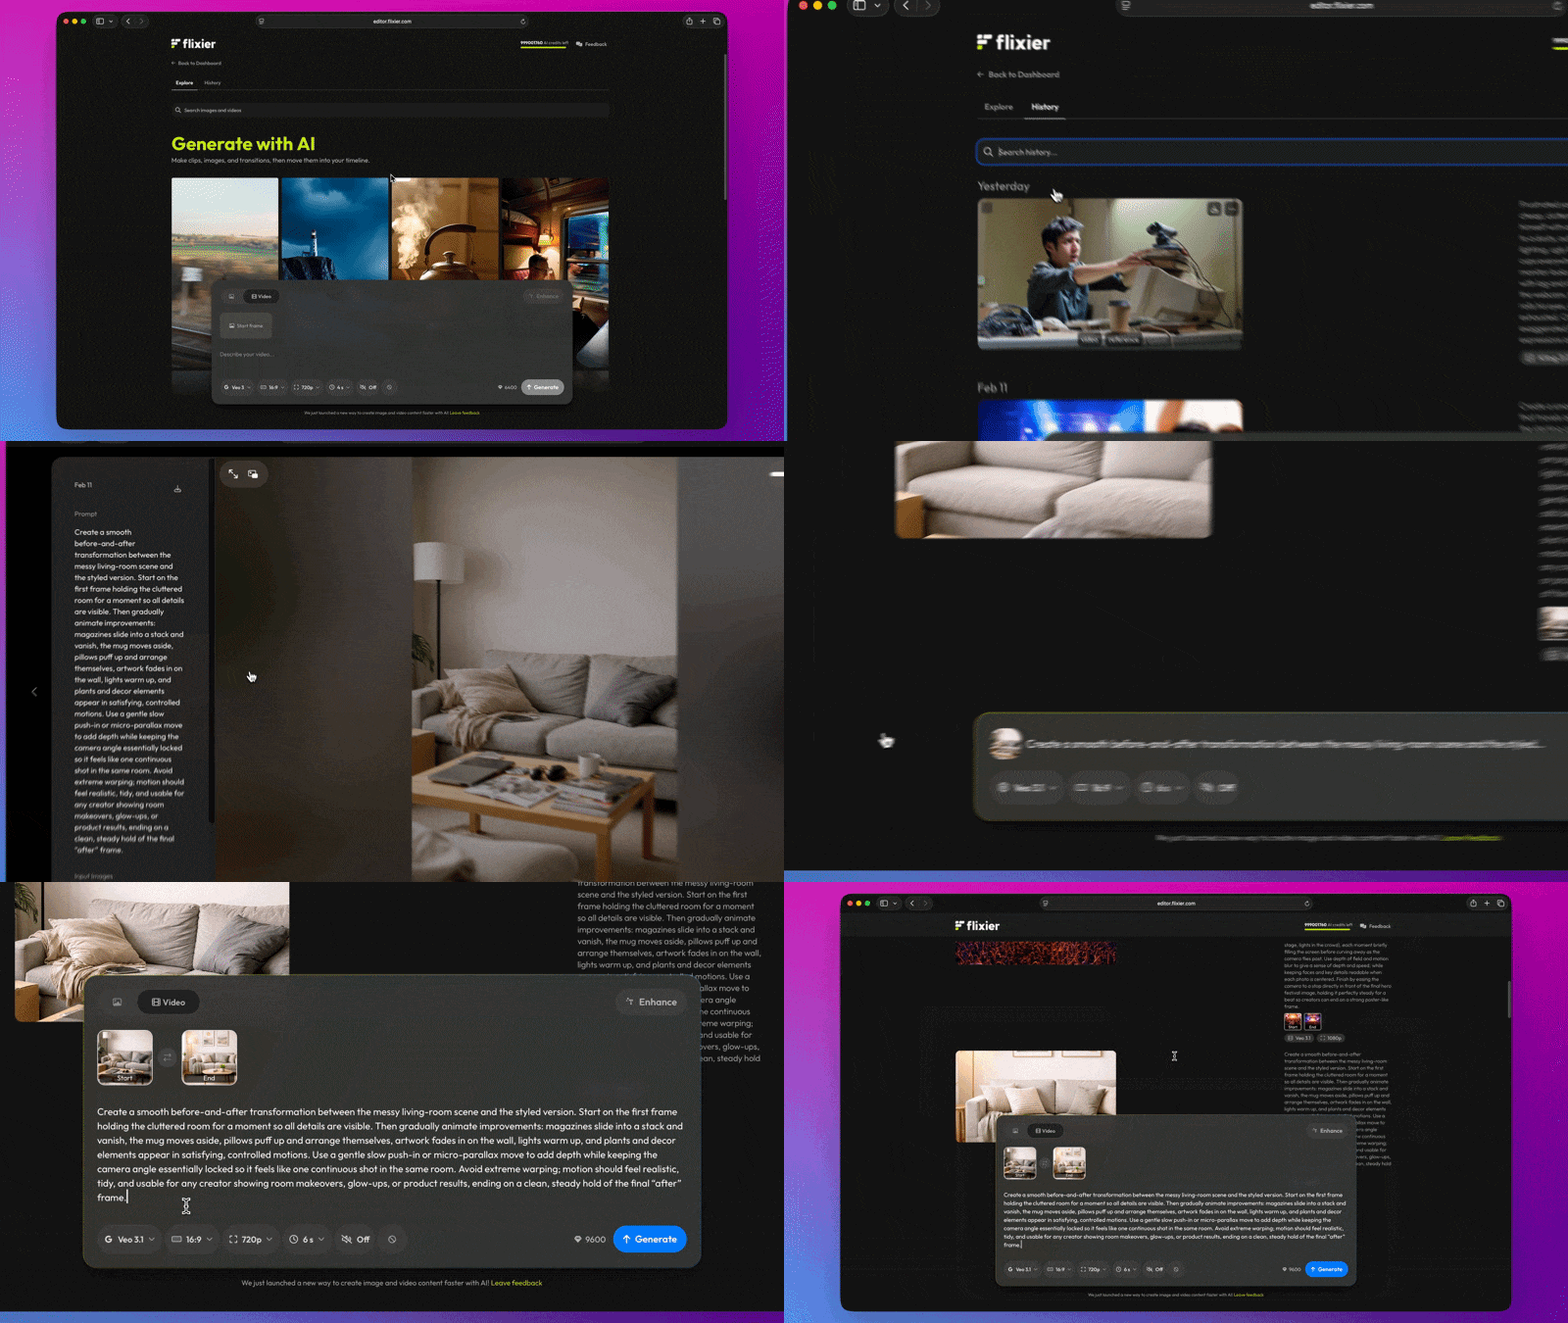
The History tab also gives you the option to turn previously generated images into videos, or use them as a reference for the video models!
Try it out for yourself by clicking the Generate button at the top of your dashboard, or by following this link!
AI video generation inside the timeline
We’re very excited to bring you a new way to work with AI videos in Flixier!
Most AI video tools stop at one-off outputs. You generate a clip, export it, and lose the ability to keep building. In Flixier, AI generation now lives directly in the timeline so clips can be extended, connected, and shaped into a real video without breaking flow.
What’s New
Extend
Generate a continuation from the last frame of any AI clip already on your timeline.
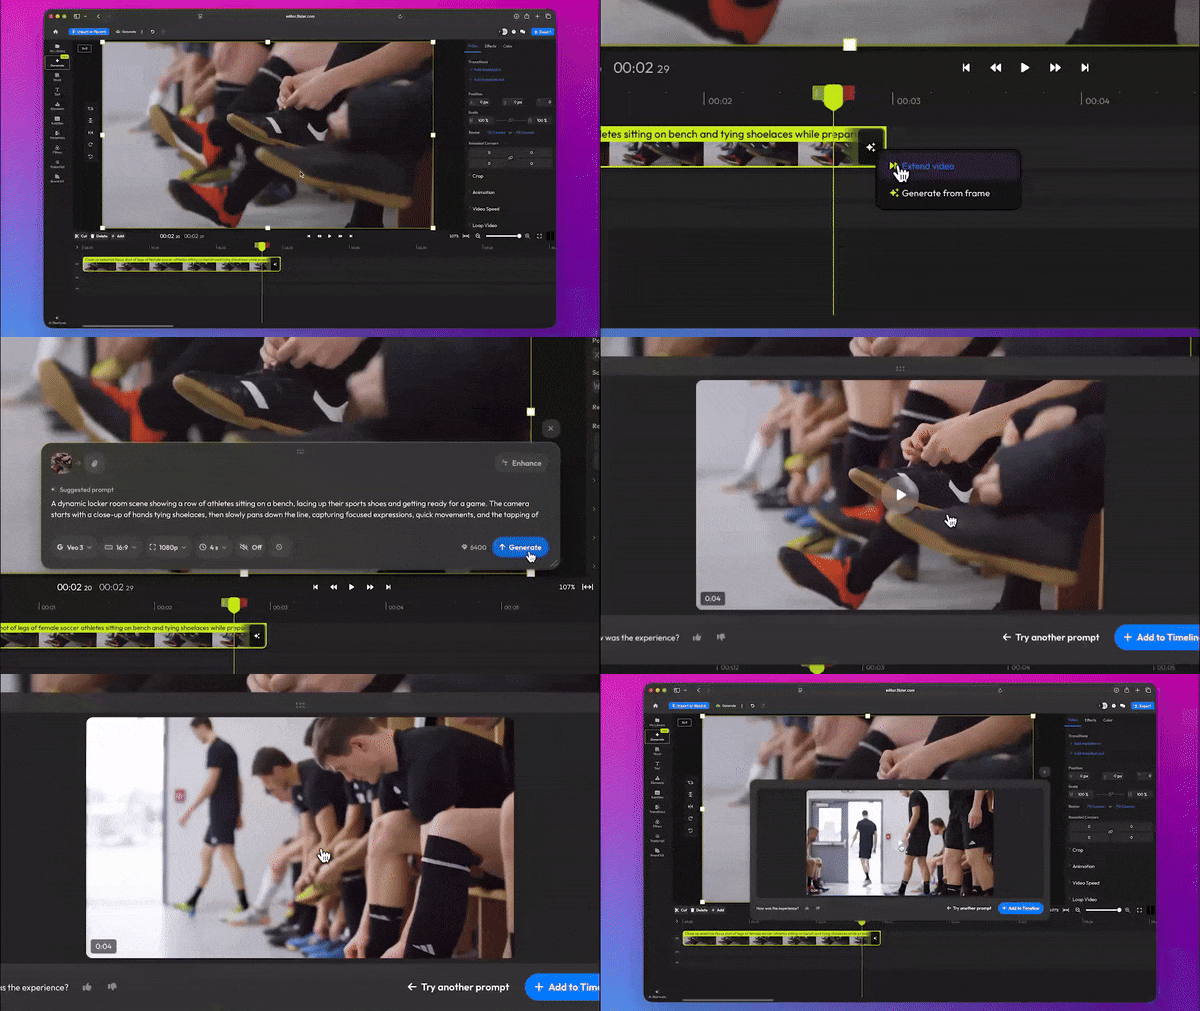
Generate
Pick any frame from an existing AI clip and generate a new shot from that exact moment.
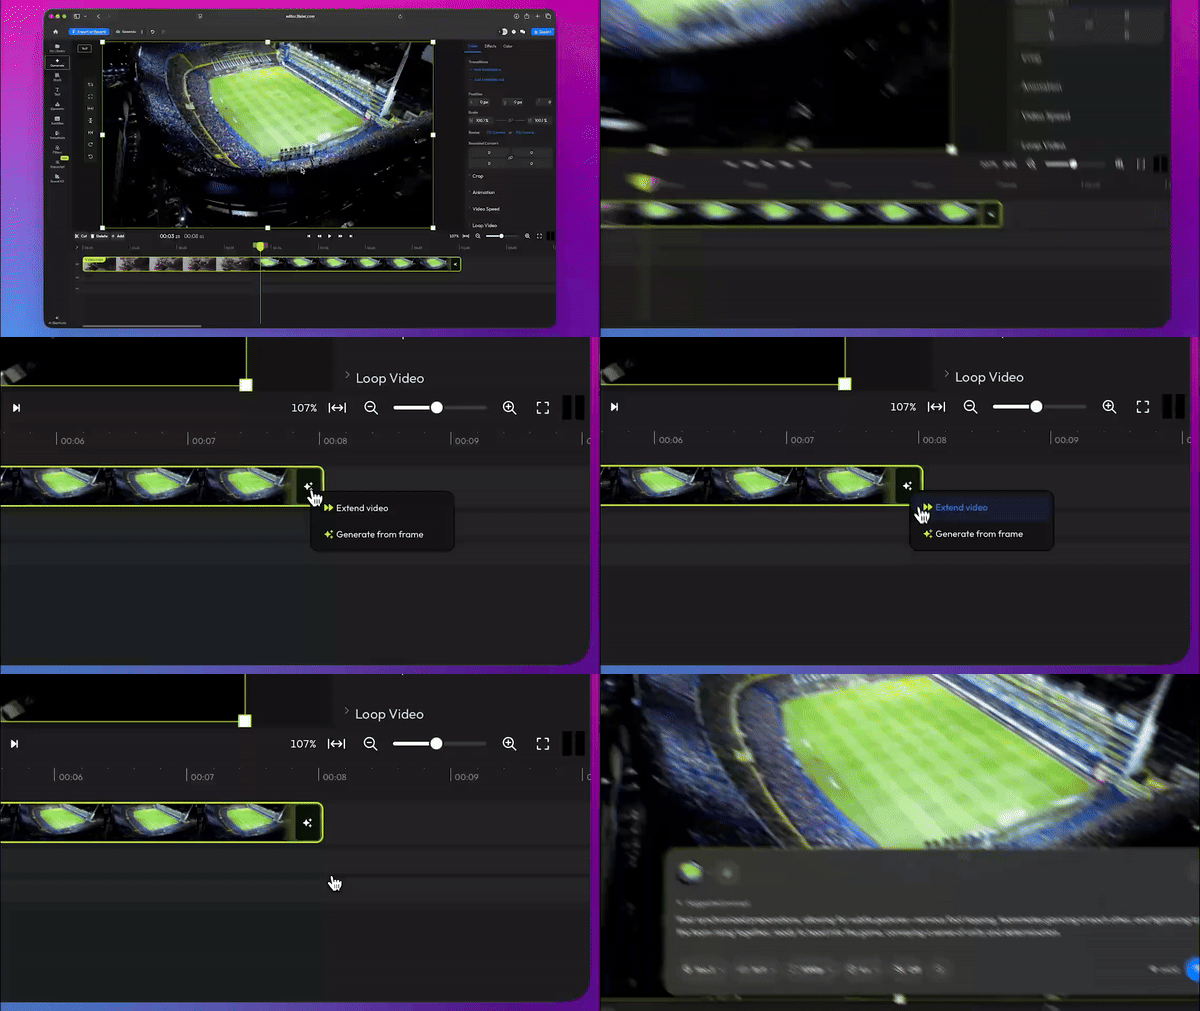
Transition
Place AI between two AI clips to generate a transition that connects them naturally.
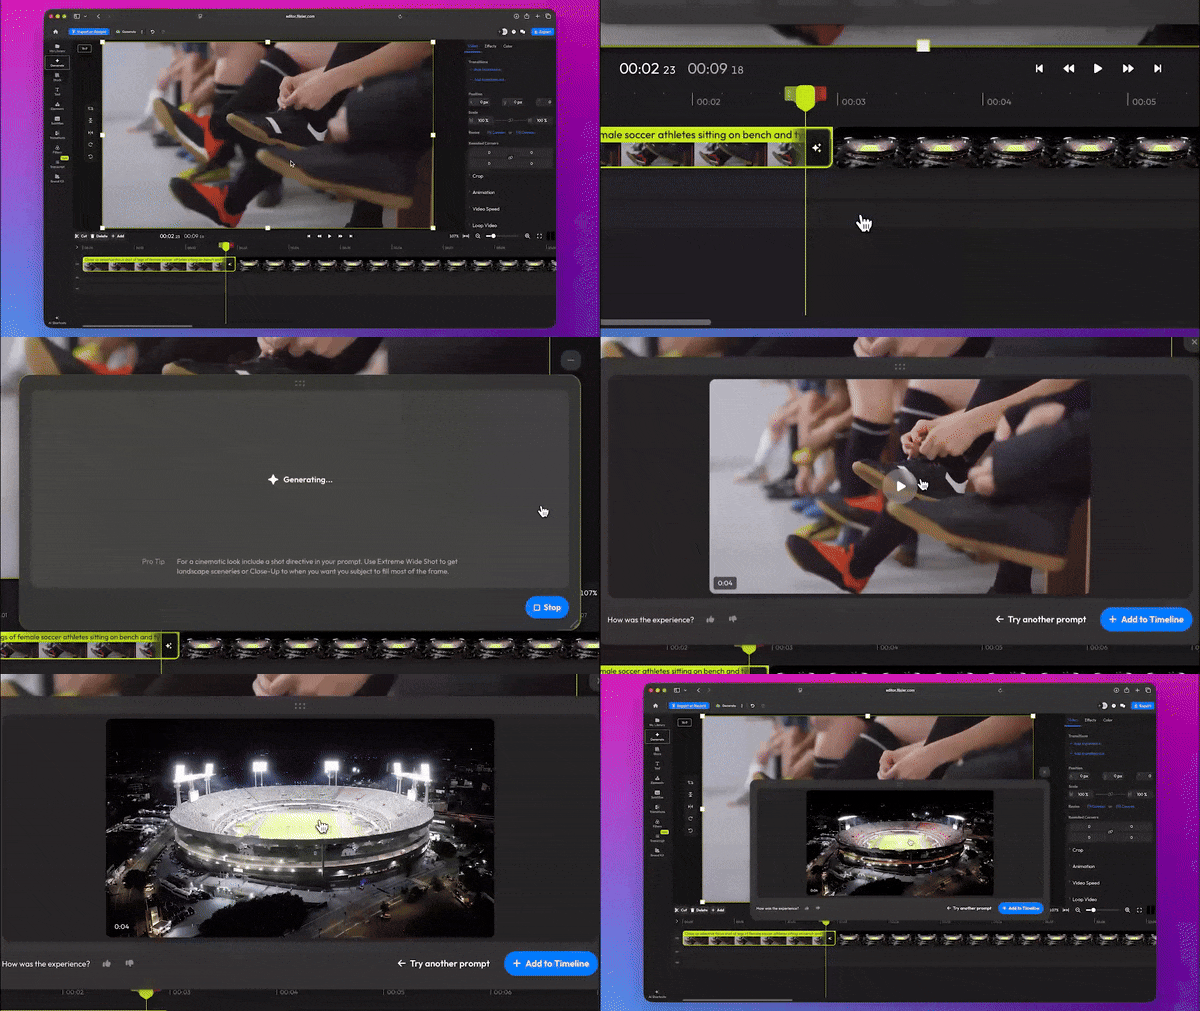
This helps you explore and compare results across multiple models like Kling, Veo, and others, then assemble everything in the same timeline where your video is finished!
Learn more about our new generative features here!
Subtitle Fixes & Improvements
We’re always working hard to squash bugs and improve existing features. This week, we focused on subtitles.
What’s been fixed:
- Fixed a bug that didn’t allow subtitle segments to be resized after splitting.
- Fixed a bug that prevented users from editing uploaded subtitles.
- Fixed a bug that caused duplicate subtitles to appear when detaching audio from a video track.
What’s new:
- Subtitles can now be detached from video tracks (right-click the video in the timeline and choose Detach subtitle)
- You can now add line breaks in subtitles.
- Improved timeline performance. Zooming in and scrubbing the timeline remains smooth even with multiple overlapping subtitle tracks.
- Added a back button to the Subtitle Timings menu so you can easily go back to the main subtitle interface to generate or upload more subtitles.
Brand NEW Recording Workflow
We have completely reworked the screen recording experience in Flixier to allow more flexibility and make it easier and faster for you to edit your captured videos. Here’s what’s new:
Adjust the layout AFTER recording
Your screen and camera are now captured on two separate video tracks, so you’re no longer locked into one layout. 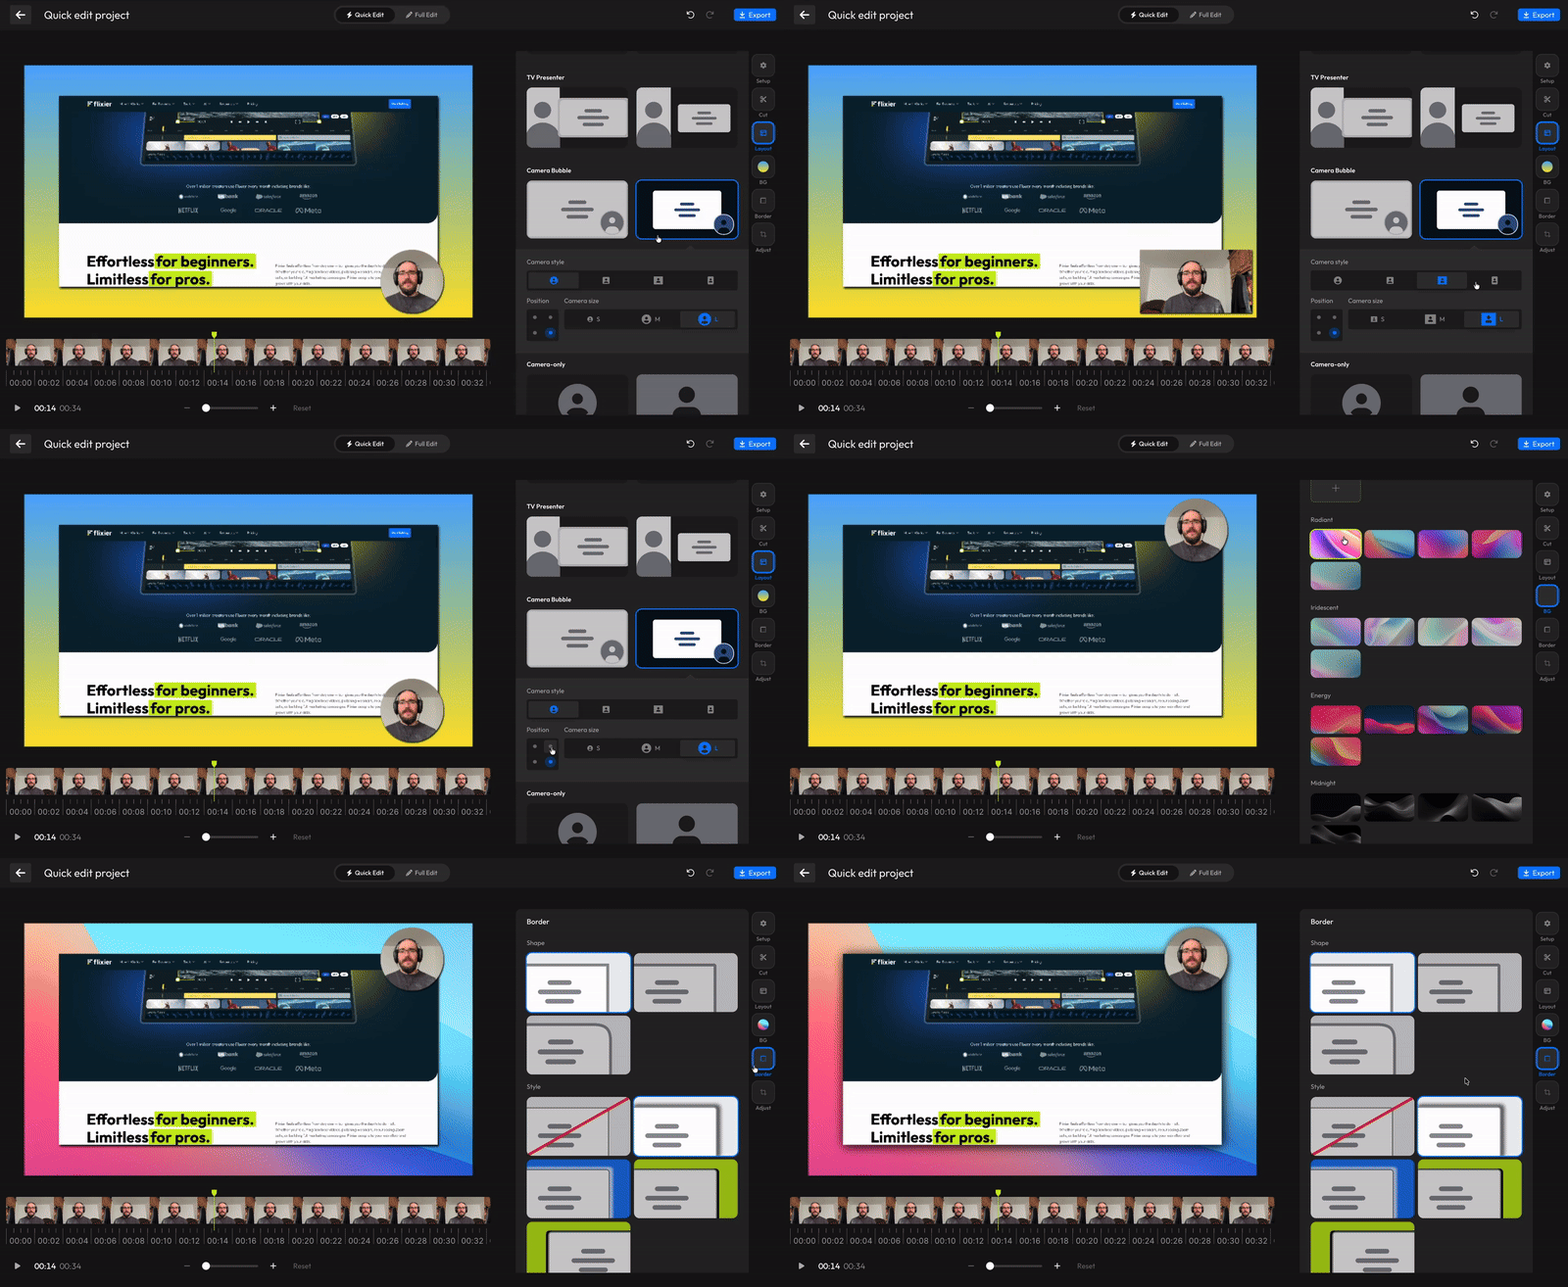
After you’re done recording your video, you can freely switch between more than 10 different split-screen or picture-in-picture layouts to see which one fits your video the best.
Quick Edit
When you’re done recording a video, you’ll be taken to the Quick Edit interface, which helps you put together professional-looking screen recordings in seconds. Here, you can:
- Cut by text - Cut out silences, filler words, and mistakes just by editing the transcript. This uses the same AI text editor you’re familiar with from regular projects.
- Edit the layout - Choose between different layouts for your webcam and screen recording.
- Change the background - Pick a new background for your recording, or upload a custom one and save it as part of your Brand Kit.
- Crop and adjust the camera - Crop your webcam feed using a new, intuitive interface.
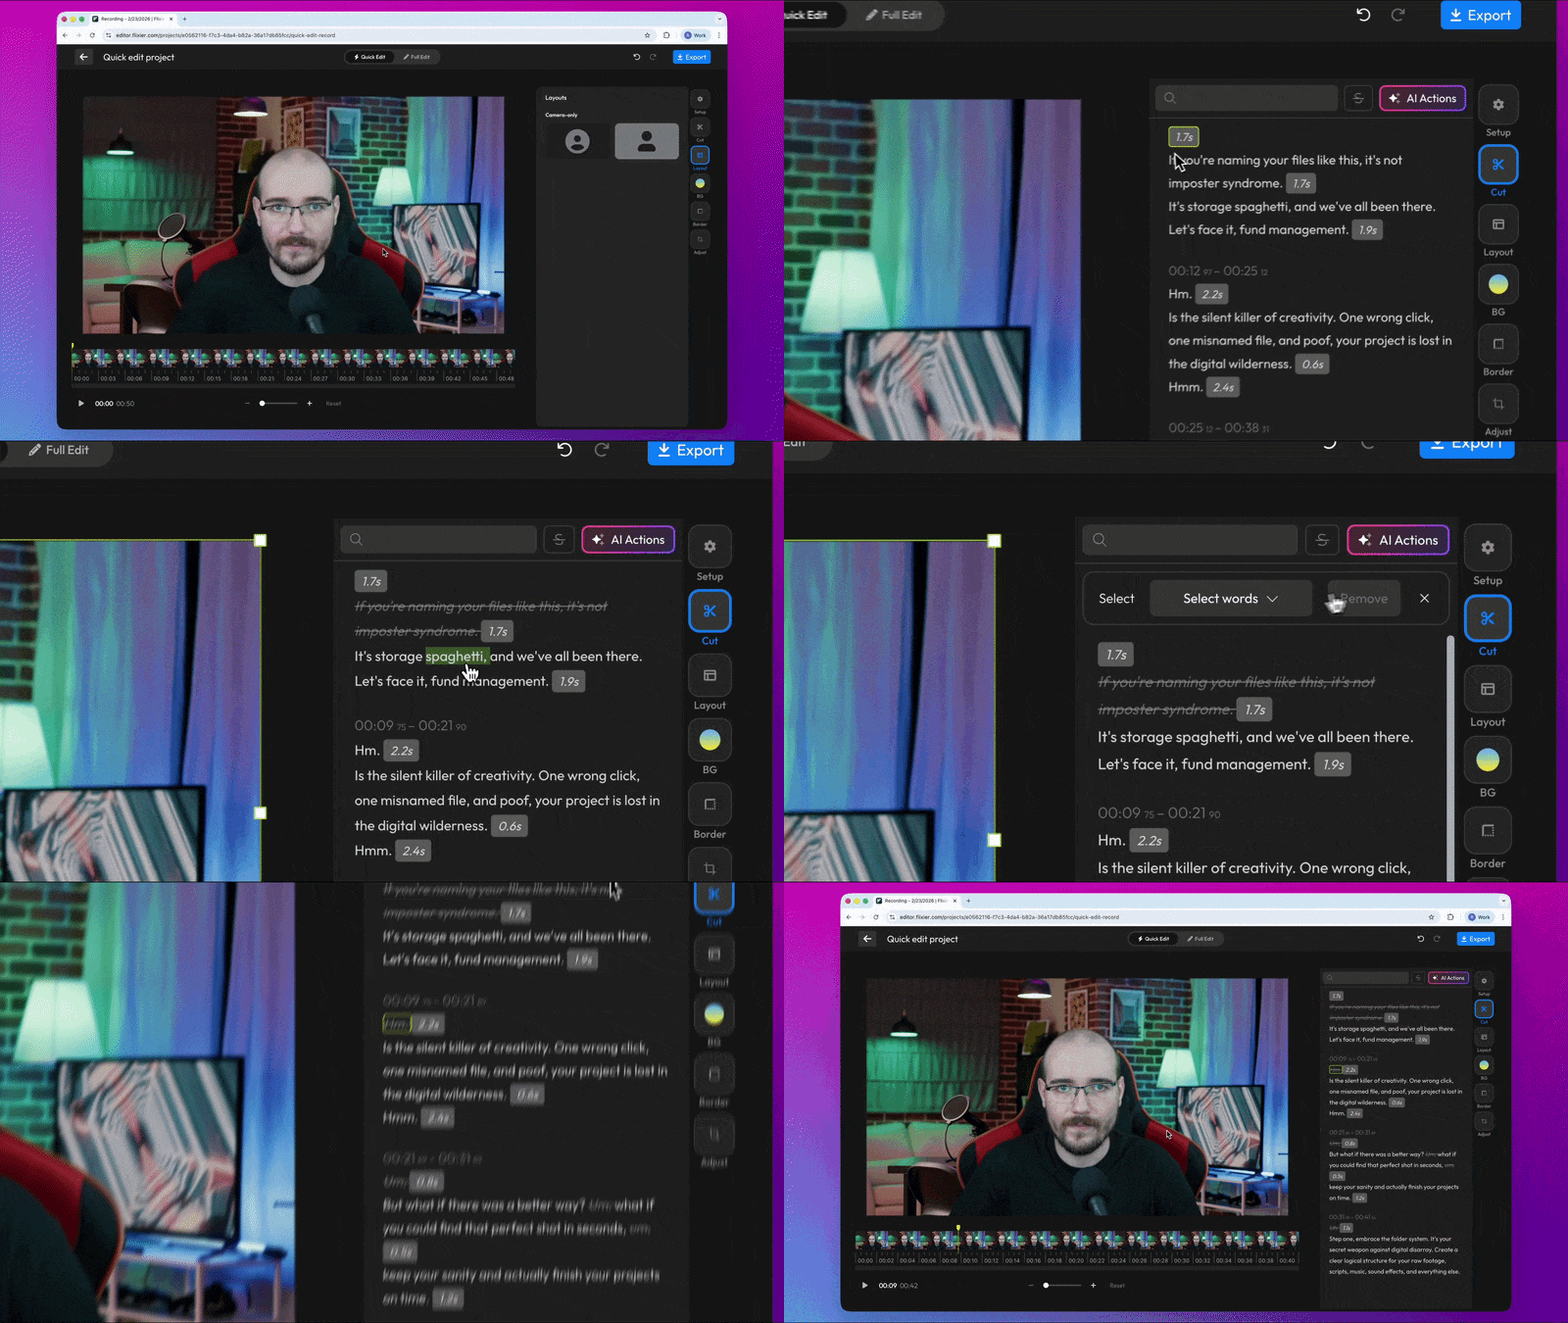
And, of course, if you want more control, you can always switch over to Full Edit mode to edit the video just like a regular Flixier project.
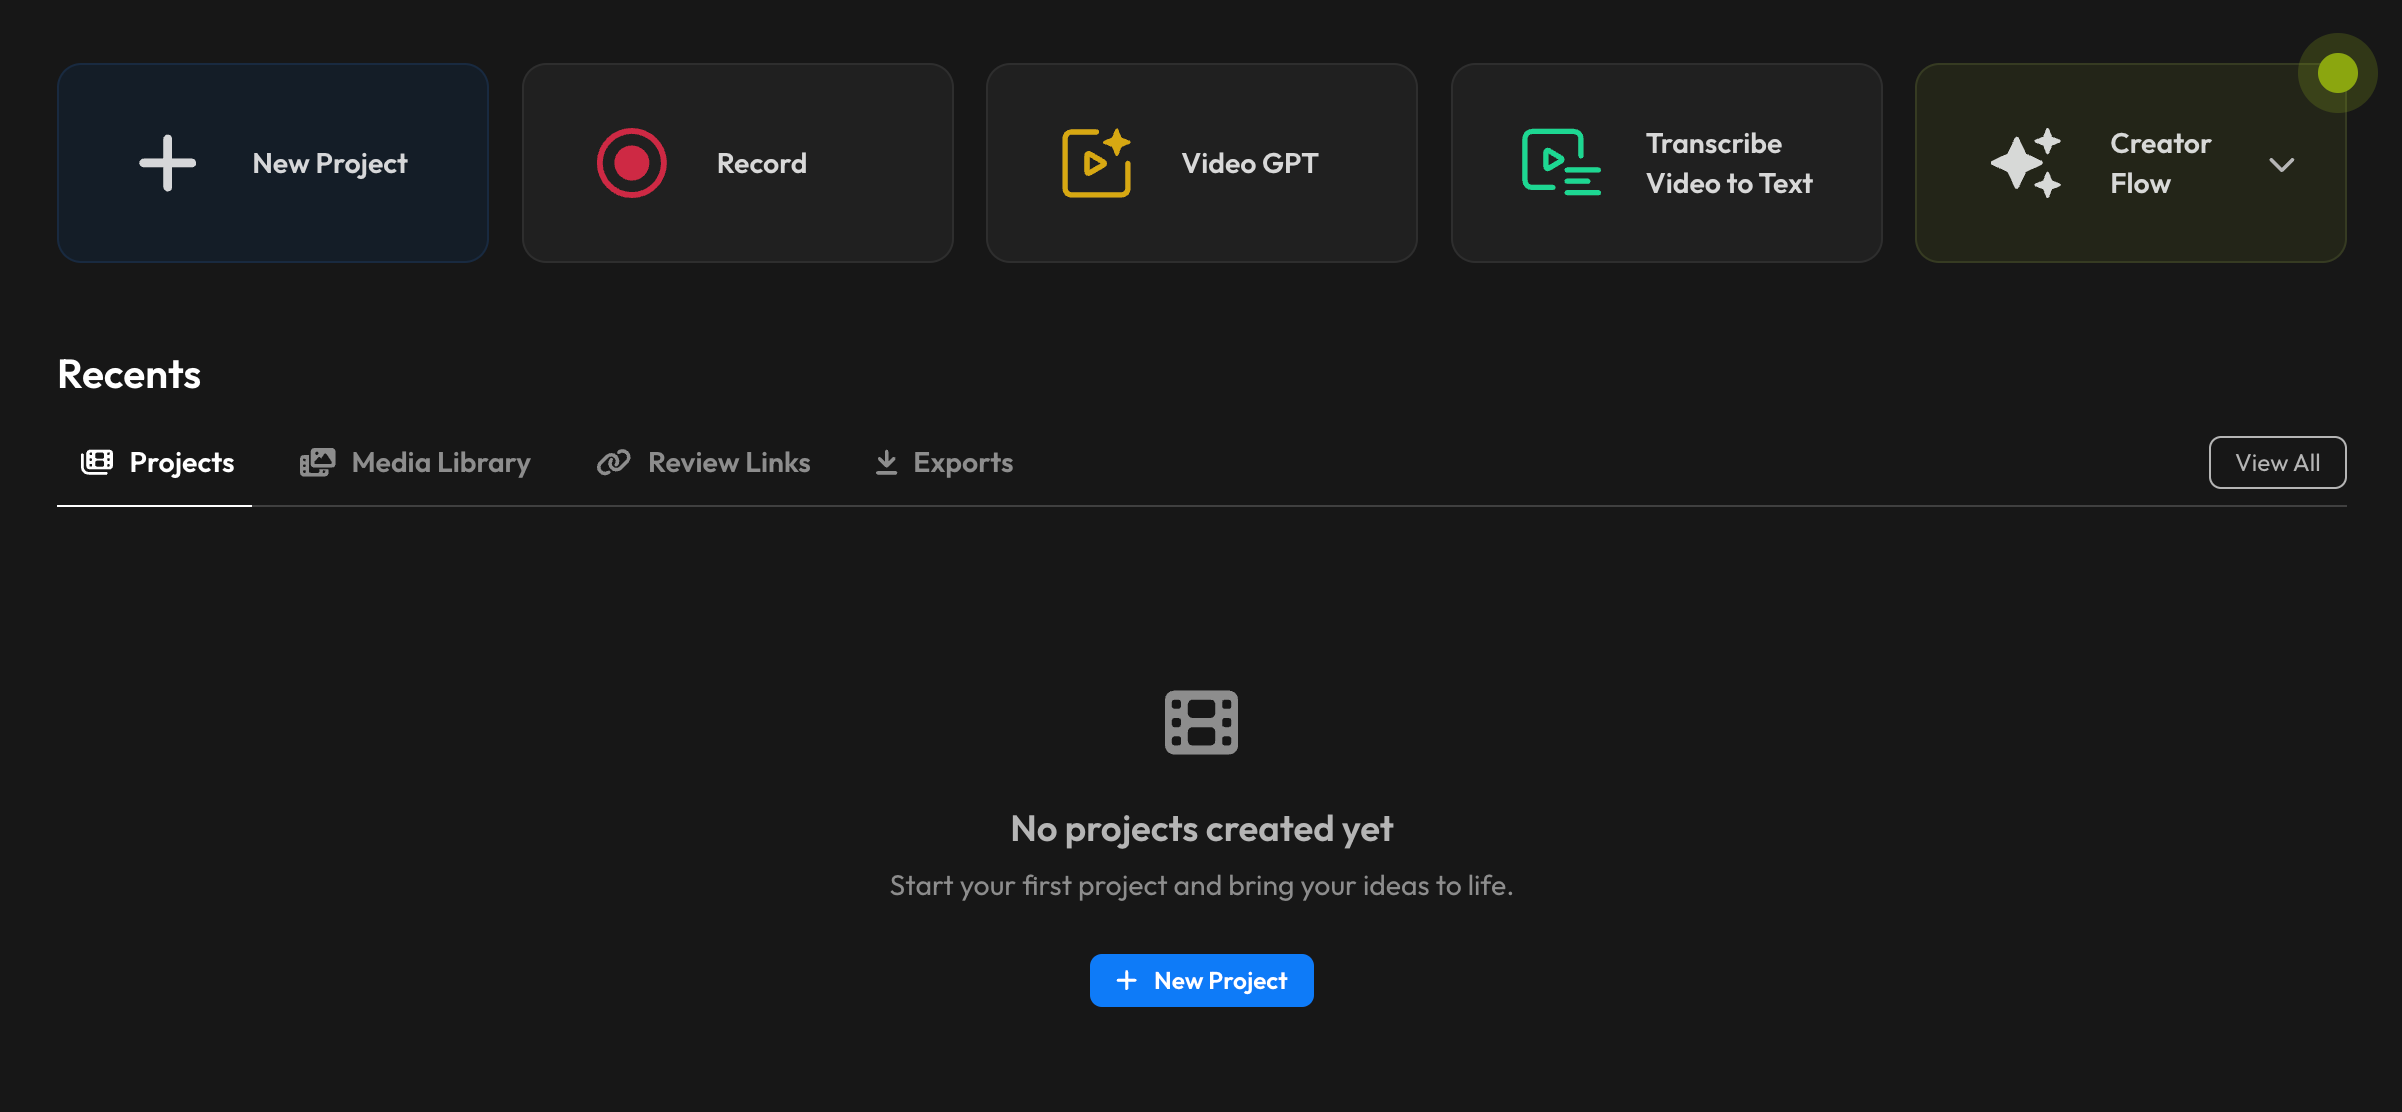
Because of all these fundamental changes, we’ve also moved the Record option outside of the Import menu. Recordings are now their own project type, and you can create a new one by hitting the Record button at the top of the dashboard.
New Subtitle Improvements - Linked Objects for Perfect Sync
While making cuts and changes to your video, the generated subtitles needed the same adjustments to bring them in sync. The same manual adjustments had to be made when adjusting video speed or using features such as Auto Rough Cut, Remove Silence, and other AI-driven editing tools.
To address this, we are introducing a significant upgrade: Linked Objects for Subtitles.
When subtitles are generated from a video, they are now automatically linked to it. Any change applied to the video cuts, trims, speed adjustments, or other structural edits is instantly reflected in the subtitle track. No drift. No manual retiming. Subtitles remain perfectly synchronized, regardless of how the video evolves.
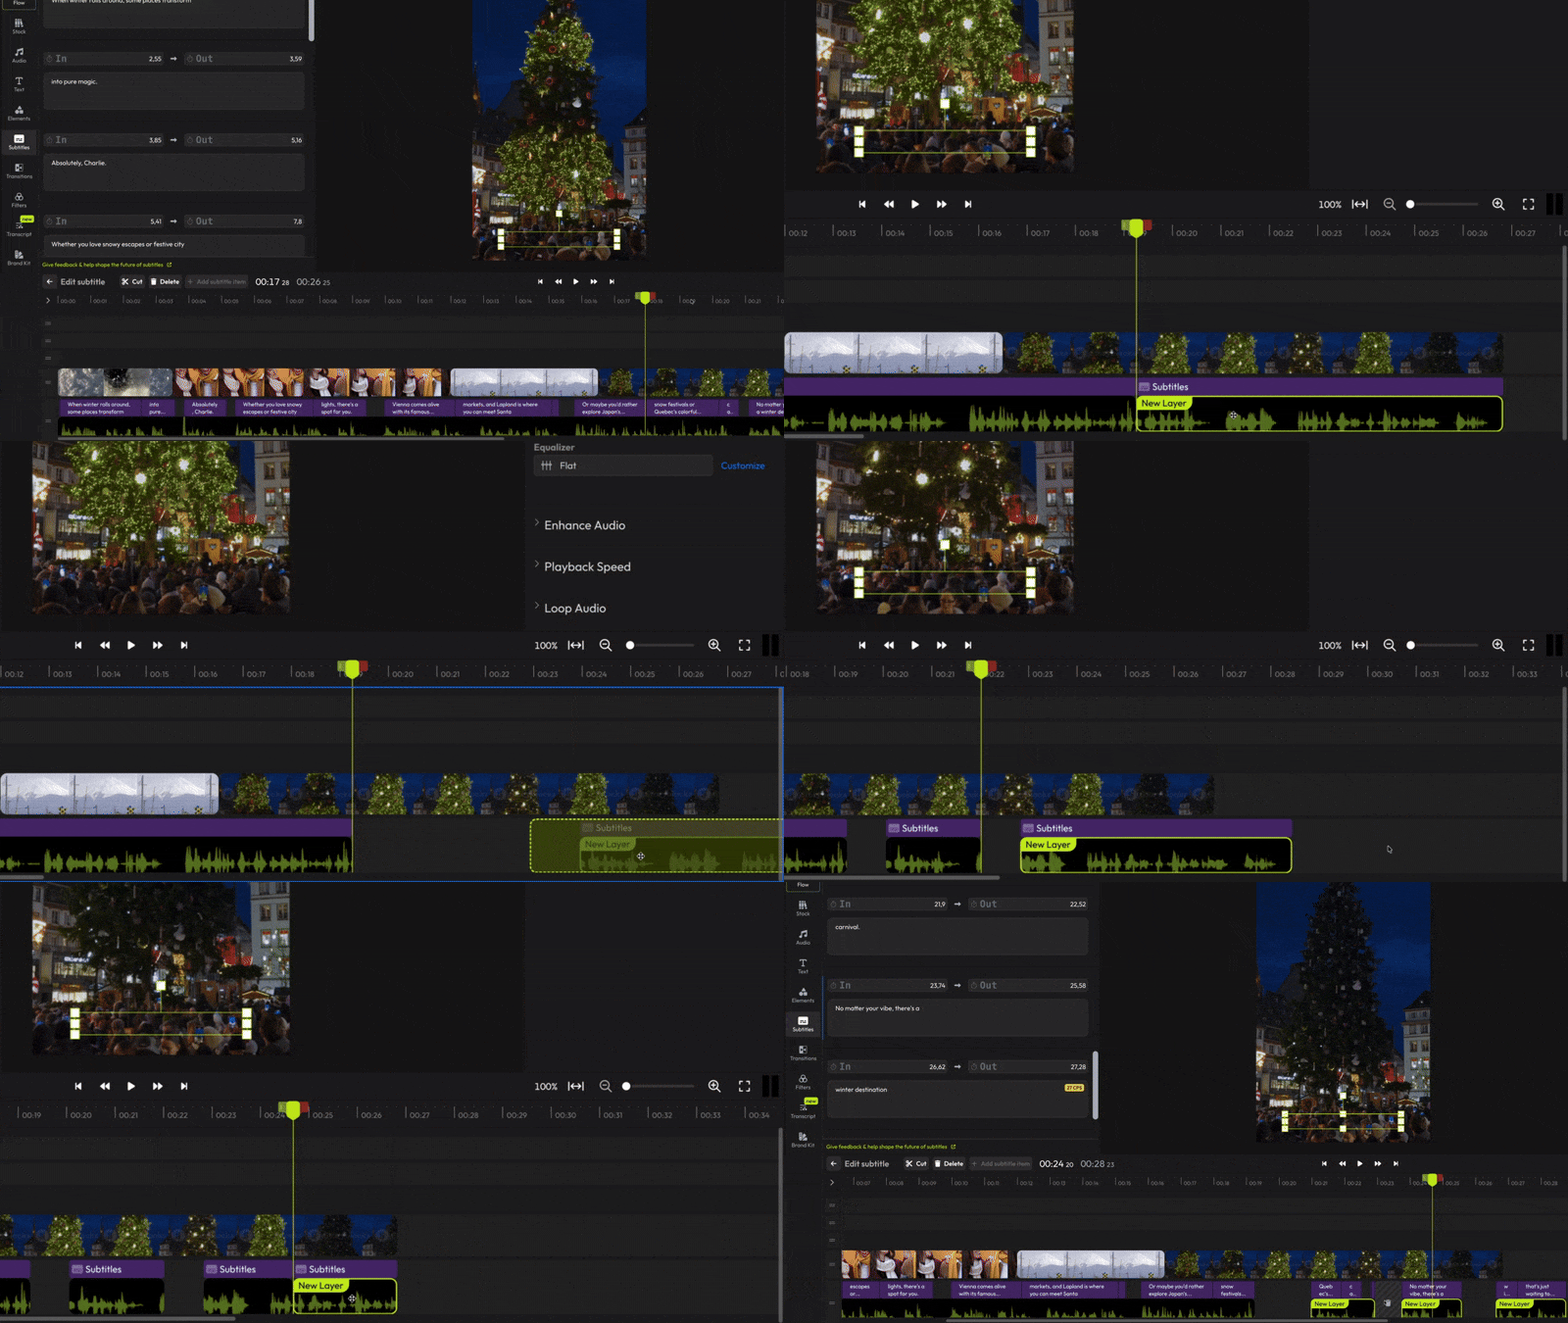
Improved Subtitle Editing in the Subtitles Tab
Previously, subtitles could only be edited by selecting individual subtitle objects directly on the timeline. The Subtitles tab did not provide access to all subtitles across the project.
With this update, the Subtitles tab now lists all subtitles in the project in a single, centralized view. Subtitles can be reviewed and edited directly from this panel, without selecting each subtitle object on the timeline.
This change simplifies subtitle management, reduces manual navigation, and improves efficiency when working with projects containing multiple subtitle segments.
