AI Selfie Generator
Turn your text into beautiful selfies using AI, directly in your web browser. Describe yourself, choose a style, pick a size, and download your AI-generated selfie as a top-quality PNG file

Create stunning selfies using AI
Get original AI selfies that look like a professional took them. Forget about costly photographers and time-consuming photo shoots. Now, you can create unbelievably realistic or creative photos of yourself in seconds using only text. Skip the complex Photoshop edits and lengthy tutorials. You can even use them in your video presentations, jazz them up with cool captions and stickers, or bring them to life with animation.
A reliable and easy to use AI selfie generator
Explore diverse selfie styles
Generate selfies for all your projects
Create an AI avatar for gaming
How to use AI selfie generator:
1
Open Flixier
Tap the Get Started button above to open Flixier in your browser. Then, navigate to the AI Tools in the left side menu and choose AI Image Generator.
2
Generate AI selfies
Provide a detailed description of how you envision your selfie photo. You can refine your description until you are satisfied with the result. Choose a selfie-style and an aspect ratio, then tap Generate Image. You can also use the Negative prompt option to specify what you don't want in your selfie, such as colors, hairstyles, background, and more. All your AI-generated selfies will be automatically saved in your library and also can be easily integrated into your videos, along with voiceovers and dynamic titles.
3
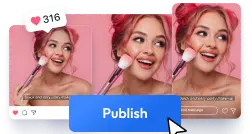
Save or Share
To save it as a high-quality standalone PNG file on your device, drag it to the Canvas. Then right-click on it and select Extract Current Frame.

Why use Flixier as an AI selfie generator:

Go beyond selfies with our powerful AI
With our advanced neural network technologies, the creative possibilities are endless. Just type your concept and let our AI generate a range of creative concepts, from anime artwork and dynamic comic book strips to iconic superheroes, astonishing jewelry designs, inspiring architectural masterpieces, and more. No advanced computer skills are needed, just your imagination.

Transform selfies into captivating self-introduction videos
Get the most out of Flixier's online video editor. With Flixier's help, you can generate high-quality headshot images and integrate them into engaging self-introduction videos with enjoyable background music and captivating sound effects. You can even record your own voice, add transitions, animated titles, and more, all within the same user-friendly dashboard.

Give voice to your digital persona
Why settle for dull, bland selfies when you can bring them to life with your own voice or a professional-sounding AI voice? The AI video script generator creates natural dialogue for your persona in seconds. Record yourself using your device's microphone, or let our AI handle the talking with over 100 realistic voice overs in 130 languages.

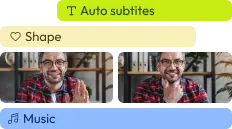
Share your projects on social media with ease
With Flixier's AI video editor and social media integration, your self-introduction videos adapt perfectly to LinkedIn, Facebook, Instagram, and YouTube requirements. Each project automatically adjusts to fit platform-specific aspect ratios, maintaining professional quality across all channels.
You`re ingood hands
Over 1 million creators use Flixier every month including brands like:


Frequently
Asked
Questions
How can AI generate a selfie?
With Flixier, you can describe the kind of selfie you want, whether it's realistic, anime-style, or a professional look, and see it come to life almost instantly. Don't forget to include plenty of adjectives and specific details for the best results.
What is the AI that makes selfies look better?
With Flixier's amazing AI selfie generator, you can create all kinds of cool portraits in different styles and sizes, from professional looks to your favorite hero character style. Flixier makes it super quick and easy to create amazing social media headshots or fun gaming platform selfies at high-quality.
How do AI-generated faces work?
Flixier's AI selfie generator simply uses advanced deep learning algorithms to analyze different physical features such as facial traits, skin color, eye shapes, head poses, and more in order to create highly realistic photos of human faces. The results are so lifelike that it's often hard to distinguish them from actual human faces.
4. How do I create an AI image of myself?
To create an AI image of yourself, you can easily upload a personal portrait and use the AI Image to Video Generator to animate it or the AI Image Editor to stylize it. Make sure to choose a photo that clearly shows your facial features for a highly realistic final result.
Need more than an AI selfie generator?
Edit easily
With Flixier you can trim videos or add text, music, motion graphics, images and so much more.
Publish in minutes
Flixier is powered by the cloud so you can edit and publish your videos at blazing speed on any device.

Collaborate in real-time
Easily collaborate on your projects with Flixier, we offer real-time feedback and sharing of projects.

