4 Essential Cuts Every Video Editor Needs to Know
Updated on July 26, 2023

No matter the software you’re using or the project you’re working on, cutting is a fundamental part of editing videos. Different types of cuts are used to great effect in all the video content we consume, from films to gaming videos on YouTube and even marketing clips or webinars.
In fact, using the right cuts at the right time can be such an effective yet subtle way of telling a story that it might even go unnoticed by the untrained eye. Improper cutting, however, is always extremely noticeable and something that can keep a good project from being truly great.
In this blog post, we’re going to explore and explain a number of essential, simple and yet highly effective cuts that we believe every video editor should master.
1. The Standard Cut
Also known as a Hard Cut, this type of cut is just what the name implies: it means cutting from the end of one clip to the beginning of another, without using any sort of transition. Standard cuts are what most people use when they first start editing videos, since all you really need to do is drag two videos next to each other on the timeline.

When do you use the standard cut?
There’s no added visual meaning to a Standard Cut, but that doesn’t mean you should dismiss them as “useless” or “unimportant”. The phrase “Less is more” may sound cliche, but when you’re editing, it’s important to keep in mind that not all projects require the same amount of visual flair. If you’re working on corporate videos, webinars or other types of content that needs to convey structured information effectively, the Standard Cut is probably the perfect tool for the job since it stays out of the way and doesn’t distract the audience, allowing viewers to focus on the message.
2. The L Cut
Now that we’ve gotten the very basics out of the way, it’s time to move on to something a little more creative.
Most often encountered in commercials and documentaries, the L-cut consists of cutting over to a different clip while the audio from the first one goes on in the background. This way your audience keeps hearing the sound from the first shot, but they’re looking at the second shot i
This technique is great when you want your dialogue to keep flowing while also providing your audience with more visual information. If you’re filming an advertisement, for example, you might start with a shot of someone talking about your product and then cut over to a slow panning shot of the product itself while the audio of the first person continues to play in the background. Similarly, a travel vlogger might start with a shot of himself talking about the place he’s in and then continue talking while he cuts over to various shots of the location in order to help the viewer get a better idea of the surroundings.
Why is it called an L Cut?
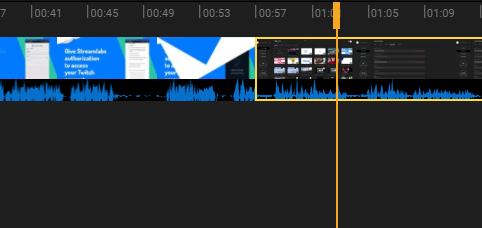
The L-cut got its name because if you look at it on a Timeline, the first clip and its audio form an L shape as the audio extends below the footage of the second shot.

3. The J Cut
The J Cut is pretty much an L Cut in reverse. This time, the audio from the second clip starts playing while the first clip is on screen.
Why is it called a J Cut?
Because when viewed on a Timeline, it looks just like a mirrored version of the L Cut and is just as easy to do!

When do you use a J cut?
Just like L Cuts, J Cuts are also common across all types of media, especially when story-telling is involved. Where the L Cut can be used to show the character first and then offer the viewer more context, the J Cut does the opposite, immersing the viewer into that character’s world before revealing who said character is.
A documentary about the Moon landing, for example, might start with a shot of the Apollo 11 rocket taking off and a voice describing the experience of being inside it at the moment, before cutting over to reveal that the person being interviewed is none other than Buzz Aldrin.
4. The Jump Cut
Superseded in popularity only by the Hard Cut, the Jump Cut is what happens when you take a long shot and cut out small parts of it to show your characters advancing through time without “fast forwarding” or boring your viewer.
Why is it called a Jump Cut?
Because it allows your characters to “jump” forward in time!
When should you use a Jump Cut?
The snappy nature of Jump Cuts makes them a favorite for online video creators, who’ve been using them successfully for more than a decade. Since Jump Cuts move things along a lot faster than normal, they’re perfect for making sure your videos don’t overstay their welcome and keep your audience engaged throughout the whole thing. A fashion influencer, for example, could use Jump Cuts to show themselves trying on different jackets while cutting out the part when they take off one jacket and change into the new one.
Since they’re fast and unexpected, well timed Jump Cuts are also often used for comedic effect. A lot of viral videos like sketches, Vines or more recently Tik Toks use Jump Cuts to develop the characters and story behind a joke in a very short amount of time.
Dan is passionate about all things tech. He’s always curious about how things work and enjoys writing in-depth guides to help people on their content creation journey.


