- Home
- Blog
- Video Marketing
- How to Create a Promotional Video in Minutes With Flixier
How to Create a Promotional Video in Minutes With Flixier
Updated on June 1, 2025
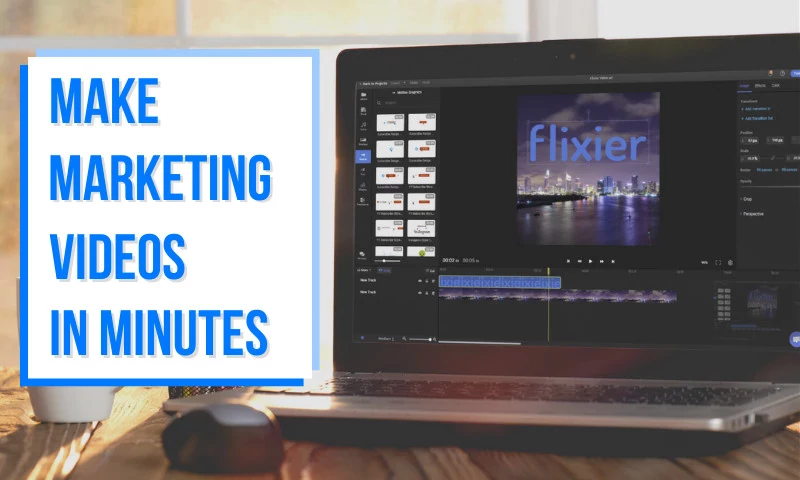
Whether we’re talking about social media stories, posts or paid ads, it’s no secret by now that video content is the best way to promote your business online. It’s attention grabbing, it keeps people engaged and it can even be embedded to improve page ranking.
The only issue is that creating video ads can appear intimidating. There is a preconceived notion that video creation is expensive, complicated and time consuming. Flixier disproves this notion every step of the way by making video editing cheap, fast and accessible.
In this blog post, we’re going to address the issue of promotional videos and show you how it’s possible to make engaging video ads with high conversion rates in a matter of minutes, and on a shoestring budget.
Just remember: your first ad will not stand up to the million-dollar budget promos that big companies make, but if you don’t start promoting your business early, you’re never going to afford making those anyway.
1. Choose an aspect Ratio
The first thing you need to think about when creating your brand new video ad (or any kind of video, really), is the aspect ratio. This means the orientation or “shape” of your clip and depends a lot on where you plan on posting it and how you intend for people to view it.
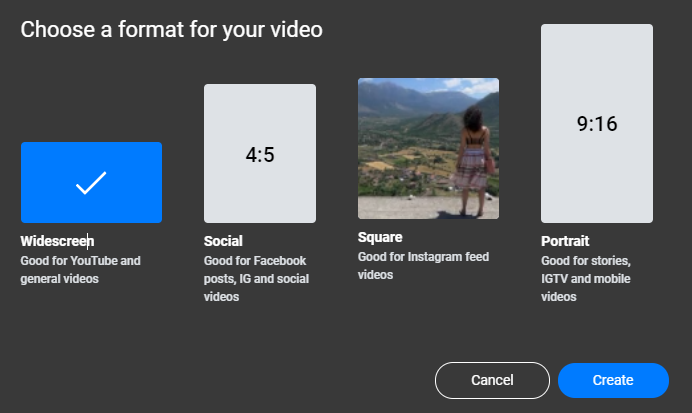
If you’re planning to post your video on Instagram or Facebook, for example, a square (1:1) ratio is probably the best.
If you want to share your video as an Instagram or Facebook Story (or more recently, a YouTube short), then you should go for a vertical aspect ratio (9:16) instead. This makes it easy for people to view it on their mobile phones without having to turn it around to landscape mode.
NOTE: You can always modify your video’s aspect ratio later in case you change your mind, so don’t worry too much about it at first.
Now that you’ve chosen the proper aspect ratio and created your project, it’s time to move on to the next step.
2. Import your own footage or choose from our library of stock videos
The way this step will go depends a lot on whether or not you have any of your own footage that you want to use in your ad.
If you filmed your own clips, all you have to do to bring them into Flixier is drag them over to your Library tab.
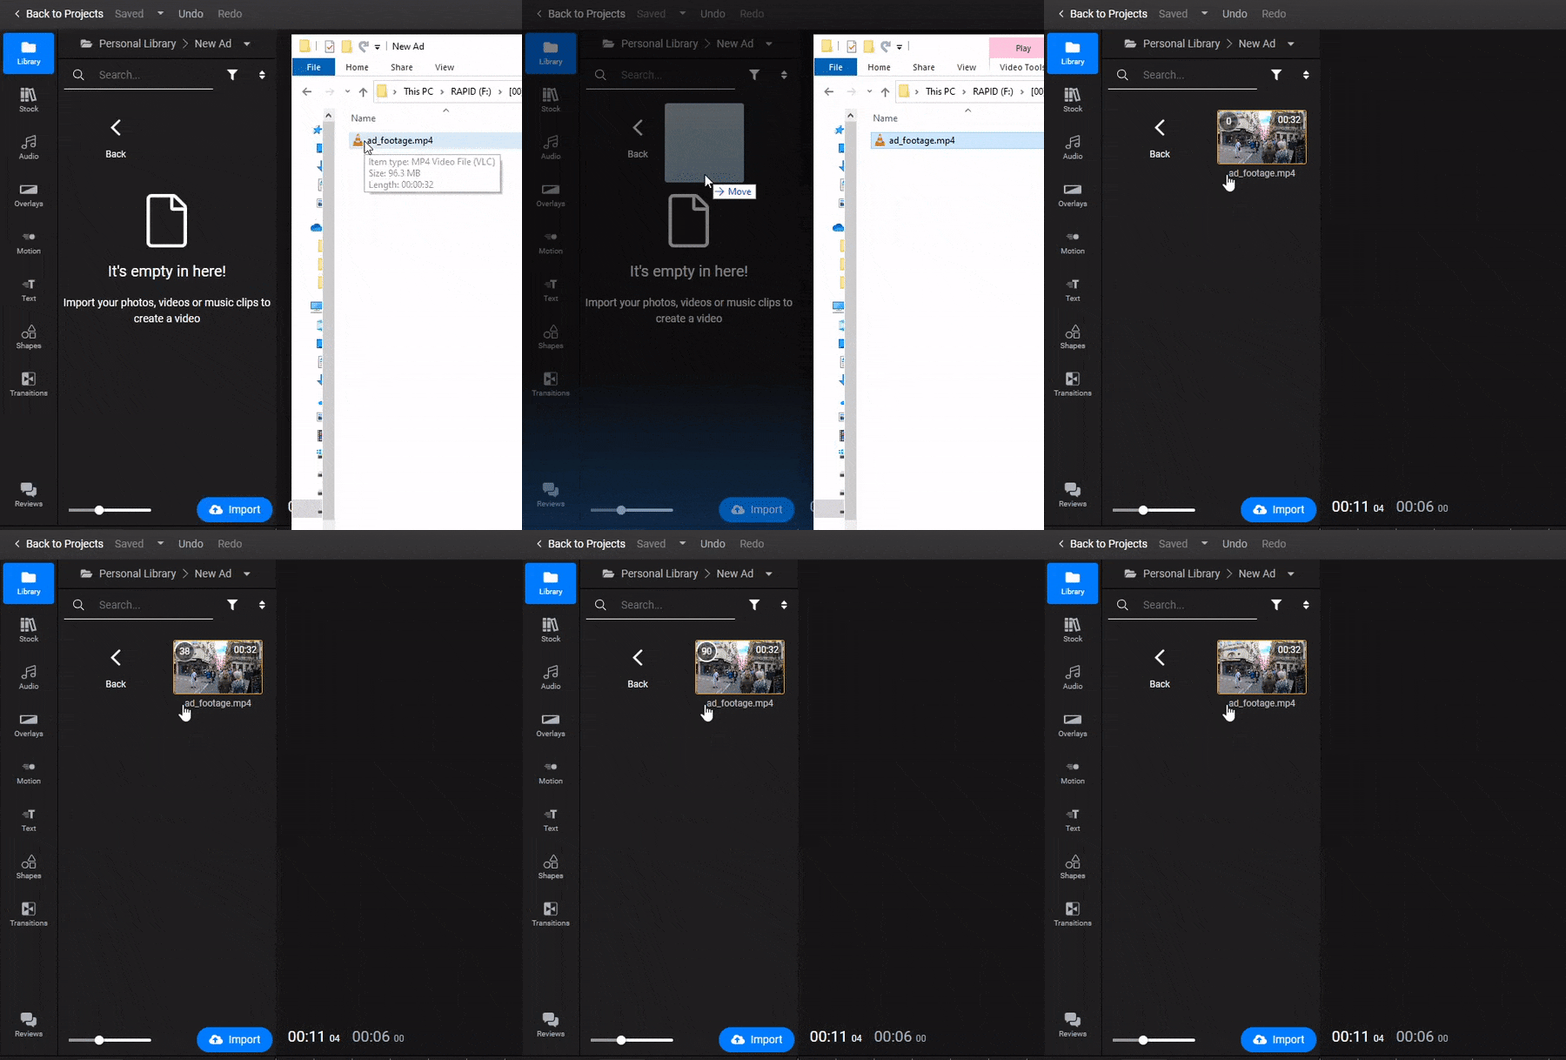
It’s going to take a few seconds for your clips to load, but after that, you can simply drag them over to the Timeline at the bottom of the screen and start editing. Flixier lets you resize, crop, cut and delete clips easily.
The interface is extremely intuitive, so you won’t have any problems adjusting your clips on the fly. We also have plenty of tutorials in our help center and over on our YouTube channel to help you in case you want to study more advanced editing.
If you don’t have any clips, don’t worry! You can choose from hundreds of stock images and videos. You don’t need to study video production or organize expensive photoshoots and filming sessions
Just go over to the stock tab, type whatever you’re looking for into the search bar, hit enter and browse away! Adding one of the clips to your video is as easy as dragging it over to the timeline.
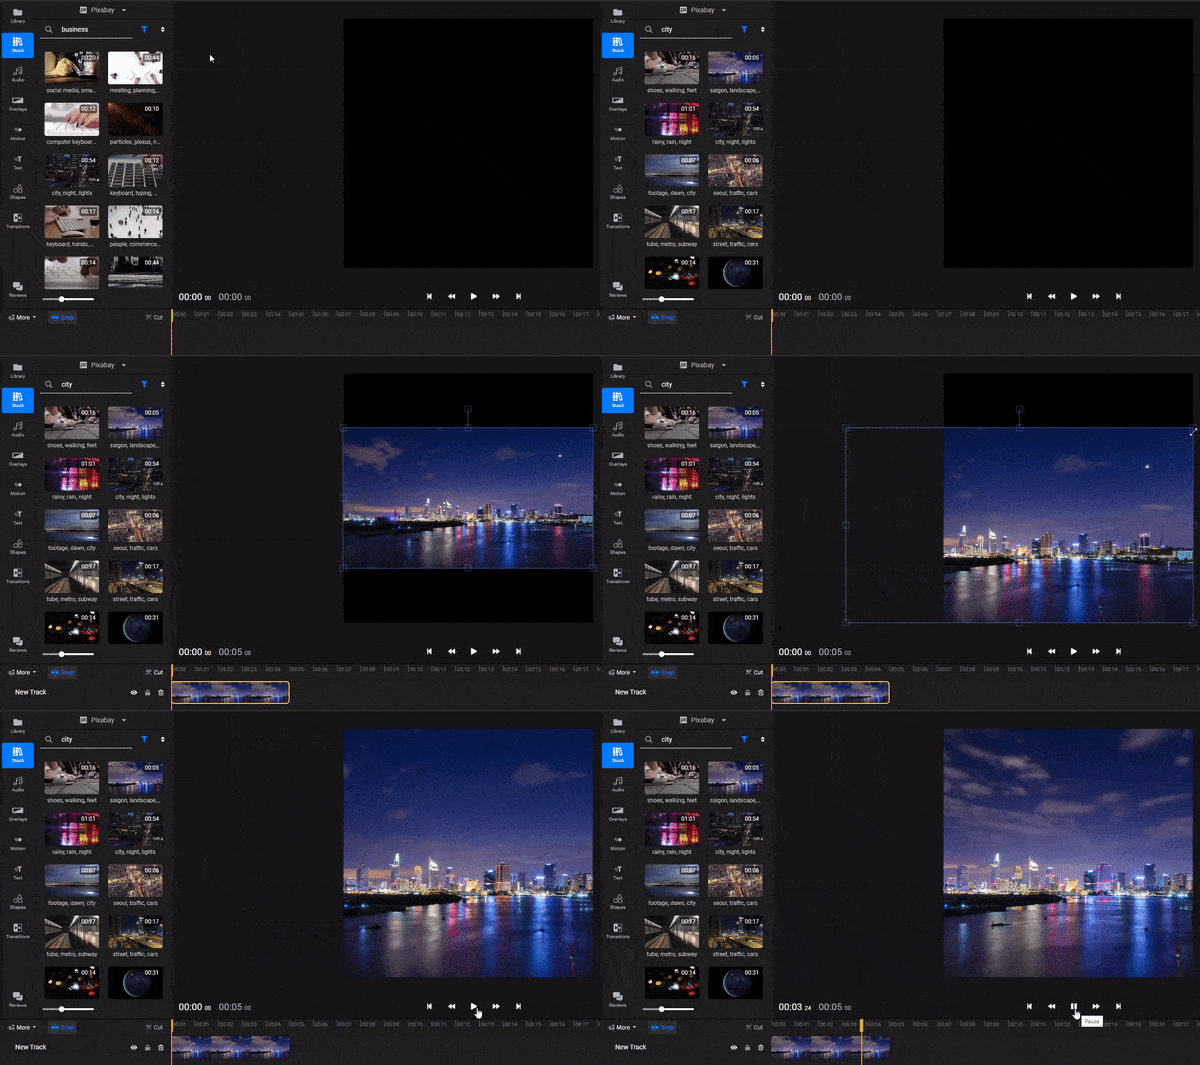
You can cut, resize or crop stock videos just like you would any other clip, so feel free to adjust them as much or as little as you wish to.
If you’re more of a visual learner, or simply want to learn more about Stock Media and how to use it within Flixier, you can check out the video we made on the topic below:
If you want to add some smooth transitions to help your video flow along a little better, Flixier offers a library of over 40 transitions for you to choose from.
To add these to your clip, just drag the ends of two clips over one another and then choose which transition you want to apply from the drop-down list.
3. Add text to your video ad
Now that you have your footage, it’s time to take care of the copy: maybe you want to add a title, announce your latest discount, or let people know how they can access your website.
Flixier gives you two options for adding text to a video, and both are as easy and dragging and dropping.
The most basic one is adding simple text. Just go to the Text menu on the left and then select Add Simple Text.
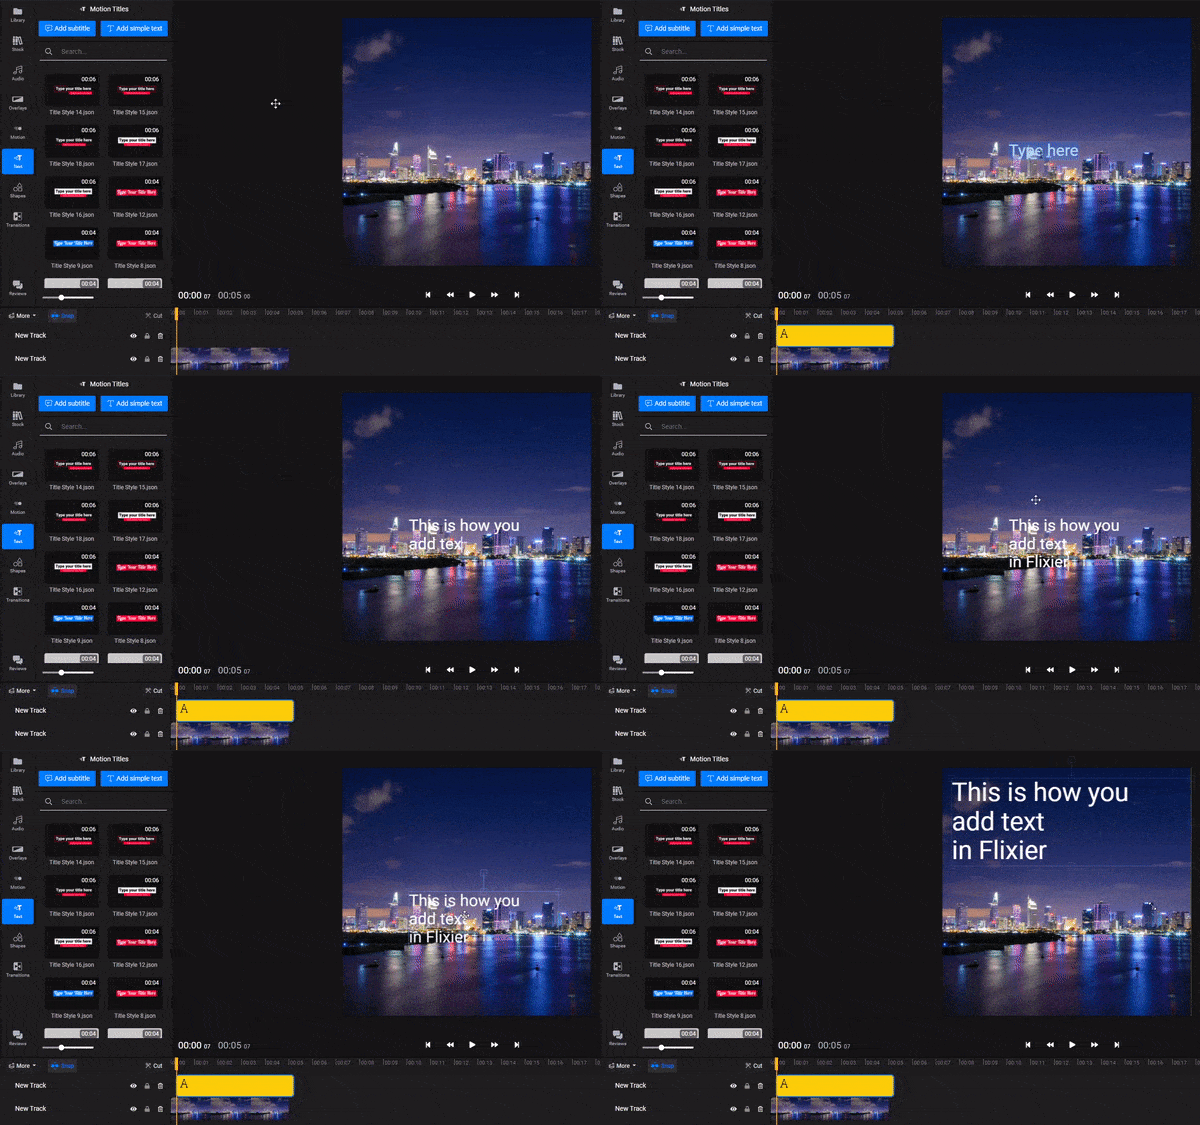
This will create a box for you to type your text into. You can move it around the canvas with your cursor and adjust the way your text looks (from font to alignment, style and stroke) by going to the Text Properties tab of the Object Inspector menu.
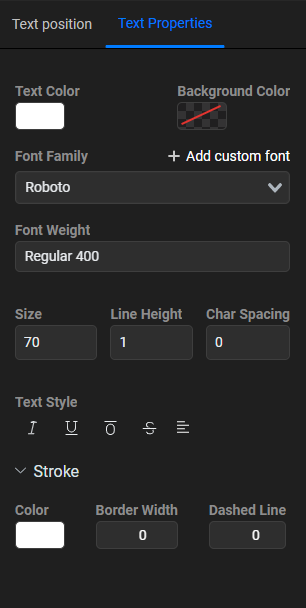
Use the timeline to control when your text pops up and how long it stays on screen for.
If you want to, you can also use the Object Inspector menu to add transitions to your text, or modify its opacity and perspective. Flixier is simple to use, but provides plenty of options, so you can spend as much or as little time as you want on your videos and still end up with a good-looking ad.
The second option for adding text is using one of our Motion Titles. These are pre-animated, fully customizable title cards and lower-thirds that will make your promos look professional.
To add these to your videos, just select one from the Text menu and drag it over to the canvas.
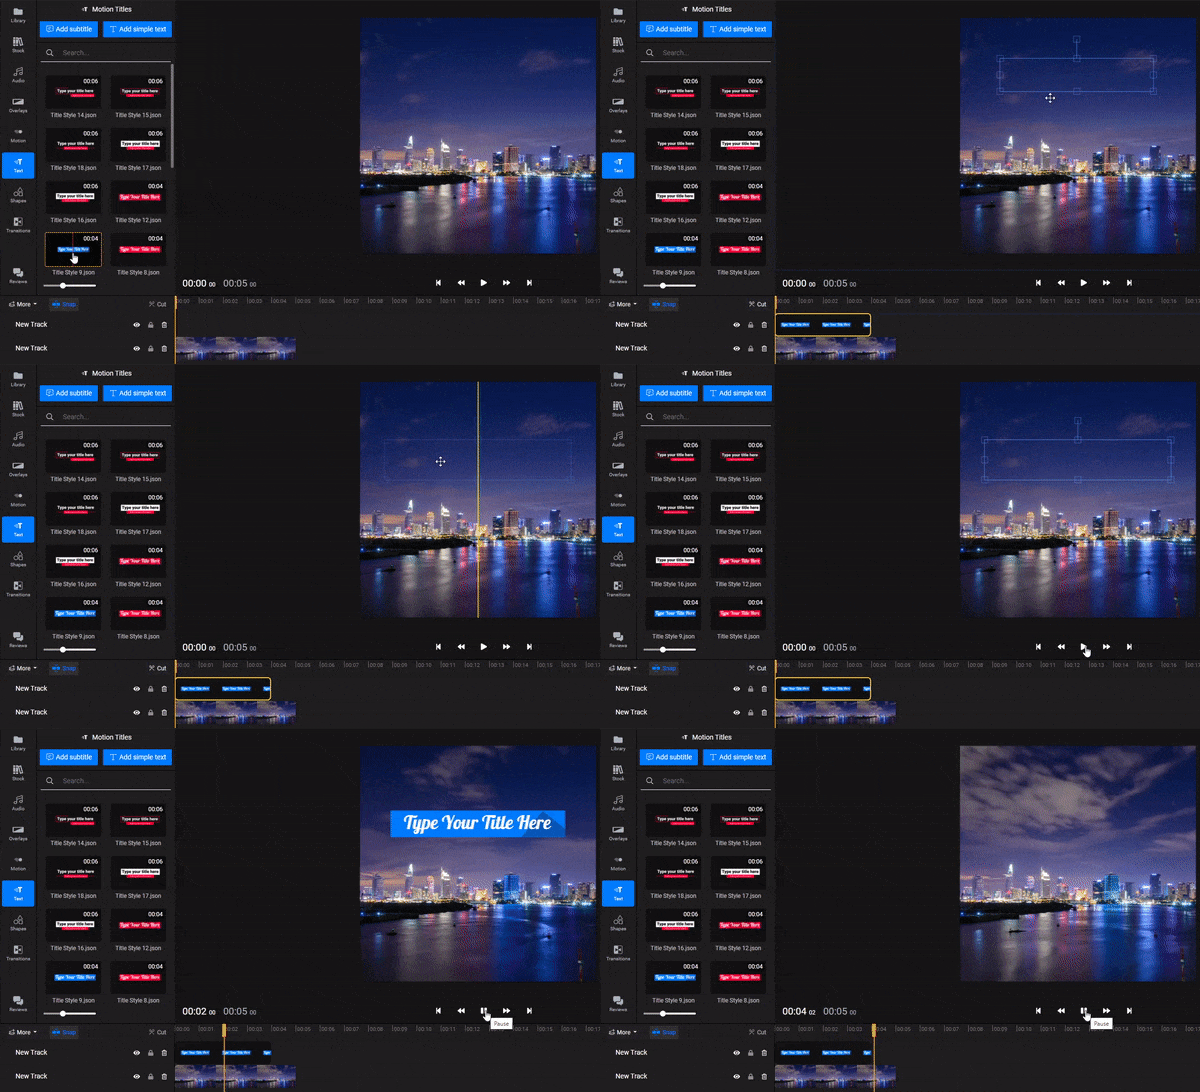
You’ll notice the Object Inspector menu has an Edit Animation button. Clicking on it will open up a window allowing you to modify the colors in the motion graphics, the text and the fonts, all with a couple of clicks.
If you want to see our motion titles in action and learn more about how to use them to increase engagement and improve conversion rates, feel free to check our YouTube video on the topic below:
4. Include logos or other branding materials
Given that this is a video advertisement, it’s only natural that you might also want to include your company’s logo or other brand-specific materials in the final clip.
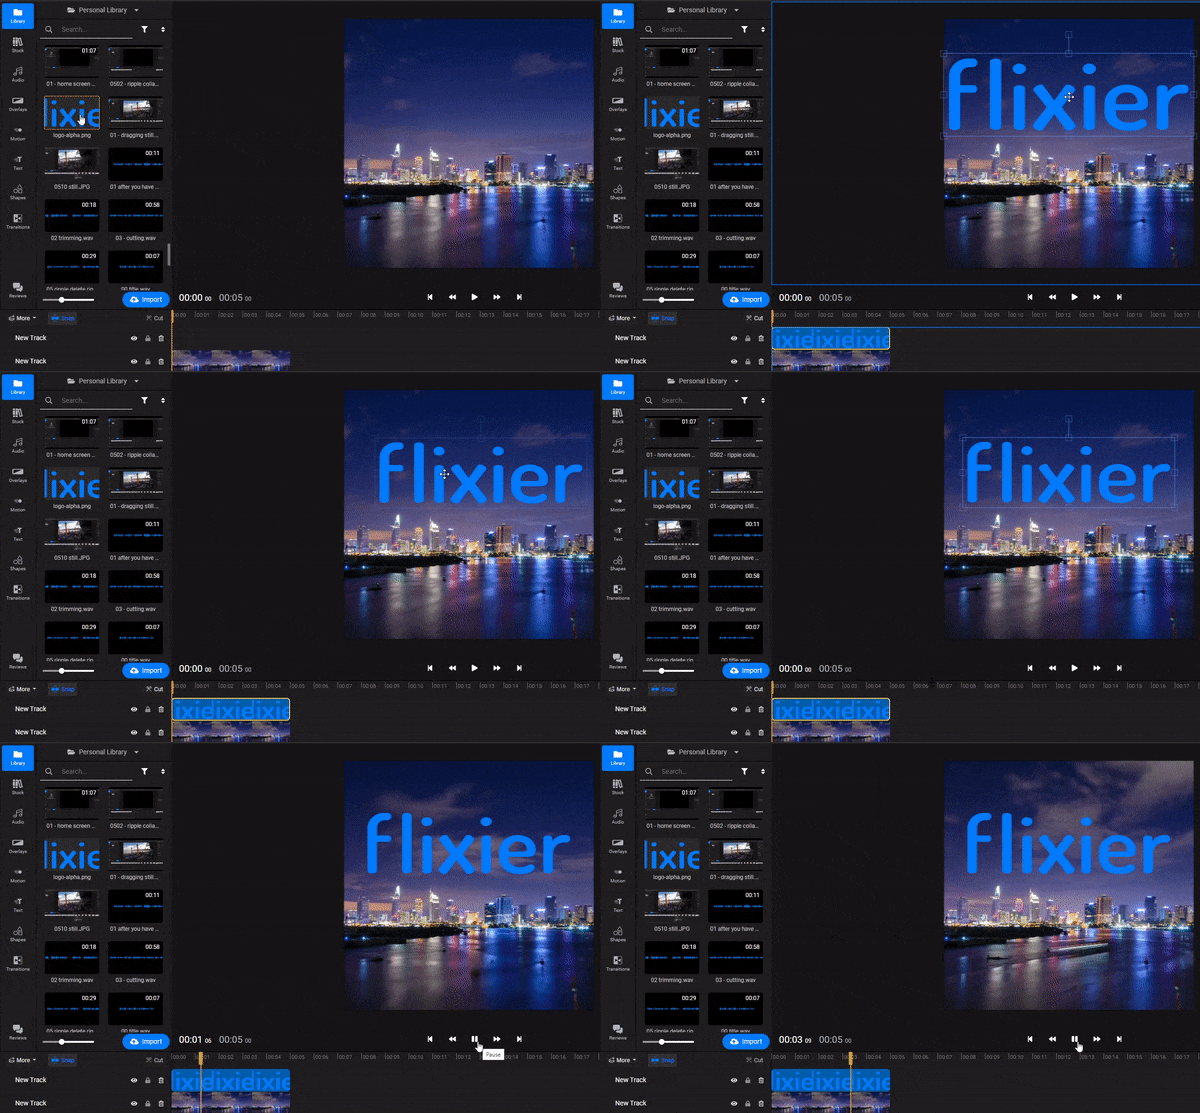
Don’t worry, doing this in Flixier is as easy as adding images to a Google Document. All you have to do is import these materials into the Flixier library (just like you did with your footage) and then drag and drop the media over to the canvas to place it wherever you want.
5. Publish and download your final clip
Once you’re happy with the way your ad looks, all that’s left to do is export it!
To do that, just click the blue export button on the top-right corner of the screen. In the export menu, you can choose to send your finished video straight to cloud storage or a number of different social media and video sharing platforms such as Facebook, YouTube and Vimeo.
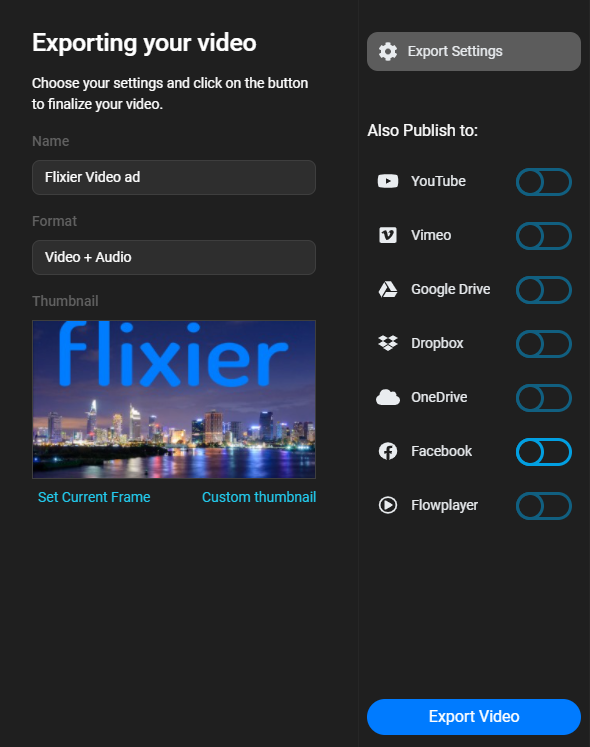
You can choose to enable as many of those as you want, or just export your video.
Either way, your video will be done in 3 minutes or less and you’ll be notified when the process is finished.
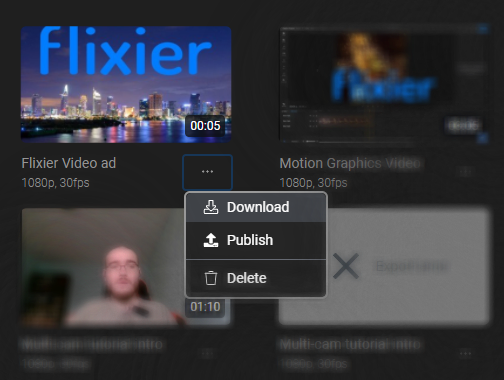
If you go over to the Exports tab on your Flixier Dashboard, you’ll be able to find all of your exported videos, as well as download them to your own computer.
Closing Words
Thank you for reading this far! We know this was a long read, but we hope it helped you get started on making engaging video promos that will help your business grow!
If you enjoyed this article, please consider checking out the rest of our blog and subscribe to our YouTube channel for more guides and step-by-step tutorials!
Dan is passionate about all things tech. He’s always curious about how things work and enjoys writing in-depth guides to help people on their content creation journey.


