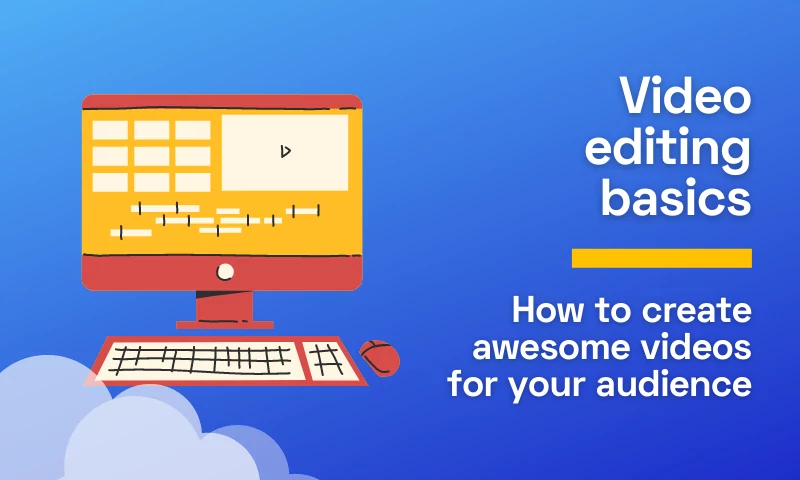
Video Editing Basics—How to Create Awesome Videos for Your Audience
Updated on March 10, 2026

Editing is a very important part of the video post-production process. It helps your audience get the most out of your video and keeps them engaged throughout.
In this article, we'll walk you through some video editing basics that will help you on your way to creating awesome videos for your audience. Learn how to increase audience retention for your videos!
Why You Should Edit Videos
The video editing process is like a magic wand. It can make the most boring video become more interesting, and it can take an already great video and make it even better. Editing works by combining multiple clips (or "takes") together to create a cohesive whole, over which you can apply video effects.
No matter the level of difficulty or the overall purpose of the video material, from making a “how to” video for your YouTube channel to producing a short movie, all these clips you are watching are more than raw footage.
So, why should you bother editing videos? Because:
- It's a great way to improve your video content and make it more compelling
- It helps you engage better with your audience
- It offers you a way to showcase your creativity.
- Videos can be accessed anywhere
- You’ll gain access to more professional opportunities
- You can start working as a freelancer
- More and more users consume video content
Basic Video Editing Tools & Techniques
There are many styles of editing that you can use when making videos; this article will cover some basic techniques for beginners who want to get started with video editing, as well as more advanced users looking for fresh ideas.
Add Text to Video
Adding text to video is a great way to specify when something happens or give credit.
For example, if you're creating a video that shows the steps of how to make your own salad dressing, you can add text telling people what ingredients are needed so they know what they should buy. This would be useful if someone was watching the video but not familiar with all of these ingredients at home.
You could also use this technique for narrating over images—if you add subtitles to videos, this will make it easier for viewers who don't speak English as their first language (or just aren't very good at speaking) to see what's going on in each scene without turning down the volume too much!
Why is it necessary to include text in your videos?
- Titles: describe your content.
- Text: provide extra context, highlight actions, and keep the audience interested.
- Captions and subtitles improve accessibility, boost SEO, and increase watch time.
Here are some things to keep in mind when adding text to edit a video:
- Text positioning and timing
- Size of the text
- Colors and fonts
Create Intro Video Content
Especially when you edit YouTube videos, having an intro is important. The video intro is the visuals or graphics that appear before each video. To be truthful, it's one of the most important elements of a video—it usually shows brand information, a logo, and lets people know what the video is about.
The intro is the essence of each video, and it serves as a synopsis of the entire video's contents. An enticing opening will convince viewers to stay and watch the rest of the video. That is, the introduction can determine whether a video is popular or not.
Thankfully, creating a video intro is super easy with the help of an intro maker.
Adding a Green Screen Video
A green screen is a green background used in video production that allows a video editor to apply visual effects in post-production via chroma keying.
Being able to alter backdrops has many applications nowadays for creating immersive and interesting content. Most popular media outlets, such as movie studios, employ them to add a variety of aspects to their photos. Green screens are also used in broadcasting studios, most notably for giving weather updates to the public.
Green screens are also used by YouTubers and Twitch streamers to appear more professional. Before you begin filming your green screen video, you must first set up a few things. If you're using green fabric, keep it draped down so that it's sleek and straight.
You must also ensure that your performer is not wearing anything green. Make sure the subject or person is at least six feet away from the green screen during filming. It will reduce spills and undesired shadows on the green screen.
As this technique might be somethings new to you, here are the steps you need to follow when editing your green screen video with Flixier:
- Record your video. Then drag it into your Flixier library alongside the video or image you wish to utilize as a background. You can also record your video using the webcam recorder integrated into Flixier.
- Add the green screen effect. Drag both clips, the one you wish to use as a background and the one with you in it, to your Flixier timeline. Check that the one shot in front of the green screen is on top. Select the top video, then click to the Effects menu on the right and search for Green Screen. Select the color of your Green Screen with the color picker, then drag the slider left or right to modify the Green Screen strength until everything looks just right!
- Export the video. Simple as that, your new video can be shared to your social media platforms.
Trim Your Videos
Video trimming is the process of deleting a segment from the beginning or end of a video clip. It is a critical approach for ensuring that your videos begin and conclude at the appropriate times. When you trim a video, you delete its beginning and/or ending, but the remainder of the clip remains unchanged. For example, when we use a tool to record the phone screen, the head and tail parts are usually not what we want to capture, therefore we must trim them.
The first five seconds of a video are critical for drawing viewers in and convincing them to stay for the duration of the video. Strategic video trimming allows you to remove everything that isn't absolutely necessary, leaving only what your viewer wants.
Use Standard Cuts
When learning about video editing processes, it is critical to start at the beginning. The normal cut is one of the most basic editing techniques available to users of an online video editor. It primarily enables editors to cut from a certain frame and immediately begin the second frame where it fits better. The two clips are cleverly combined, connecting the previous frame and beginning with the next. These cuts are so subtle that no one in the audience can spot them.
In most circumstances, the fundamental cut creates a shot-reverse-shot sequence. This is a continuation of the previous clip, which is being established from a different perspective.
Add Audio to Video
Sound editing plays an important role in the video editing process. Therefore, it is essential to add audio to video materials. You can record your own voice tracks, import background music and voice overs from your computer or SoundCloud.
No matter where you choose to add audio files from, you can adjust the volume and timing of the sound, trim the video and audio layers, detach the original audio from your video, and much more.
Create a Split Screen Effect
If you want to display to videos on the screen at the same time, you can use a Split Screen Effect. This is great for comparison videos like reviews, or for storytelling (since it allows you to show two characters doing two different things in different locations at the same point in time).
To create a split screen video, just add the two clips you plan on using to different tracks on the timeline. Then, use the crop tool or move them around on the canvas to display them side by side. If you want to, you can add graphical elements like a line to separate the two sides of the screen. This can be done both vertically and horizontally depending on your preferences.
Use Video Transitions
What is the purpose of video transitions? They help you stand out from the crowd, add a professional touch to your video clips, elevate and artisticize your message, trigger emotions, and create a specific mood.
Transitions come in a variety of styles, and most video editing software includes transitions that you can utilize in your production. The following are some of the most typical forms of transitions:
- Transitions between slides (up, down, left, right)
- Wipes and swabs
- Twists and spins
- Fade in and out
- Transitional blur
- Iris transformations (in and out)The transitions you choose depend on your video footage, but you can be as creative as you want when you video edit.

Make Color Adjustments
The color scheme of your video is important for setting an appropriate mood and keeping people engaged. Therefore, when editing videos, it is important to make color adjustments, whether we talk about color correcting or color grading.
Color correcting is the process of correcting technical color errors in order to make the footage appear more natural (adjusting exposure, contrast, white balance, etc.). Color grading, on the other hand, is a more creative procedure that is responsible for generating a specific mood and ambiance. The final appearance of the video is determined by color grading.

These steps are not interchangeable; they work in tandem. You won't achieve the ideal appearance on your video throughout the color grading process unless you use proper color correction.
Choosing the Right Aspect Ratio
Based on where you want to share the video after the editing phase, it is important to choose the aspect ratio.
To put it simply, it is the width and height of your image. The aspect ratio of a picture or video indicates the image's size as two numbers separated by a colon. An image having an aspect ratio of 1.85:1 means that its width is 1.85 times its height.

Therefore, if you already know that you want to export the video to YouTube, one of the key features you should take care of in the video editing process is to use the YouTube aspect ratio from the project settings.
Choosing the Right Video Editing Software
Now that you are more familiar with the video editing basics, there is one more critical step to be taken in your video editing journey: selecting the right software.
There are several video editing apps available for a variety of platforms. As a result, those learning how to edit video do not need to invest in the most advanced and robust platform accessible. In fact, that is an expensive proposition that might make the task at hand much more difficult.
If you are looking for a powerful video editing software, then Flixier is the way to go. Our online video editor allows you to simply produce videos on your browser. You may also trim, cut, and crop videos in a matter of minutes without having to download or install any software. You can create high-quality content quickly, regardless of your level of experience.
The Flixier video editing software combines a robust interface with ready-made drag-and-drop capabilities to meet everyone's demands. Creating video content has never been so easy. Get ready to bring your ideas to life and wow your target audience with your visuals!
Andra is highly curious about the marketing field, but most of her experience lays in the content writing sphere, mainly in relation to social media marketing, social media automation, and video marketing.