Why Should I Add a Video Progress Bar?
Updated on February 18, 2025
While spending time on the Internet, there's a strong chance you've seen a lot of social media videos with interesting progress animations. These are video progress bars, and they keep on gaining popularity between content creators.
If you still don’t know if your video materials would benefit from this feature, this article will introduce you to the benefits of adding progress bars to your material when video editing. Fasten your seatbelt and learn why you should add a progress bar to your video in order to keep viewers engaged!
What is a Video Progress Bar?
As the name states, a progress bar helps viewers understand the progress made when watching video materials.
Progress bars are eye-catching elements that help you keep your audience interested throughout the full length of your video. If you want them to have a visual sneak peek of how long your video content will be without watching the complete video, you should definitely add progress bars to your material.
The progress bar is often a narrow, square bar that is integrated at the bottom of the video. However, you can customize your progress bar style or position according to your needs and your audience’s preferences.
Why Should I Add a Progress Bar to a Video?
A simple loading bar video can be a game changer for those individuals or businesses who regularly upload videos of any format on social platforms, whether it is Instagram, YouTube, or Facebook.
We have prepared a list of reasons why you need to add a progress bar to your video template:
- To drive more video engagement
- To help you build a personal brand
- To show the viewer’s watching progress
For a better understanding, we will closely analyze each one of them:
To Drive More Video Engagement
When you post a video online, you expect conversions. And most of the time, conversions come as engagement metrics: views, likes, comments, or shares.
But how do you drive video engagement? The use of progress bars can help relax and better engage your viewers. This is done by creating a sense of activity and expectancy.
A progress bar on video materials can be seen as a means of open communication and transparency with the viewers. They are informed from the preview by a progress bar that the video they watch right now would take this long. Thus, they can decide if they want to continue watching the material or if they want to save that time and use it to do something else.
As they feel that their time was respected, the viewer will experience an endorphin surge as soon as the progress meter is finished. This way, the audience will feel closer to the brand or video content creator, leading to more engagement in the long run.
How to make sure the progress bar is catchy enough to grab the attention of the viewers? It should be animated as smoothly as possible from left to right. If the animation pauses for an extended period of time, the user may believe that the process has stalled and they will not wait.
To Build a Personal Brand
Branding is an important factor in the development of a business, therefore your content should be easily recognizable.
Thankfully, progress bars can make your business stand out from the crowd. Especially when you are using a unique progress bar template in your video editing process.
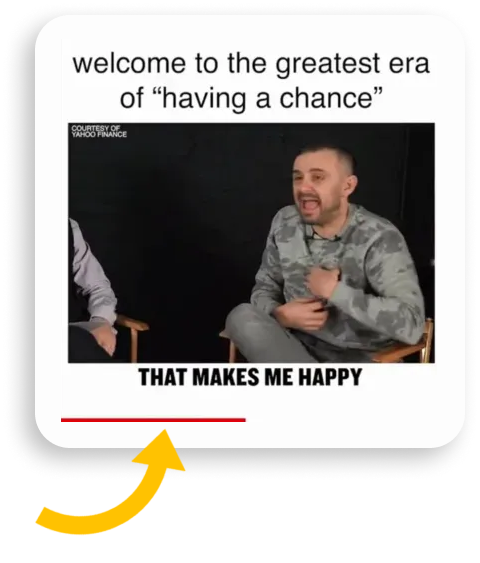
But how does that work in practice? Let’s take a look at Gary Vee, a social media influencer who managed to engage with his audience through his well-edited Instagram videos, which all contain progress bars. That helped him create an established personal brand, with thousands of people googling for “ways to edit videos like Gary Vee”.
To Show the Viewer’s Watching Progress
Let’s say you are watching a video online that lasts more than half an hour, and you feel the need to take a break. A dynamic progress bar animation can help you pick up the video without wondering “where was I?”.
Therefore, when you upload your own materials on social platforms, having a progress bar to video content is vital.
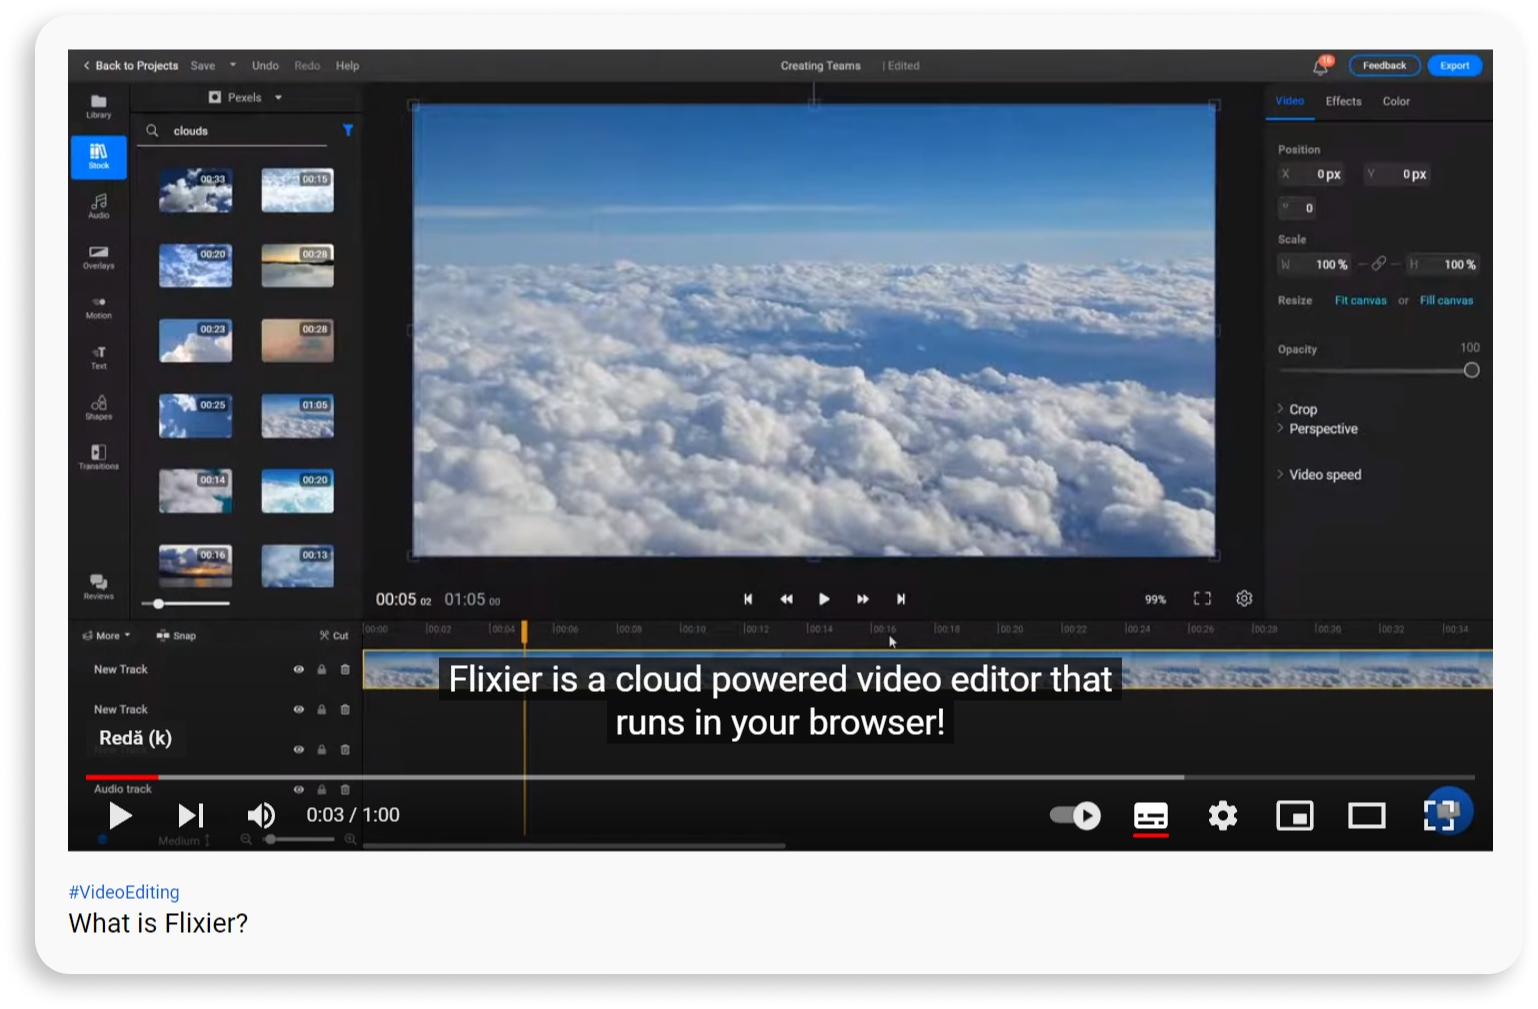
Think about YouTube’s well-known red progress bar. Even if you want to switch from computer to phone or to any other device, you can play your videos right from where you left the last time you watched them with the help of the position of the progress bar.
However, the YouTube progress bar has many other benefits. For example, you can view the most popular video segments on the graph located above the progress bar.
When searching for a video, an eye-catching graph will appear above the red progress indicator. If the graph is high, a lot of people have seen that particular section of the YouTube video.
How Can I Add a Progress Bar with an Online Video Editor?
Hard work always pays off, so it’s time to get practical! Now that you know why and when you should add progress bars to your video, it’s time to focus on how to add a progress bar to a video. And the solution is simple: with the help of the right tools
Most video editors will provide you with the platform to create a progress bar to your video with the help of keyframes, an important feature for video animation.
What is a Keyframe?
Keyframes are anchor points or markers used by video creators to describe how they want their video to look at a certain point in time.
Placing two keyframes several seconds apart creates a keyframe interval, which tells your editing program that you want your clip to transition from one state to another in the period provided.
If you want to learn more about keyframes and how to use them in Flixier, you can check out the video below:
Steps You Need to Follow When You Add Progress Bars with Flixier
If you are looking for the concrete steps you need to follow when you add a progress bar to your videos, we have put together a step-by-step guide to make your Flixier user experience a lot smoother.
Create a new Video Project
Click on Get Started to open Flixier up in a new tab. Then, upload the video that you want to add a progress bar to. How? Simply drag and drop any video material from your laptop to your personal library.

You haven't shot any videos yet? No issue. Get some stock video from the built-in library you have access to and adapt it to your needs.
You might only choose a mock video to edit just to try out your progress bar editing skills.
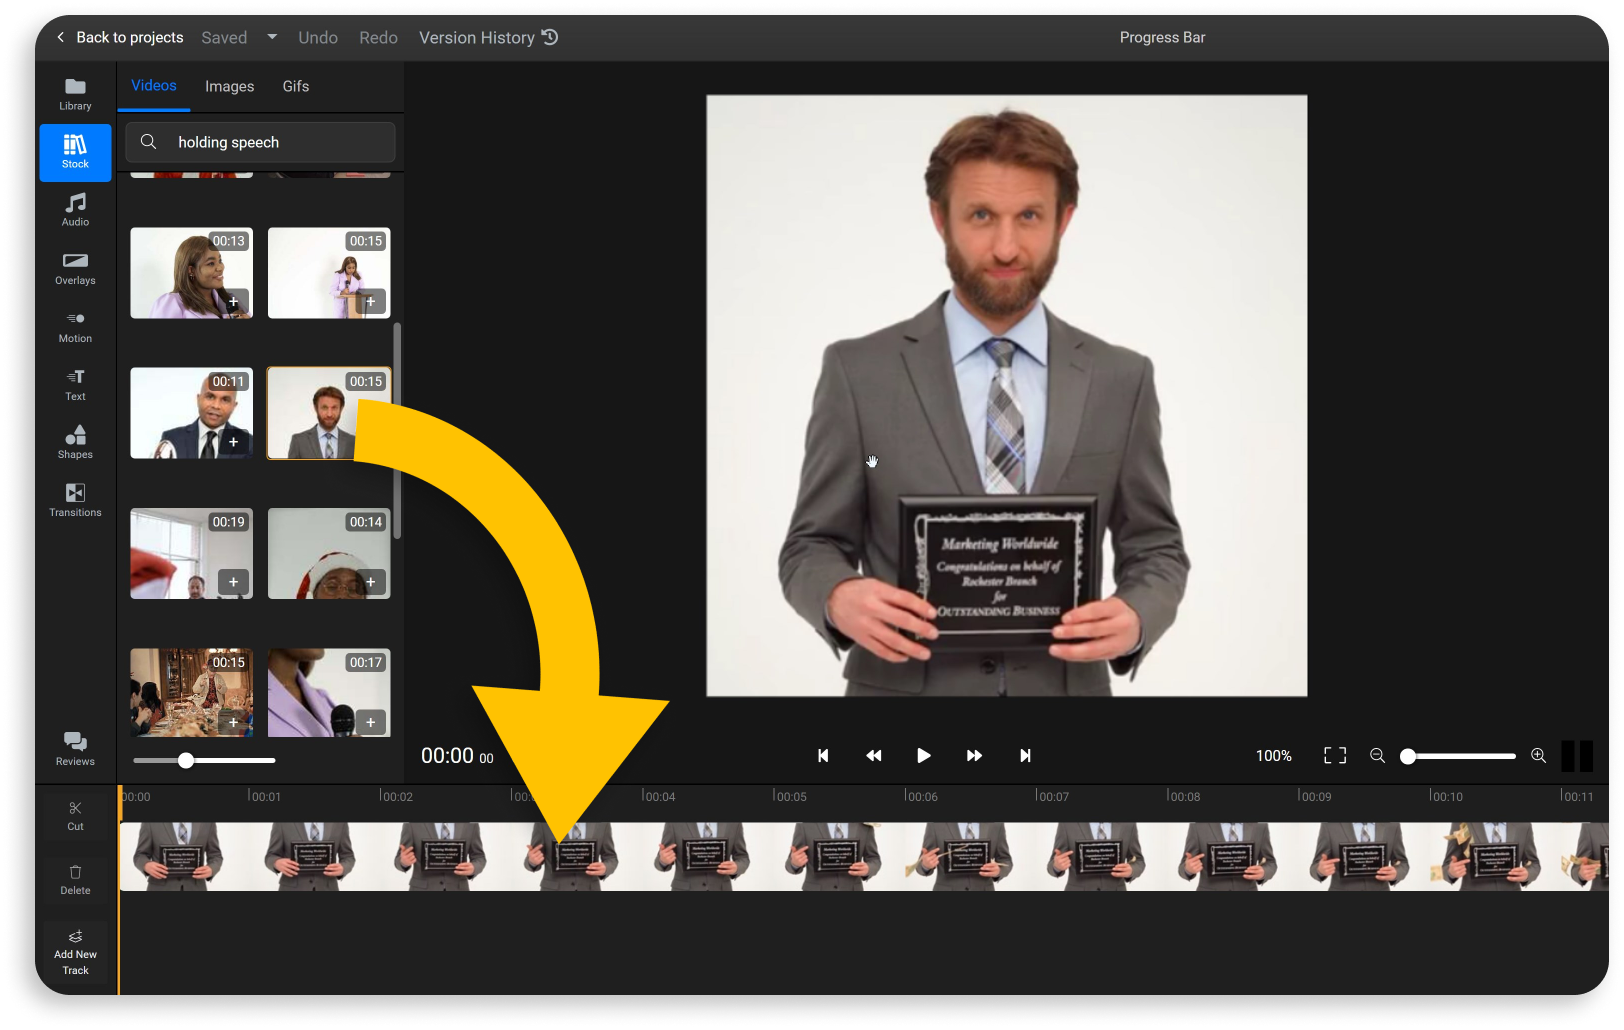
Add a Shape to the Video
You can find all the available shapes on the left side of the screen. We strongly suggest adding a square shape to your video for an easier process of customization.
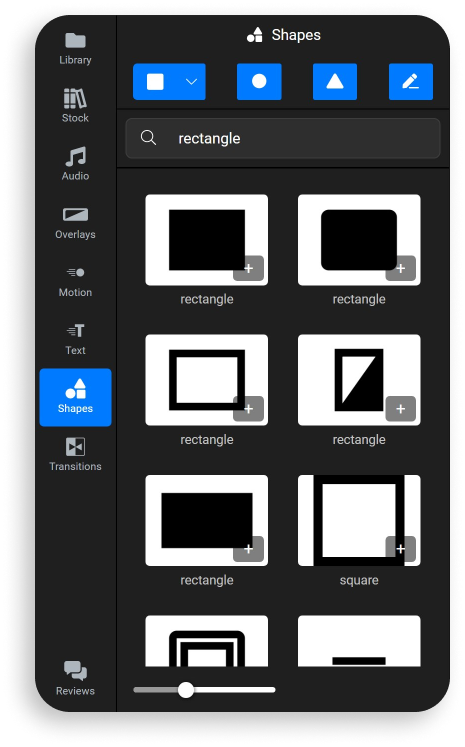
Customize the looks of your progress bar
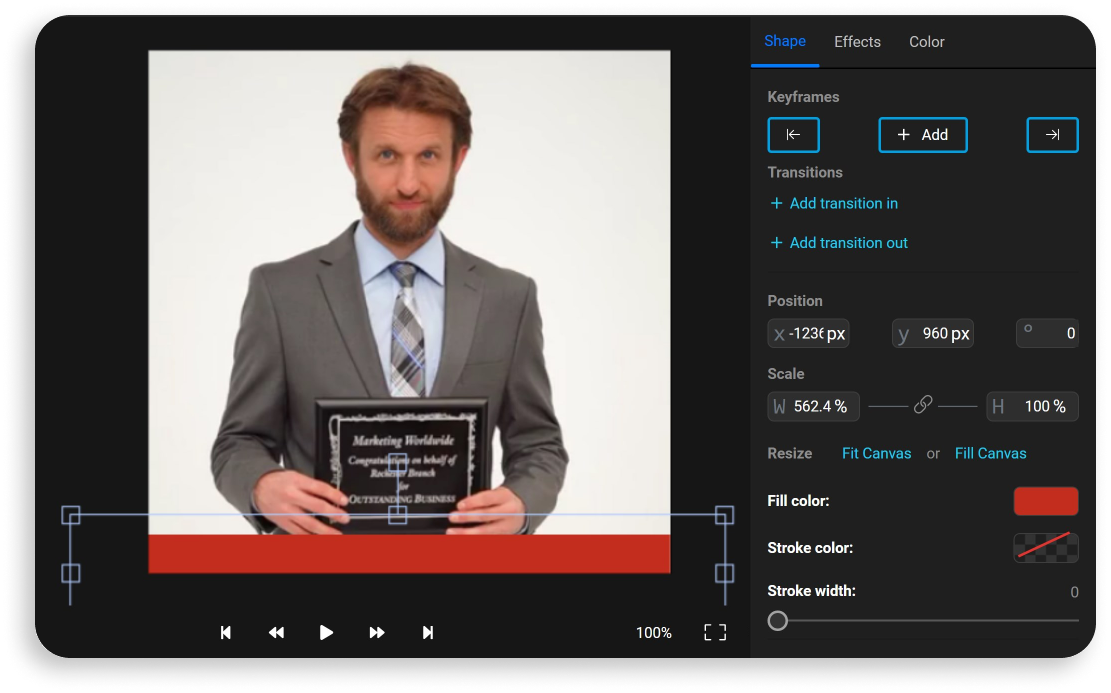
The format of your progress bar plays an important role in the overall quality of the video material. Choose the right color and size and make sure it is suitable for your needs. Make sure your progress bar extends all the way across your video like in the screenshot above.
Tip: You are encouraged to use your brand colors when designing your video progress bar.
Add a Keyframe to the Video
First off, it's very important that you drag on the ends of your rectangle shape in the timeline and extend it to the entire duration of your video. Then, in the right upper corner you will find the rectangle settings. Press on “Add Keyframe” to start animating your bar.
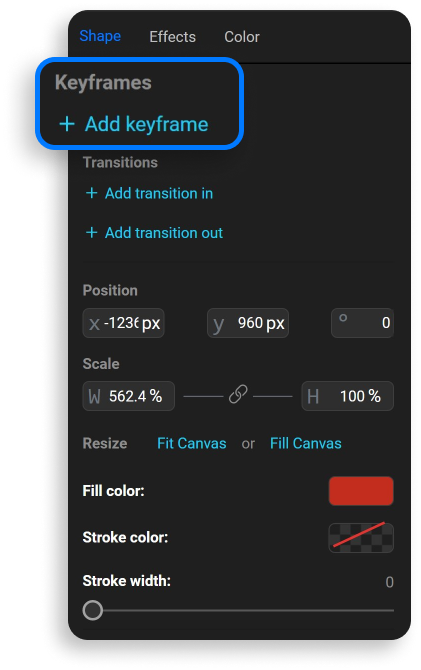
Choose the Beginning and the End of Your Animation
You will notice two keyframes have appeared on your video in the timeline when you clicked the button.
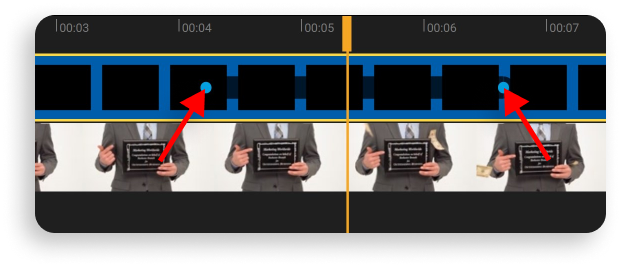
Drag the first keyframe to the very beginning of the video and the second one to the end. Then, select the first keyframe and move your shape to the left until it is just off-screen. If you did it right, you'll see a pop-up letting you know that the keyframe was updated.
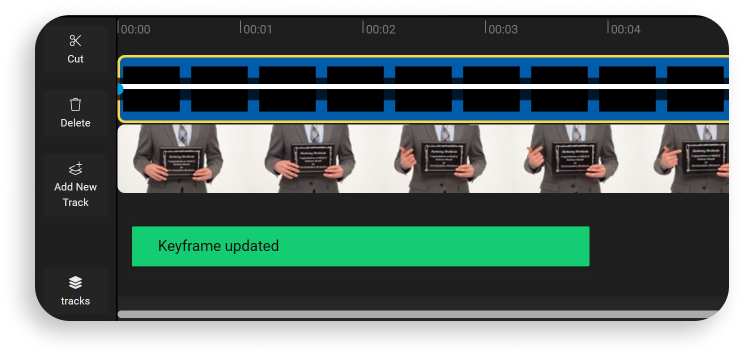
Now, select the send keyframe and drag the progress bar all the way to the right, until it covers the bottom of your video. After the keyframe updates. play your video from the beginning. You'll see that the progress bar now moves along with the clip. Congratulations! You hace created a simple progress bar, from scratch! All you need to do now is save the video and upload it to your social media accounts, whether it’s Instagram, Facebook, or YouTube.
Downloading Your Video
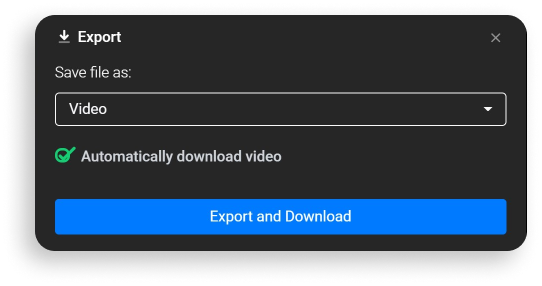
To download your video, click the blue Export and Download button in the top right corner of the screen. Make sure to select the Video format from the drop-down screen and then press Export again. Flixier will take a few seconds to process your video and then it will automatically be saved to your computer.
Add Progress Bars For Video Materials with Flixier!
While this might seem like a lot of information to take in, once you start practicing, you will see how easy it actually is to add a video progress bar with the help of Flixier. Our online video editor aims to make your video editing process a lot smoother, and that goes without saying when you’re trying to add progress bars to your content.
Oftentimes, you need pricey editing software and editing expertise just to get started with progress bars. With Flixier’s software, though, that is no longer the case. What was once impossible, is now merely one click away.
Create and edit videos and show your video’s duration to viewers on all social media platforms! You can also trim, cut or crop videos, all in a couple of minutes without the need to download or install any software.
Try our free tool and make the most out of our video editing features—just upload your video and let’s get started!
Andra is highly curious about the marketing field, but most of her experience lays in the content writing sphere, mainly in relation to social media marketing, social media automation, and video marketing.


