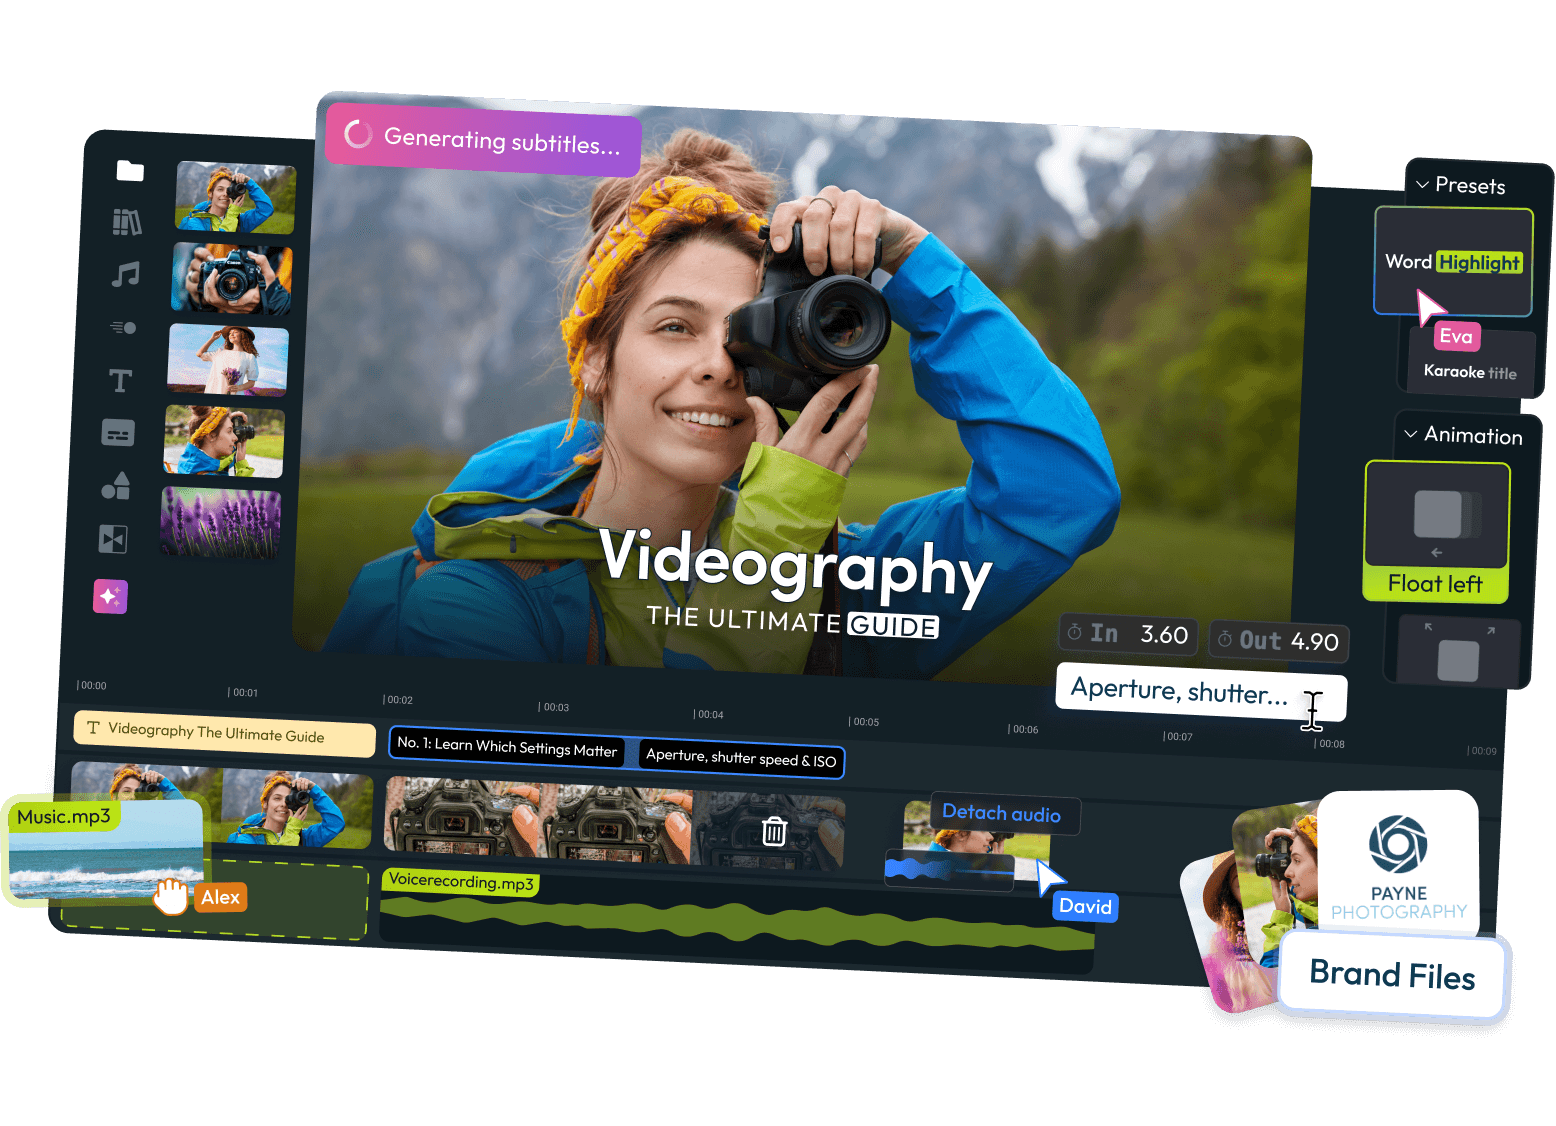
Announcements
Find out about our latest product changes as we continue improving Flixier to enable your team to make amazing videos

Generate complex videos with Eva!
Eva’s ability to generate videos just got upgraded! Tell her your idea for an ad or promo video, and she will
- Generate a complex script based on your prompt
- Break it down into scenes
- Create detailed prompts for each scene and choose the most appropriate model for generating them
- Create an over-arching voiceover if needed
- Arrange all of the generated clips on the timeline for you to polish and refine
Transitions Improvements
The Transitions tab has also been revamped. You can now switch between different tabs for Standard Transitions, AI Transitions, and Word Transitions.
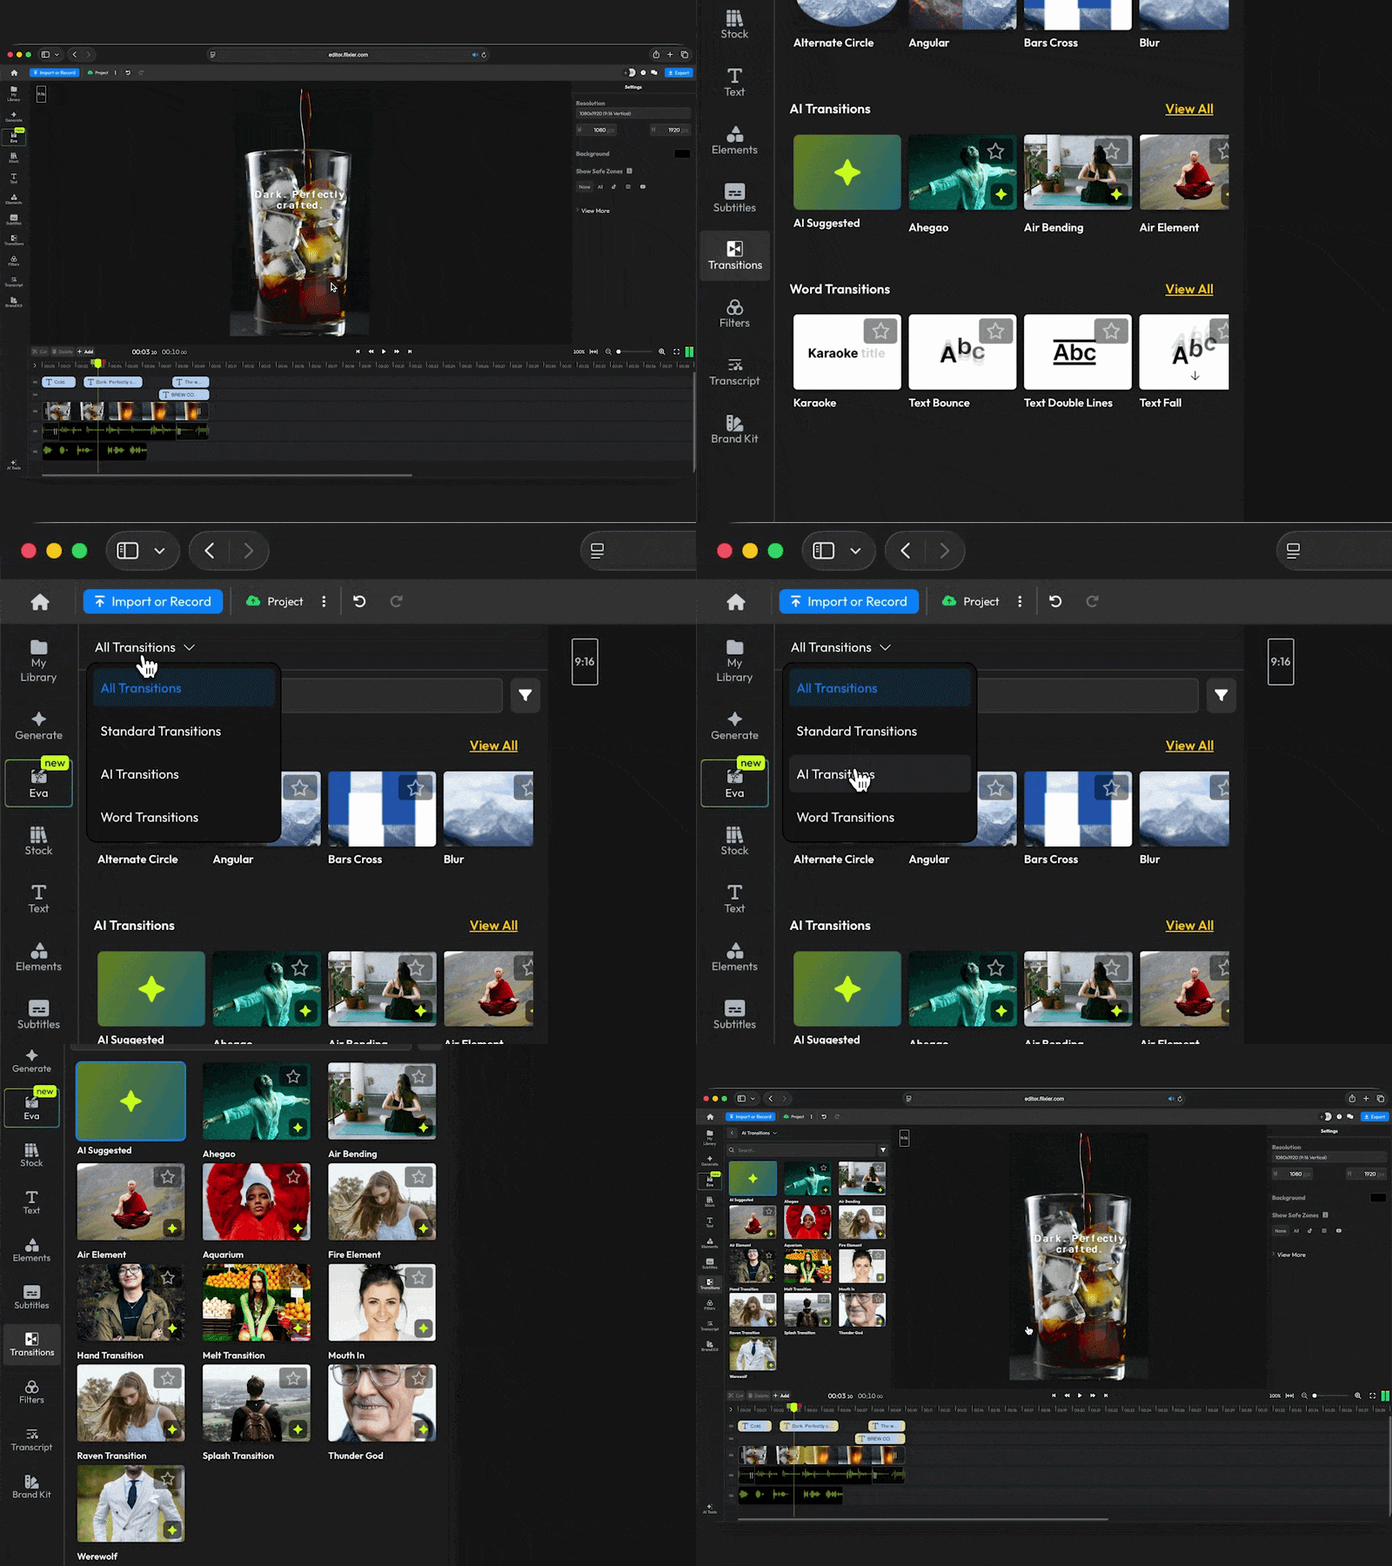
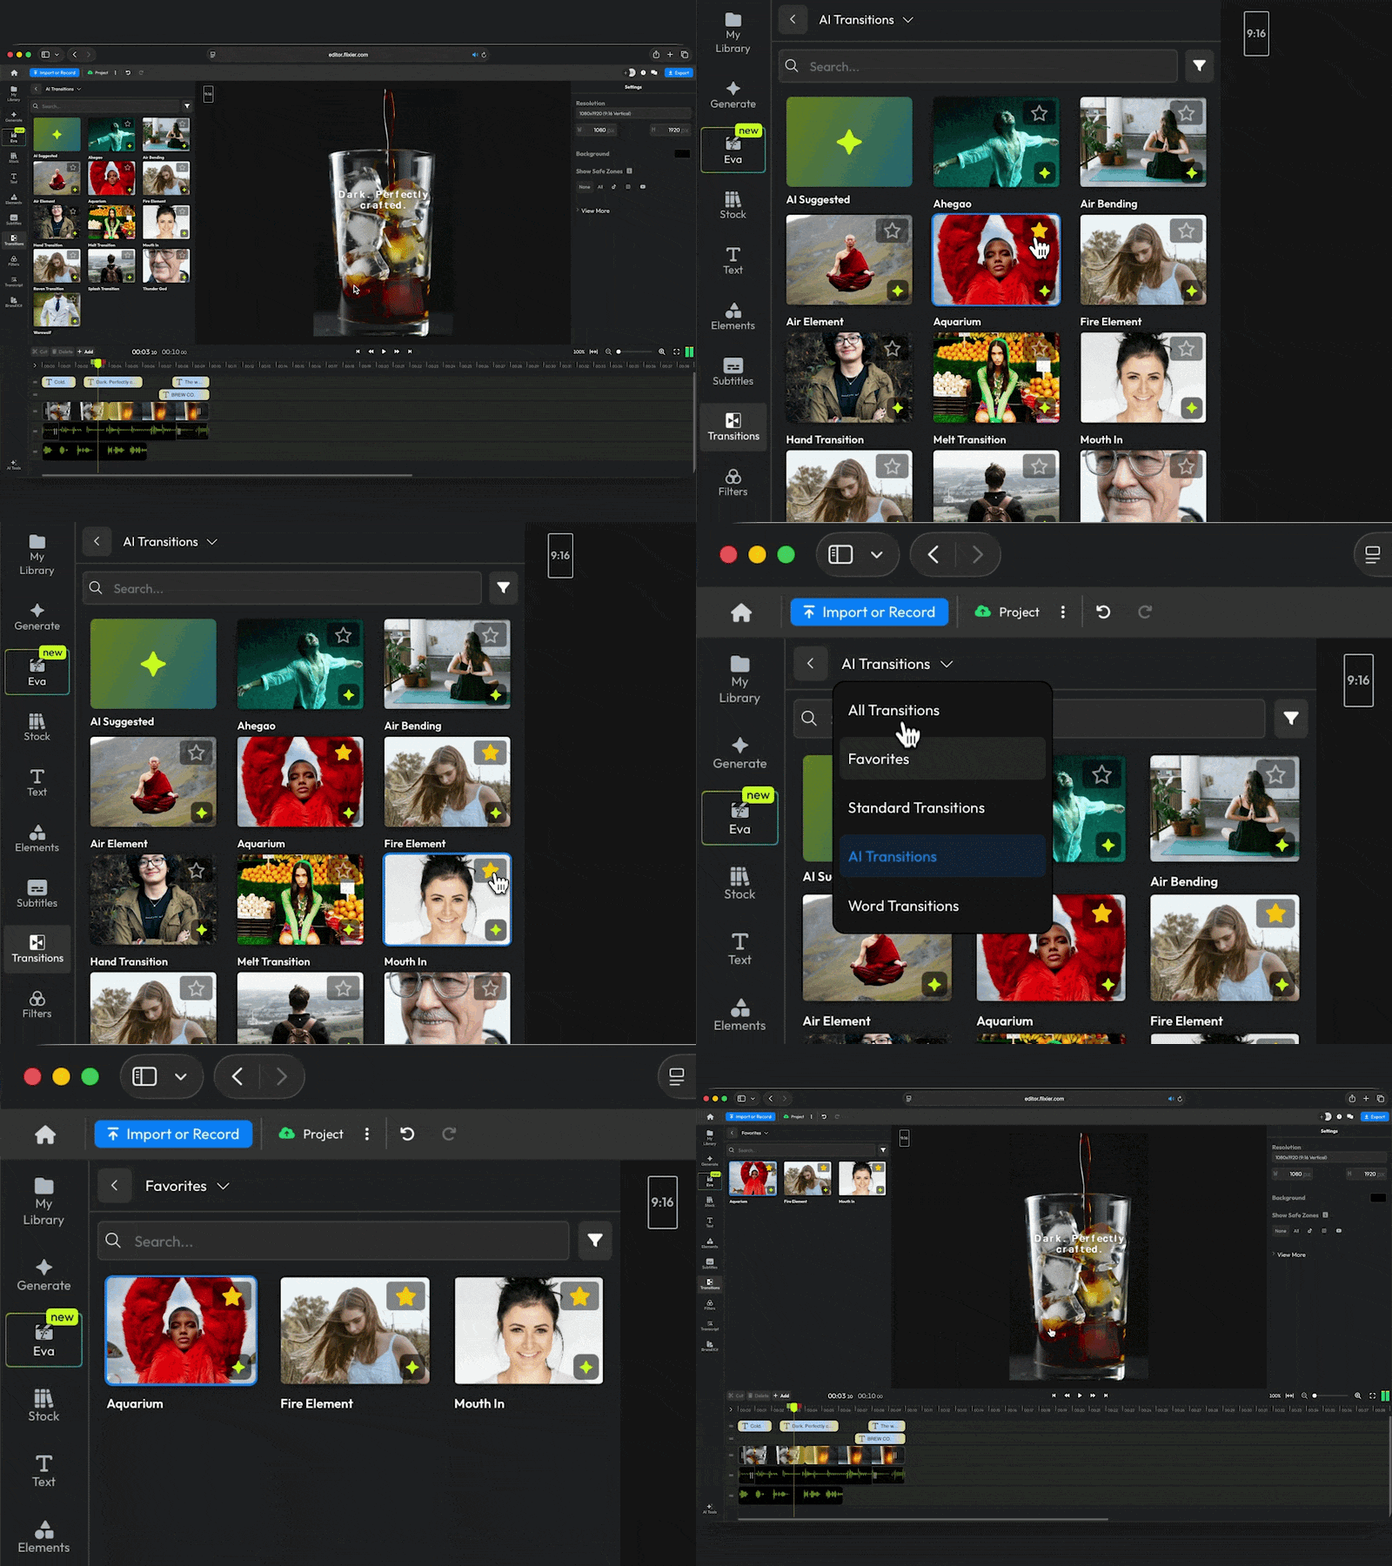
You can also add transitions to favorites and find them easily in the Favorites tab.
New & Improved Audio Enhancer
Our Audio Enhancer just got a massive update with better AI models for noise removal and entirely new features like reverb and breath removal.
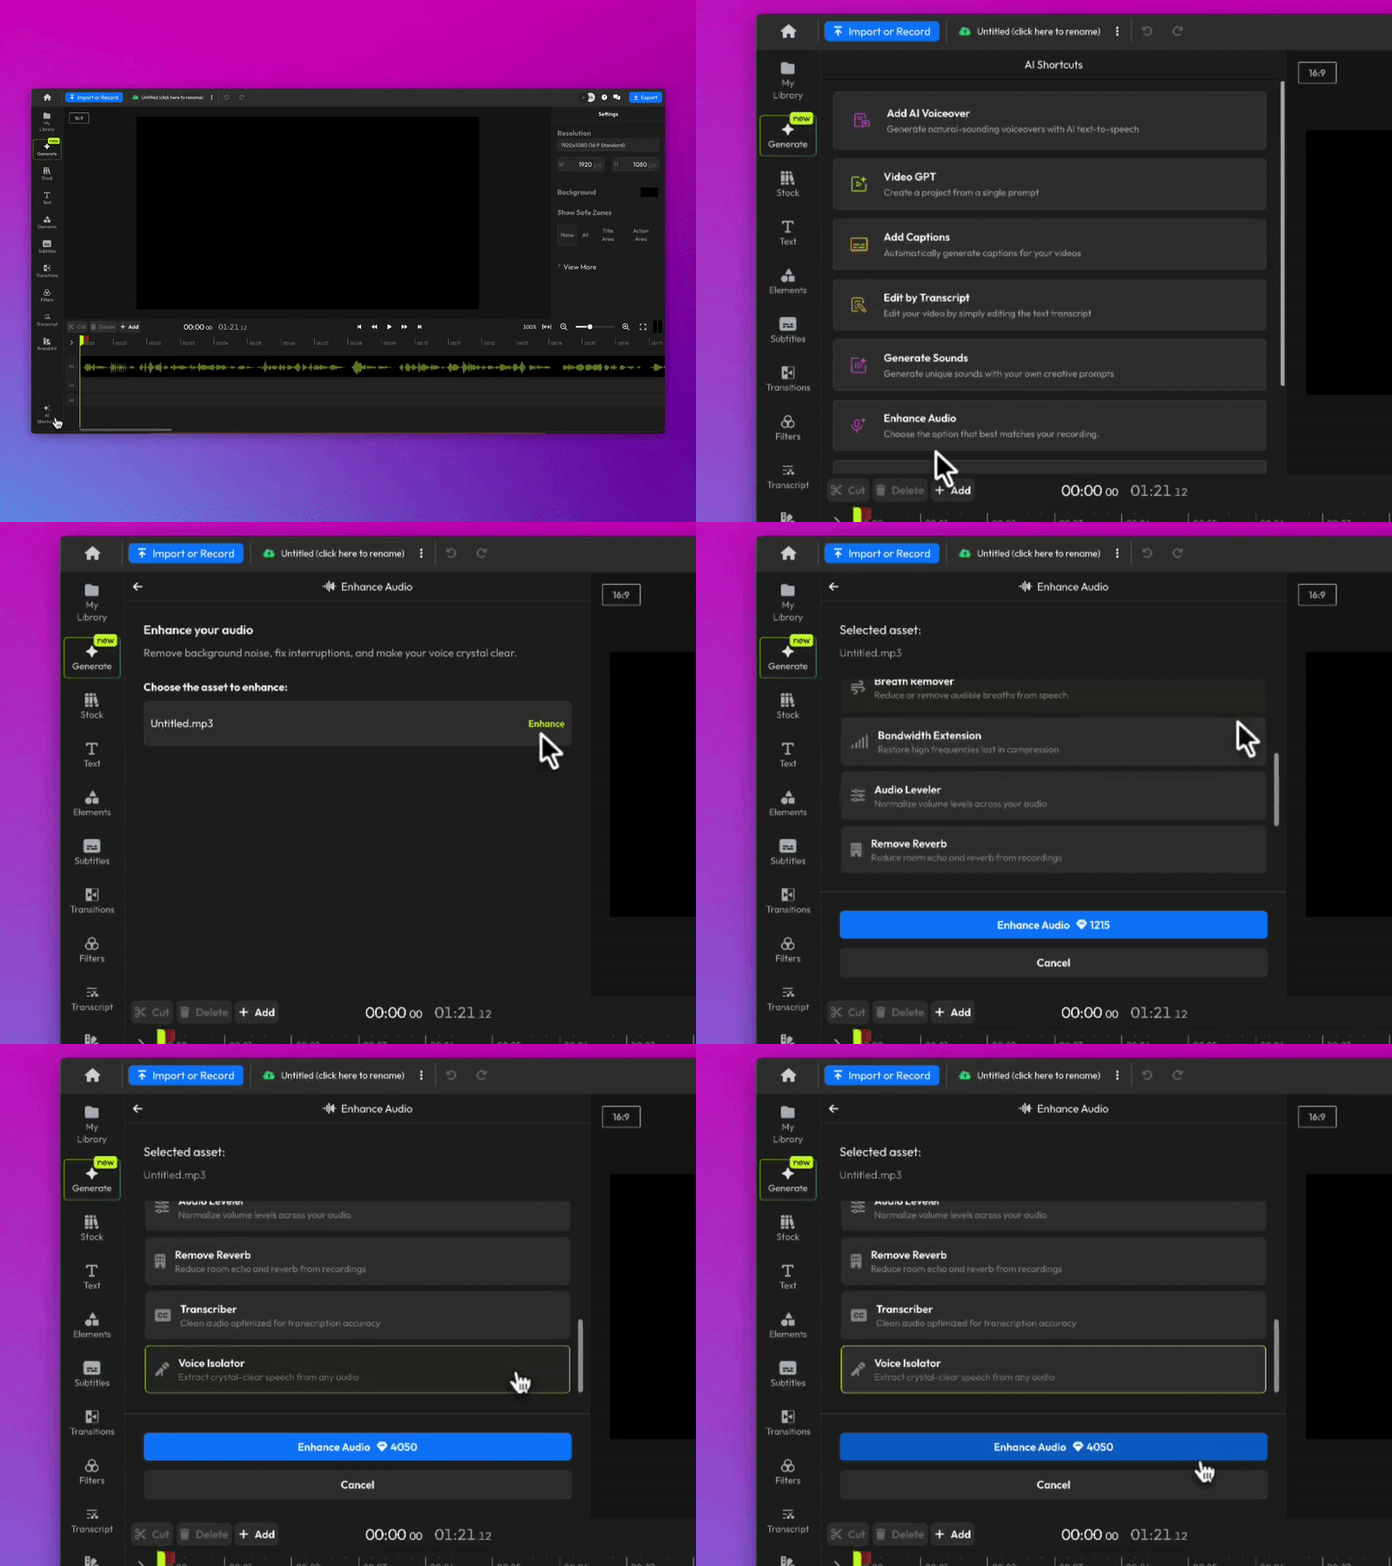
Here’s what’s new:
If you just want to make your audio sound better, the Audio Cleaner option combines noise reduction, audio leveling, and other enhancements into a single, convenient package.
For specialized enhancements, we have:
- Static Noise Removal gets rid of constant noise like fans, AC units, humming, or engine sounds.
- Speech Cleaner is optimized for voiceovers and podcasts.
- Voice Isolator is our supercharged model optimized for extracting crystal-clear voiceovers from recordings with loud ambient noises.
- Remove Reverb is perfect for lecture halls, speeches, and voiceovers recorded in untreated rooms.
- Breath Remover can help you save voiceovers that would otherwise have been ruined by breathing into the microphone.
- Bandwidth Expansion restores high frequencies lost during file compression.
- Audio Level keeps the volume constant. Perfect if you’re dealing with guests constantly moving away from the microphone.
New Audio Enhancer Pricing
The new Audio Enhancer will now consume AI credits depending on the model you use and the duration of the audio you’re trying to enhance.
Huge improvements to cropping, captioning, and brand kit
This latest update brings with it a large number of improvements to cropping, subtitles, and the Brand Kit! Here’s what’s new:
A more intuitive way to crop videos
We wanted to make cropping videos simpler, so we added the Easy Crop button. Select your video on the timeline, click Easy Crop in the right-hand menu, and a brand new crop interface will pop up!
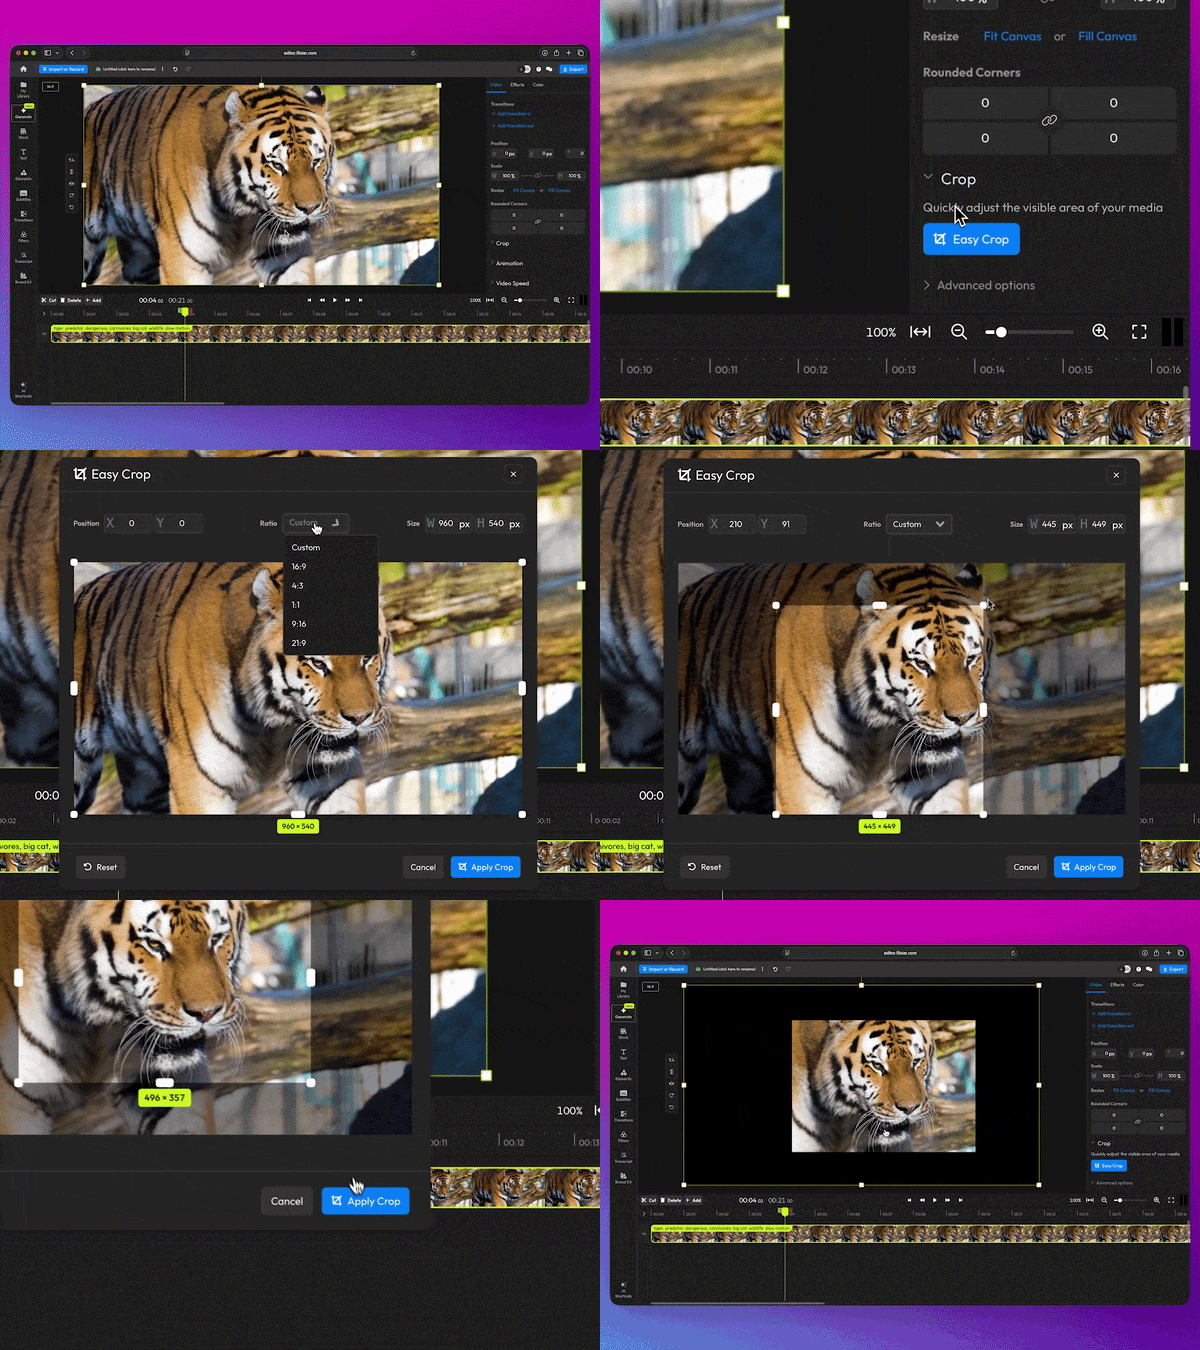
Here, you can crop your video to a custom size by dragging with your mouse, choose a preset Ratio, or enter a custom resolution!
And if you were a fan of the old cropping method, you can rest assured it’s still there; you’ll find it under Advanced Options in the Crop menu.
Save backgrounds to your Brand Kit
You can now add background images to your Brand Kit, then apply them to your videos using the editor!
To apply your backgrounds, open the canvas settings, click on the background color, then go to the Images tab!
Subtitle fixes and improvements
- We fixed a bug that caused text objects, including subtitles, to glitch out after being resized.
- Subtitle style changes apply to every subtitle object linked to your video. That means no more wasting time adjusting the color, size, or animation of each subtitle object individually!
- You can now delete every subtitle object linked to your video in one click. You can find the new Delete button in the top right corner of the Subtitle Timings menu.

Subtitle Fixes & Improvements
We’re always working hard to squash bugs and improve existing features. This week, we focused on subtitles.
What’s been fixed:
- Fixed a bug that didn’t allow subtitle segments to be resized after splitting.
- Fixed a bug that prevented users from editing uploaded subtitles.
- Fixed a bug that caused duplicate subtitles to appear when detaching audio from a video track.
What’s new:
- Subtitles can now be detached from video tracks (right-click the video in the timeline and choose Detach subtitle)
- You can now add line breaks in subtitles.
- Improved timeline performance. Zooming in and scrubbing the timeline remains smooth even with multiple overlapping subtitle tracks.
- Added a back button to the Subtitle Timings menu so you can easily go back to the main subtitle interface to generate or upload more subtitles.
New Subtitle Improvements - Linked Objects for Perfect Sync
While making cuts and changes to your video, the generated subtitles needed the same adjustments to bring them in sync. The same manual adjustments had to be made when adjusting video speed or using features such as Auto Rough Cut, Remove Silence, and other AI-driven editing tools.
To address this, we are introducing a significant upgrade: Linked Objects for Subtitles.
When subtitles are generated from a video, they are now automatically linked to it. Any change applied to the video cuts, trims, speed adjustments, or other structural edits is instantly reflected in the subtitle track. No drift. No manual retiming. Subtitles remain perfectly synchronized, regardless of how the video evolves.
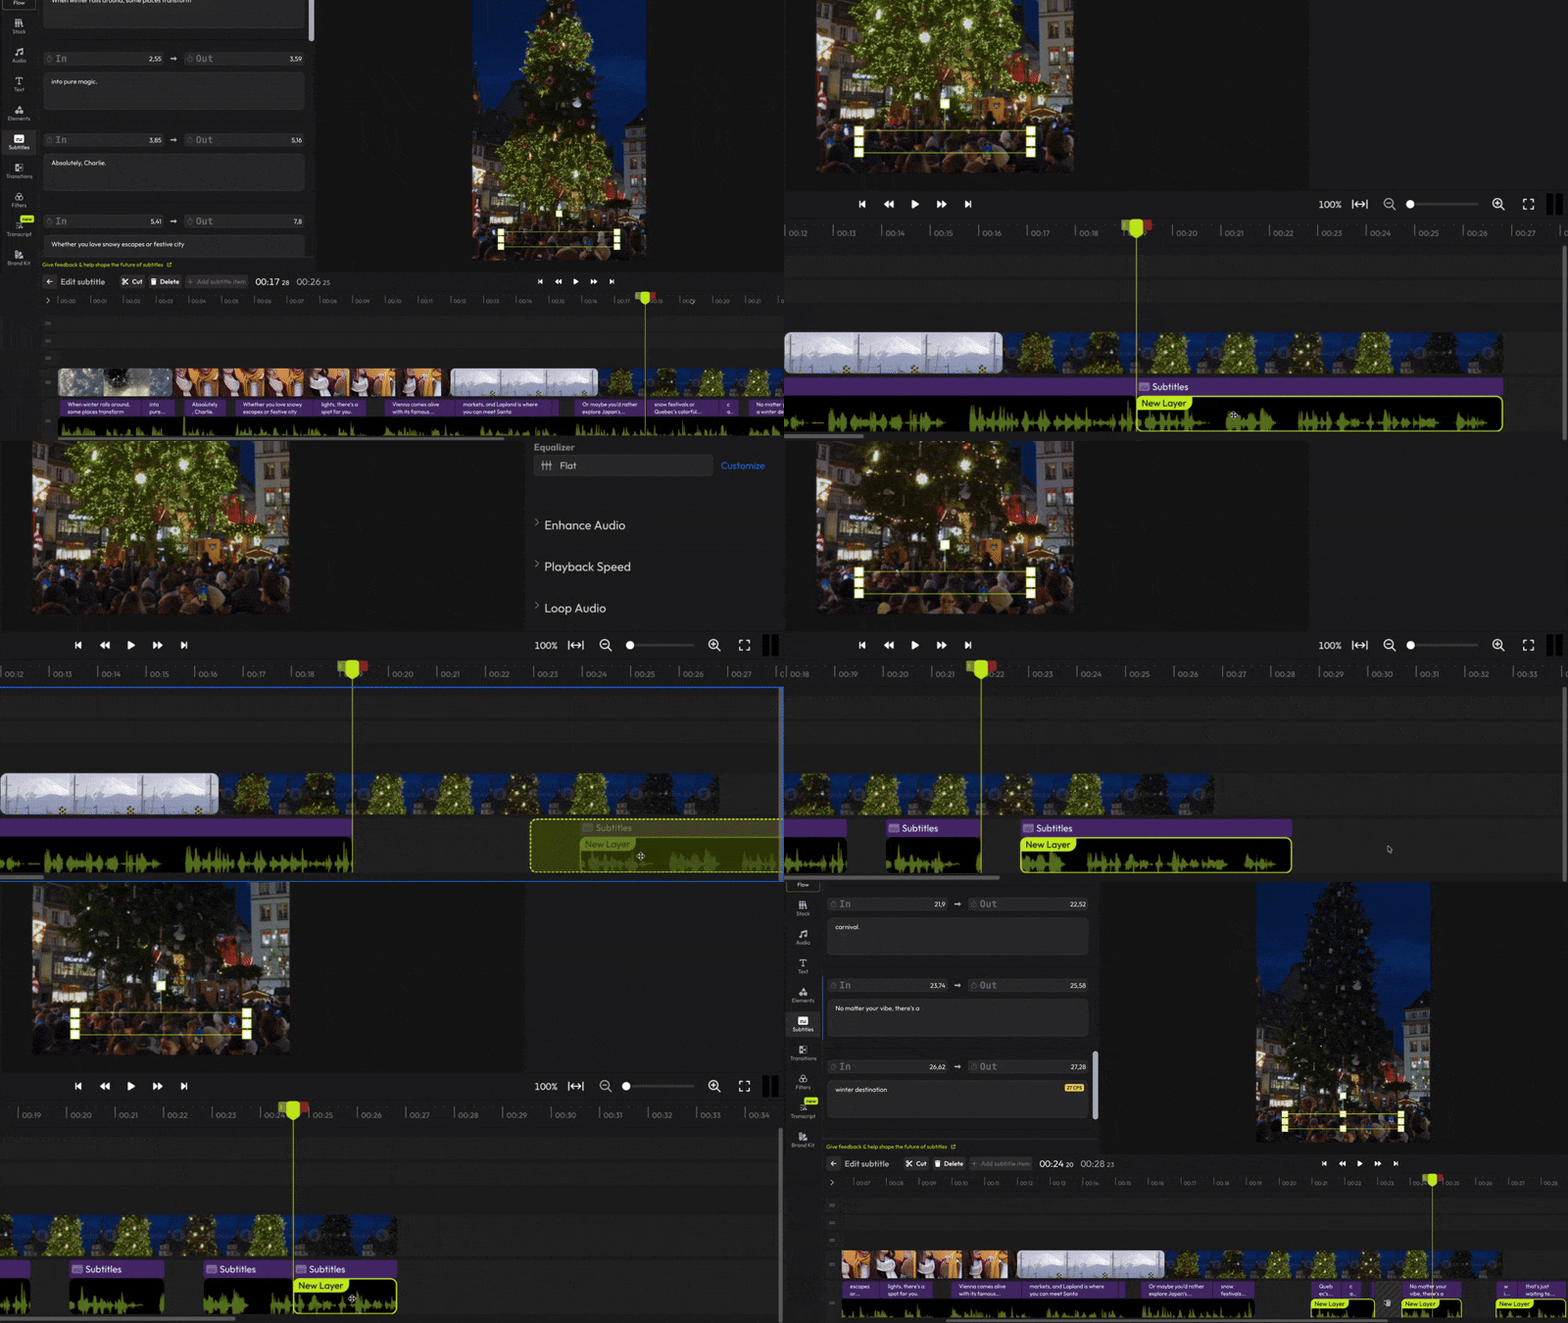
Improved Subtitle Editing in the Subtitles Tab
Previously, subtitles could only be edited by selecting individual subtitle objects directly on the timeline. The Subtitles tab did not provide access to all subtitles across the project.
With this update, the Subtitles tab now lists all subtitles in the project in a single, centralized view. Subtitles can be reviewed and edited directly from this panel, without selecting each subtitle object on the timeline.
This change simplifies subtitle management, reduces manual navigation, and improves efficiency when working with projects containing multiple subtitle segments.
Timeline Changes
The timeline has gotten a makeover this week!
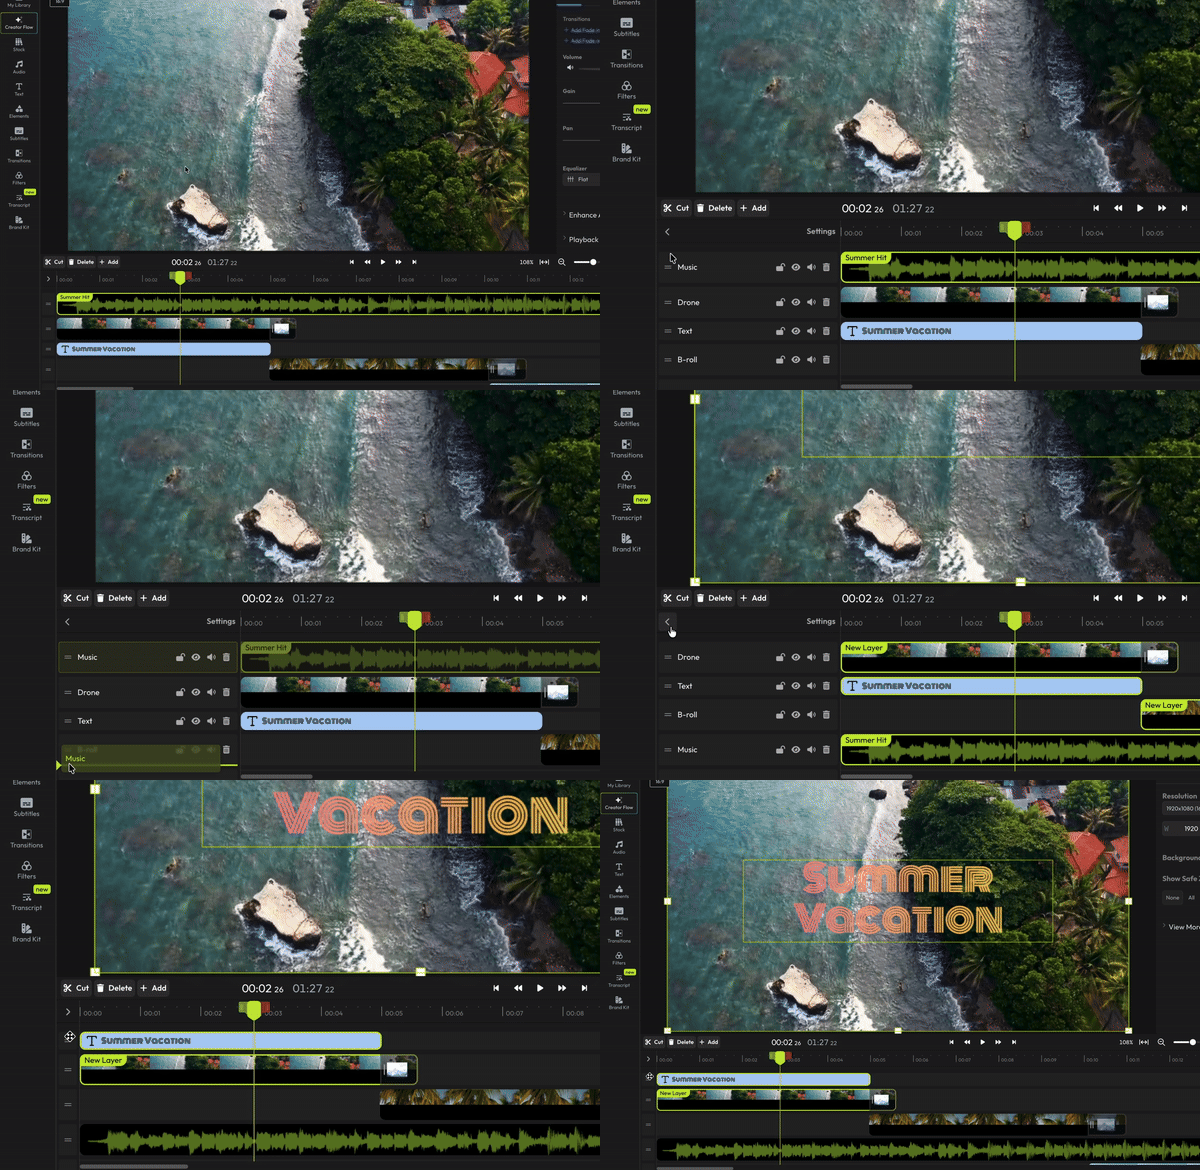
The Cut and Delete buttons have moved from the left of the timeline to under the canvas. This was done to make the Left-side menu easier to render on shorter monitors.

Additionally, we’ve added new handles to the tracks to make it easier to move them at all times, without opening the Timeline Settings menu.
🐜 🚫 Fixes:
- Fixed a bug that could break the track names if the user didn’t press Enter after renaming a track.
AI Rough Cut Improvements
We’ve been working hard to improve the AI Rough Cuts feature over the past couple of weeks, and now it's finally out of Beta!
Here’s all you need to know about it:
After opening the Transcript editor and creating your transcript, click the AI Actions button and choose Auto Rough Cut.
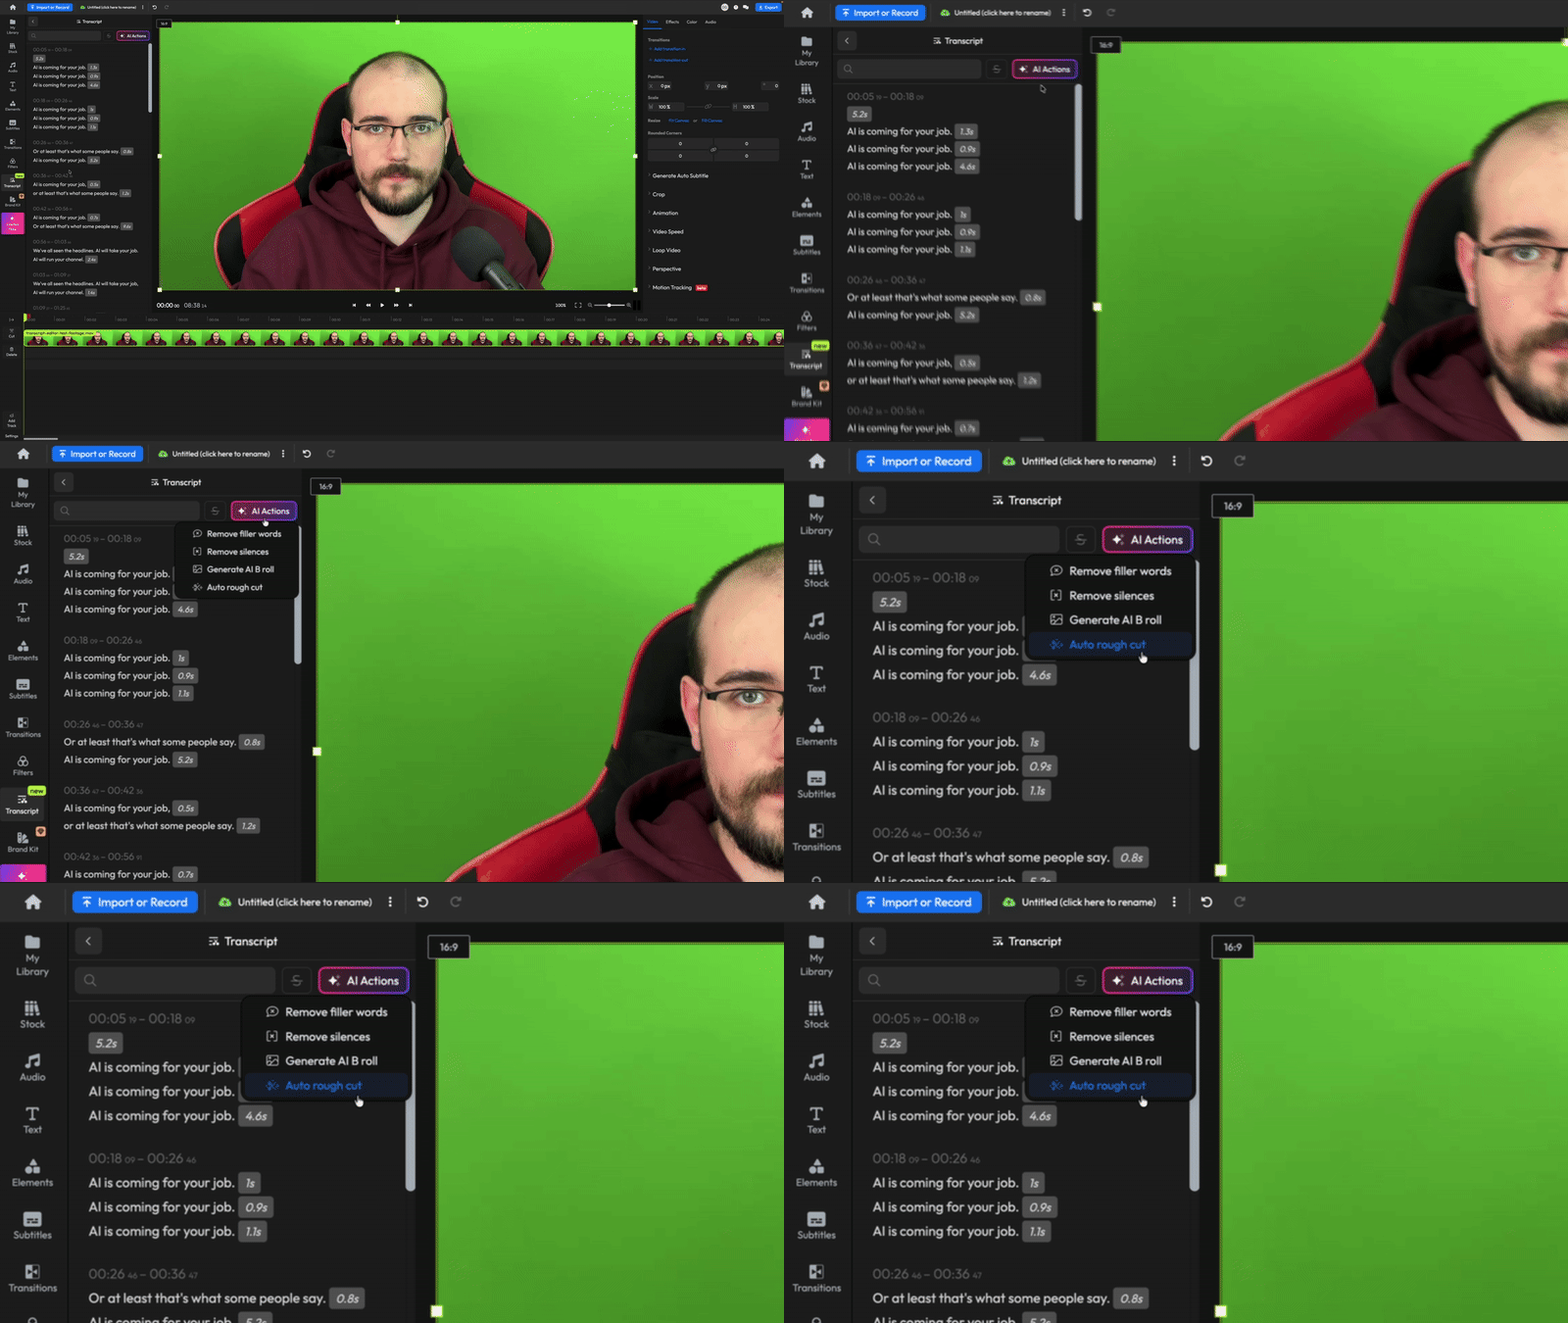
Use the slider to determine how heavy you want the edits to be. The Low setting will only cut out obvious mistakes, while Heavy will really get into detail and try to get rid of all the fluff for a tight cut.
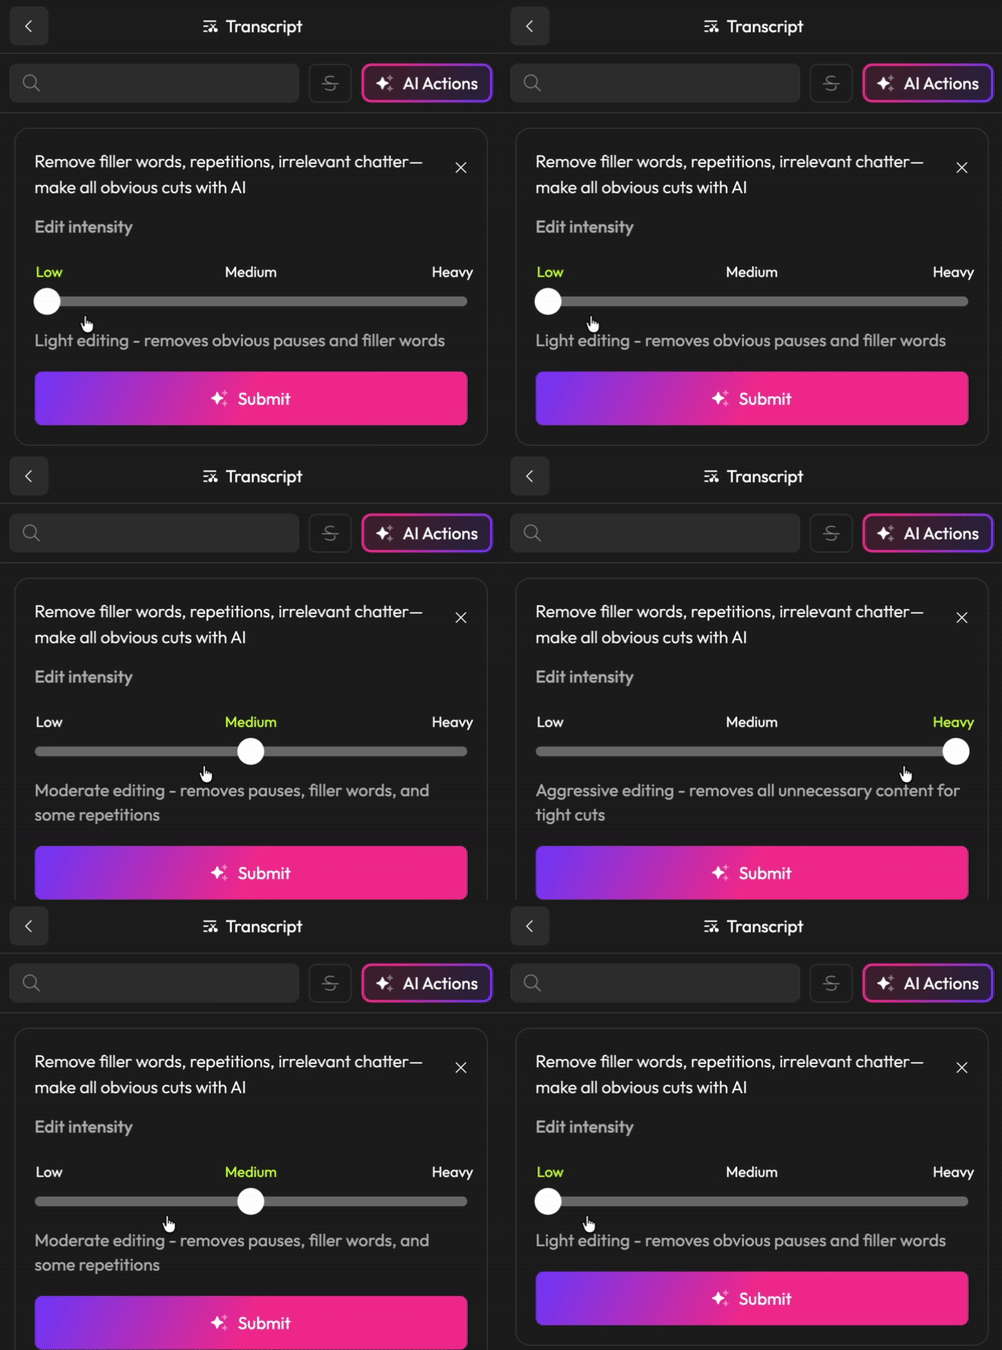
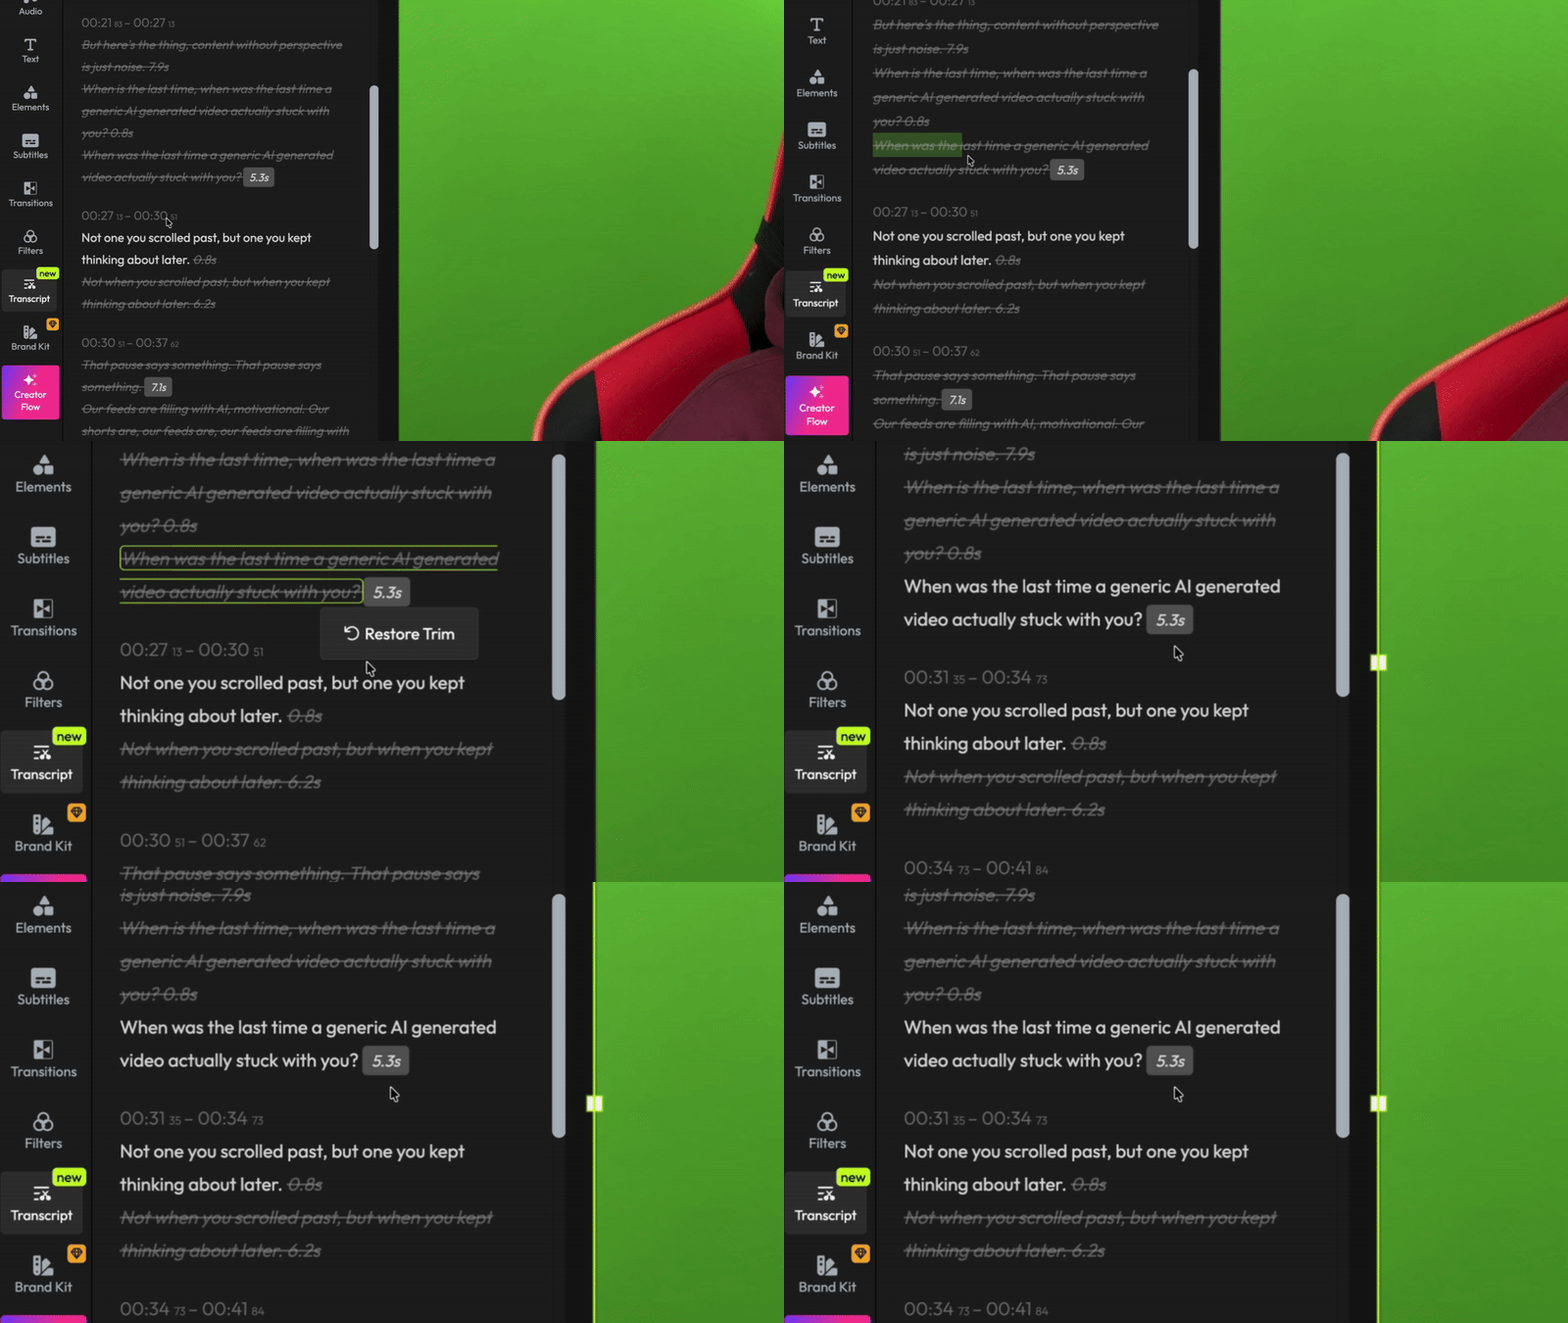
After you hit submit, Flixier AI will process your script and then suggest changes. You can accept them all at once, or review each change individually to make sure the AI got it right.

And if you ever want to go back on a decision, don’t worry. You can easily restore any cuts by selecting the deleted text and choosing “Restore Trim”.
The new export menu is here!
We’re happy to announce that our export menu has gotten a well-deserved makeover, making it more consistent and more intuitive than ever.
The menu now pops up on the right whenever you click the Export button. The three available formats are all listed right at the top, alongside any format-specific options such as GIF framerate.

There’s a checkmark allowing you to choose whether you want your video to be downloaded as soon as the export is finished.

The lower side contains a list of all the platforms to which you can export your video. Clicking on one will prompt you to link your accounts or fill in any specific information required to publish videos on the platform.

The Export tab of the Dashboard has also been upgraded. Clicking on a video here will now open the Publish menu, which displays a quick preview of your video alongside basic information like file size, duration, and resolution on the left side. The right side gives you the option to download the video to your computer and gives you a full list of platforms to publish your video to.

Transitions just got a big update:
We’re excited to announce a big update to our transitions library!
NEW ↔️ In-between transitions ↔️
You can now add in-between transitions between two clips or images easily to blend scenes together seamlessly without fading to black. Just drag the transition between two clips on the timeline:

NEW🎨 Change transition color 🎨
Some transitions are now customizable! Change the color and transparency of your transition from the menu on the right side:

NEW✨ New transitions ✨
You now have a wider variety of transitions to use in your Flixier projects. Browse through them easily and pick from dozens of options, including new glitch effects, wipes, and more!
IMPROVEMENT 66 new languages available in the translator
The following languages are now available when translating subtitles: Afrikaans, Akhan, Amharic, Assamese, Aymara, Belarusian, Bhojpuri, Bambara, Basque, Cebuano, Corsican, Dhivehi, Dogri, Esperanto, Ewe, Filipino, Frisian, Galician, Guarani, Hawaiian, Hmong, Igbo, Ilocano, Javanese, Khmer, Kinyarwanda, Konkani, Krio, Kurdish, Kurdish (Sorani), Kyrgyz, Lao, Latin, Luxembourgish, Luganda, Lingala, Maithili, Malagasy, Maori, Meiteilon (Manipuri), Mizo, Myanmar (Burmese), Nepali, Nyanja (Chichewa), Odia (Oriya), Oromo, Quechua, Sanskrit, Scots Gaelic, Sepedi, Sesotho, Shona, Sindhi, Samoan, Sundanese, Tajik, Tatar, Tigrinya, Tsonga, Turkmen, Uyghur, Xhosa, Yiddish, Zoroba, Zulu, Chinese (Simplified)
We hope these new features make your experience with Flixier more enjoyable. As always, we welcome your feedback, so please don’t hesitate to reach out if you have any questions or comments!
Happy editing!
The Flixier Team
Add More Character to Your Videos with Motion Elements
NEW 🌟Motion Elements🌟
We’re thrilled to announce that we just added a brand-new library of motion elements packed with over 300 000 new animated objects you can use to bring your videos to life!

Using the search bar, you’ll find emojis, countdown timers, stickers, loading bars, and pretty much any other type of icon or graphic you can think of.
Why you’ll love it:
- Boost engagement: Keep people watching with visually captivating, colorful animations and icons.
- Unleash your creativity: With more than 300,000 elements to choose from, you can always find an eye-catching graphic to help you illustrate your point.
- Increase Production Quality: Add a professional touch to your videos with smooth, high-quality animations that you can resize and customize as you wish.
How to use the new animation library
- Open the Motion menu and go to the Elements tab.

2 . Explore the new animations or search for a specific keyword.

You can also browse by categories such as:
- Emojis
- Loading animations
- People
- Badges
- Logos
- …and more!
3. Drag the animation over to the canvas to add it to your video!

You can also customize the colors in most animations using the Object Inspector menu on the right side of the screen:

We can’t wait to see what you’ll create with these new animated objects at your disposal!