Five Ways to Make Your Videos Scarier This Halloween
Updated on July 26, 2023
October has finally arrived and Halloween is creeping around the corner! Pumpkin decorations are starting to go up and the internet is slowly being taken over by “spooky” memes, horror movie discussions and hashtags such as #spooktober.
As an advertiser or video content creator, it’s only natural for you to want to join in on the fun and take advantage of this fun seasonal trend in order to grow your business or audience.
Injecting a little spookiness into your content is the most obvious way to go about it, but if you’re used to making clean, professional videos, scaring people might not necessarily come naturally for you.
If that’s the case, don’t worry! We’re going to give you 5 tips to help you make your videos a little scarier and give them that Halloween flavor!
1. Use Ominous Music
Using creepy, ominous music is probably the easiest and most effective way to add a nice Halloween touch to your videos.
A specialty of legendary horror directors such as Alfred Hitchcock, the idea of using music to create suspense and terror has been around for as long as horror movies themselves.
It’s also incredibly popular on the internet, with YouTube channels such as Nexpo or Blameitonjorge constantly employing it in their videos to great effect and getting hundreds of thousands of views.
The nice thing about it is that it’s very easy to make any subject seem a little unsettling if you use the right music. It’s also something that will definitely keep your audience a little on edge without being scary enough to deter people who aren’t Halloween fans from watching your content.
Another great advantage of using unsettling music is that it’s a really easy thing to do: just go to one of the many royalty-free music websites or access Flixier’s free music library, pick your favorite track and add it to the background of your Halloween video!
2. Add Glitching Effects
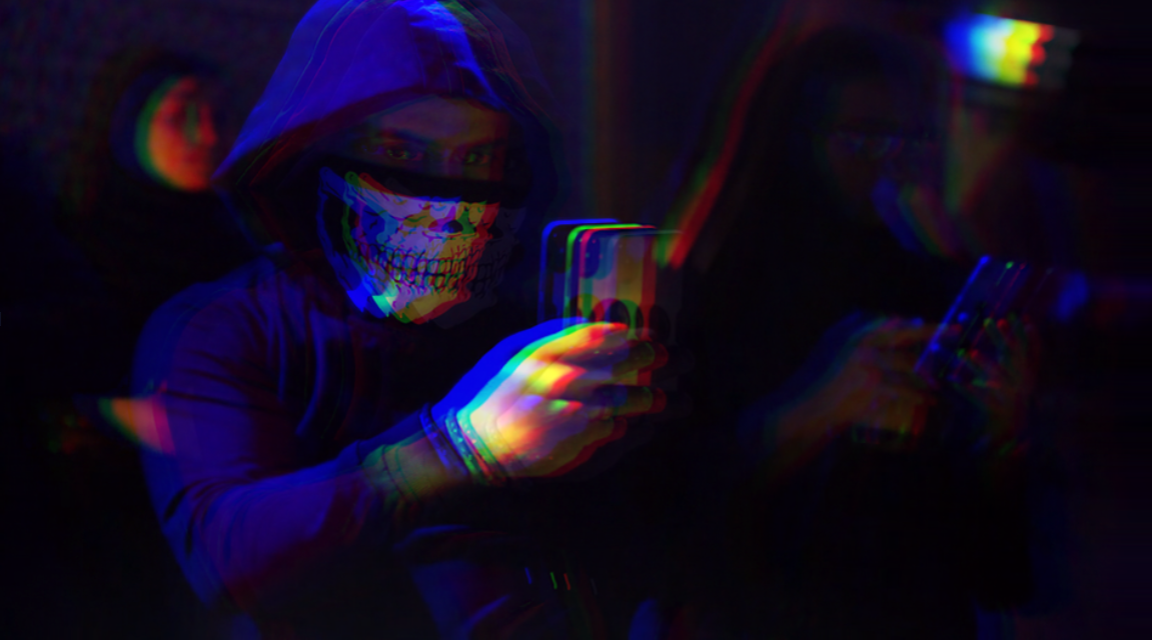
As we advance into the digital era, the Glitch effect (also known as Chromatic Aberration) is becoming more and more popular across all visual media.
While there are many artists who use glitching to create beautiful works of art, we’re going to focus on using it to give our audience a little jolt. With people spending more and more time inside consuming digital media, it’s only natural that seeing it glitch out is going to be a little startling.
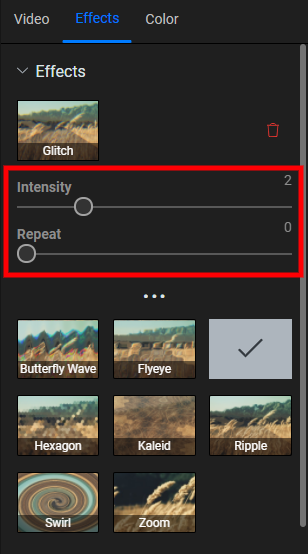
In Flixier, adding a Glitch effect to a clip or image is easy. All you need to do is select the desired object, go to the Effects tab of the Object Inspector menu on the right side of the screen and select “Glitch”.
You can play with the Intensity and Repeat slider to select how intense you want the effect to be and how many repeats you want it to have. We recommend setting the two sliders to low values, since overdoing it is probably going to disorient your viewers.
You should also be careful not to overuse the effect! It works extremely well when used for a split-second during an intro in order to set the mood, but constantly applying it throughout your video is very likely to annoy people and drive them away, which will result in lower Audience Retention.
You can watch a video tutorial containing step-by-step instructions on how to add a Glitch effect below:
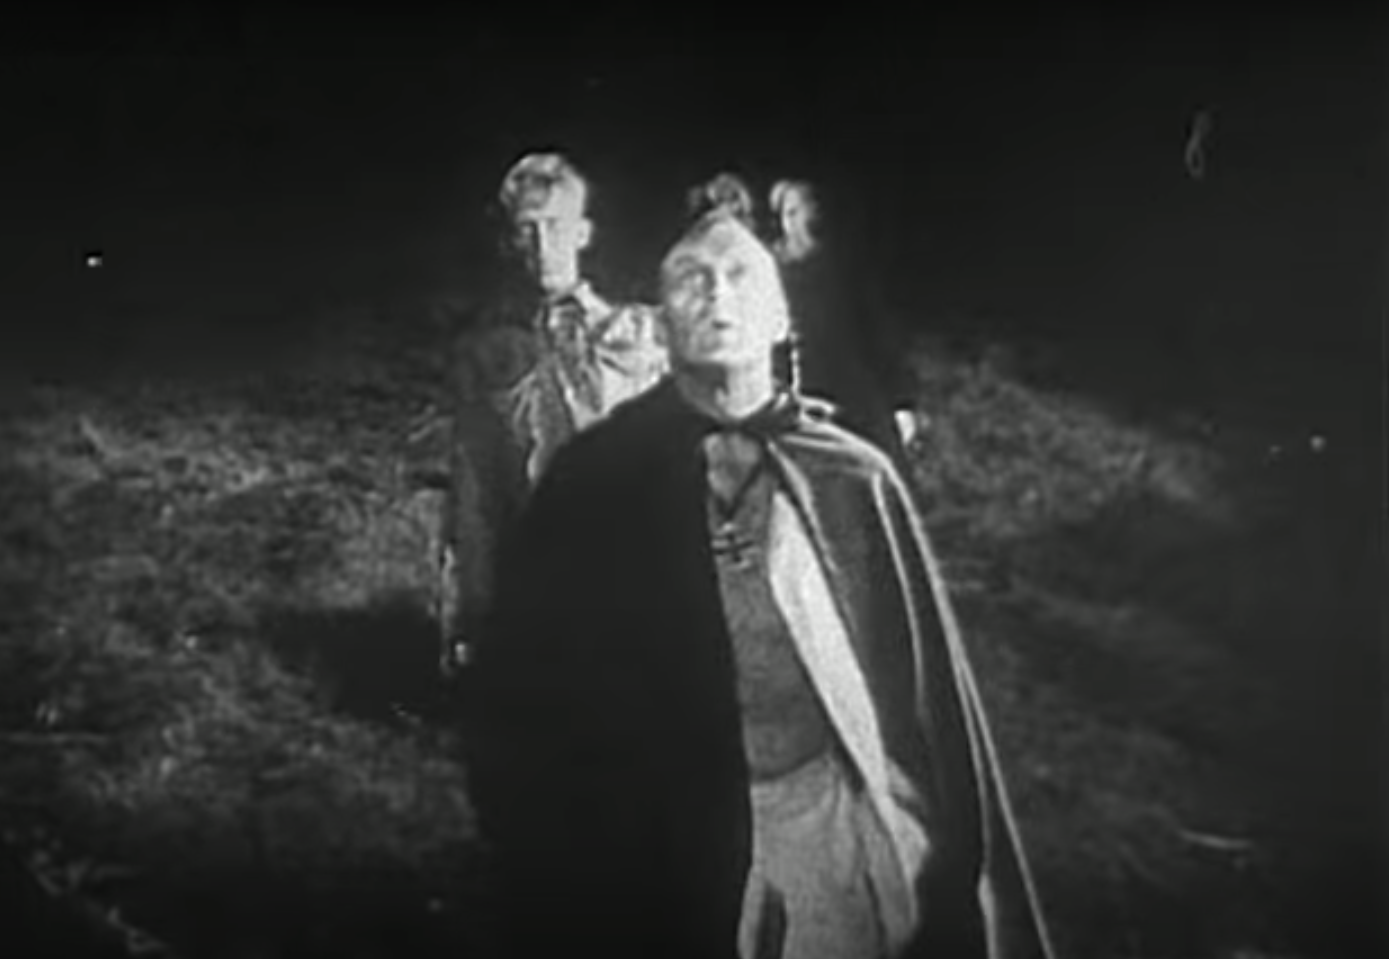
While not as straight-forward as the glitch effect we talked about earlier, making your footage look older is still really easy to do if you’re using Flixier!
Just select your video, go to the Effects tab and apply either a Sepia, Black and White or Grayscale effect. Grayscale is more subtle and allows for more clarity, but Black and White works better for a very lo-fi, “cursed” look.
Next, you’ll want to go to the Effects tab and use the sliders in the Advanced section to add a little Vignette effect. This will make the corners of the video darker, contributing to the old-timey aesthetic and giving it a nice surreal look.
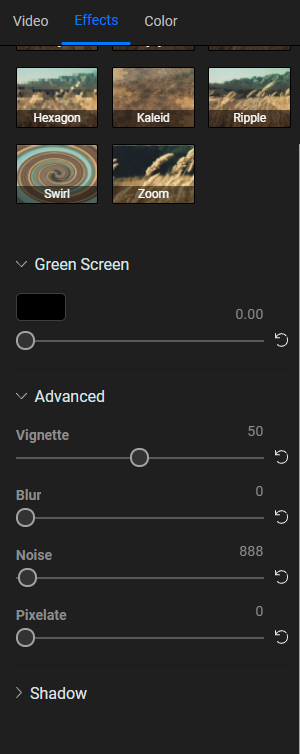
The Noise slider available here is also important. Turn it up just a little bit to create the illusion of film grain.
Voila! Your footage should now look like found footage from the 1950s. Perfect for the Halloween season!
5. Make your video look like CCTV footage
Since most security cam footage only gets looked at when something bad happens, most people’s brains automatically associate that grainy, pixelated look with the idea that something shady or disturbing is about to go down.
The close association with news reports also makes the clips seem so much more gritty and realistic!
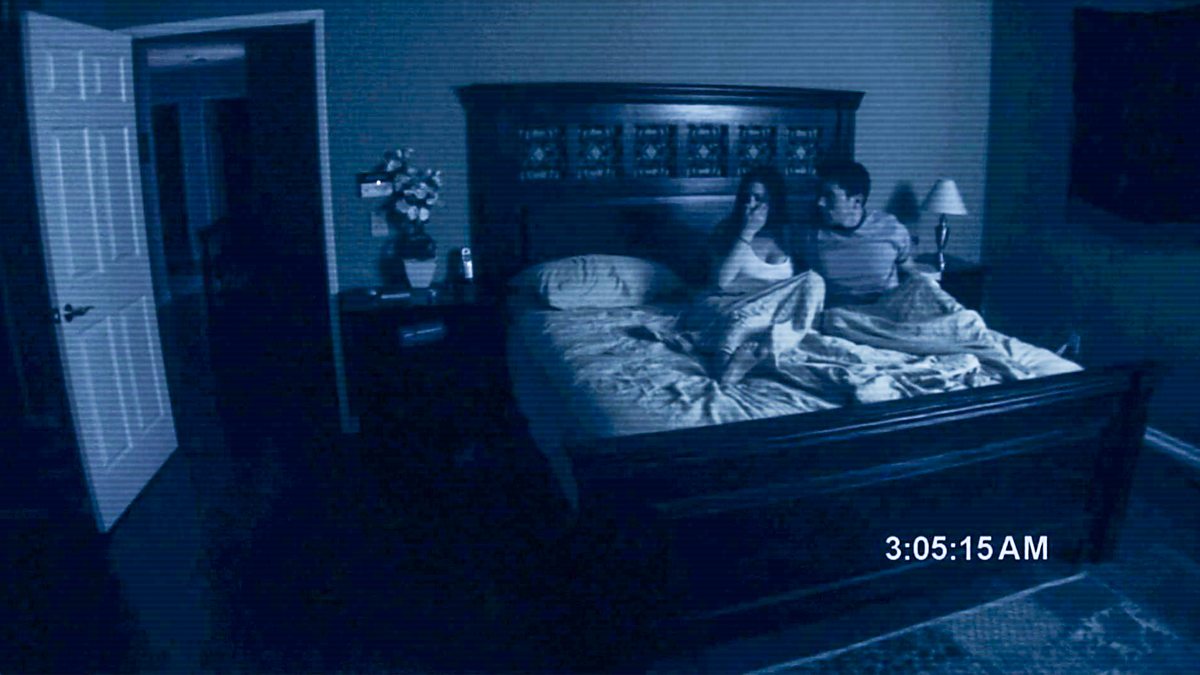
Achieving the security footage effect in Flixier is pretty similar to aging it up!
Select your clip, go to the Effects tab on the right side of the screen and turn up the Pixelation and Noise sliders just enough to give the footage that low quality look.
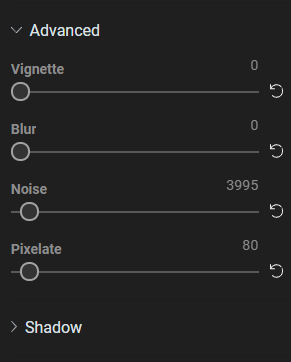
If you want it to look like it’s coming from a black and white security camera, go to the Color tab and apply the Grayscale effect as well. Feel free to experiment with the Contrast slider below it to get it looking just right.
If you followed all the steps, your video should now look like creepy security cam footage that will keep your viewers on edge!
Closing words
Thank you for making it to the end! If you enjoyed this article, make sure to subscribe to our YouTube channel and stay tuned for some video tutorials giving you step by step instructions on how to apply these effects using Flixier!
Dan is passionate about all things tech. He’s always curious about how things work and enjoys writing in-depth guides to help people on their content creation journey.


