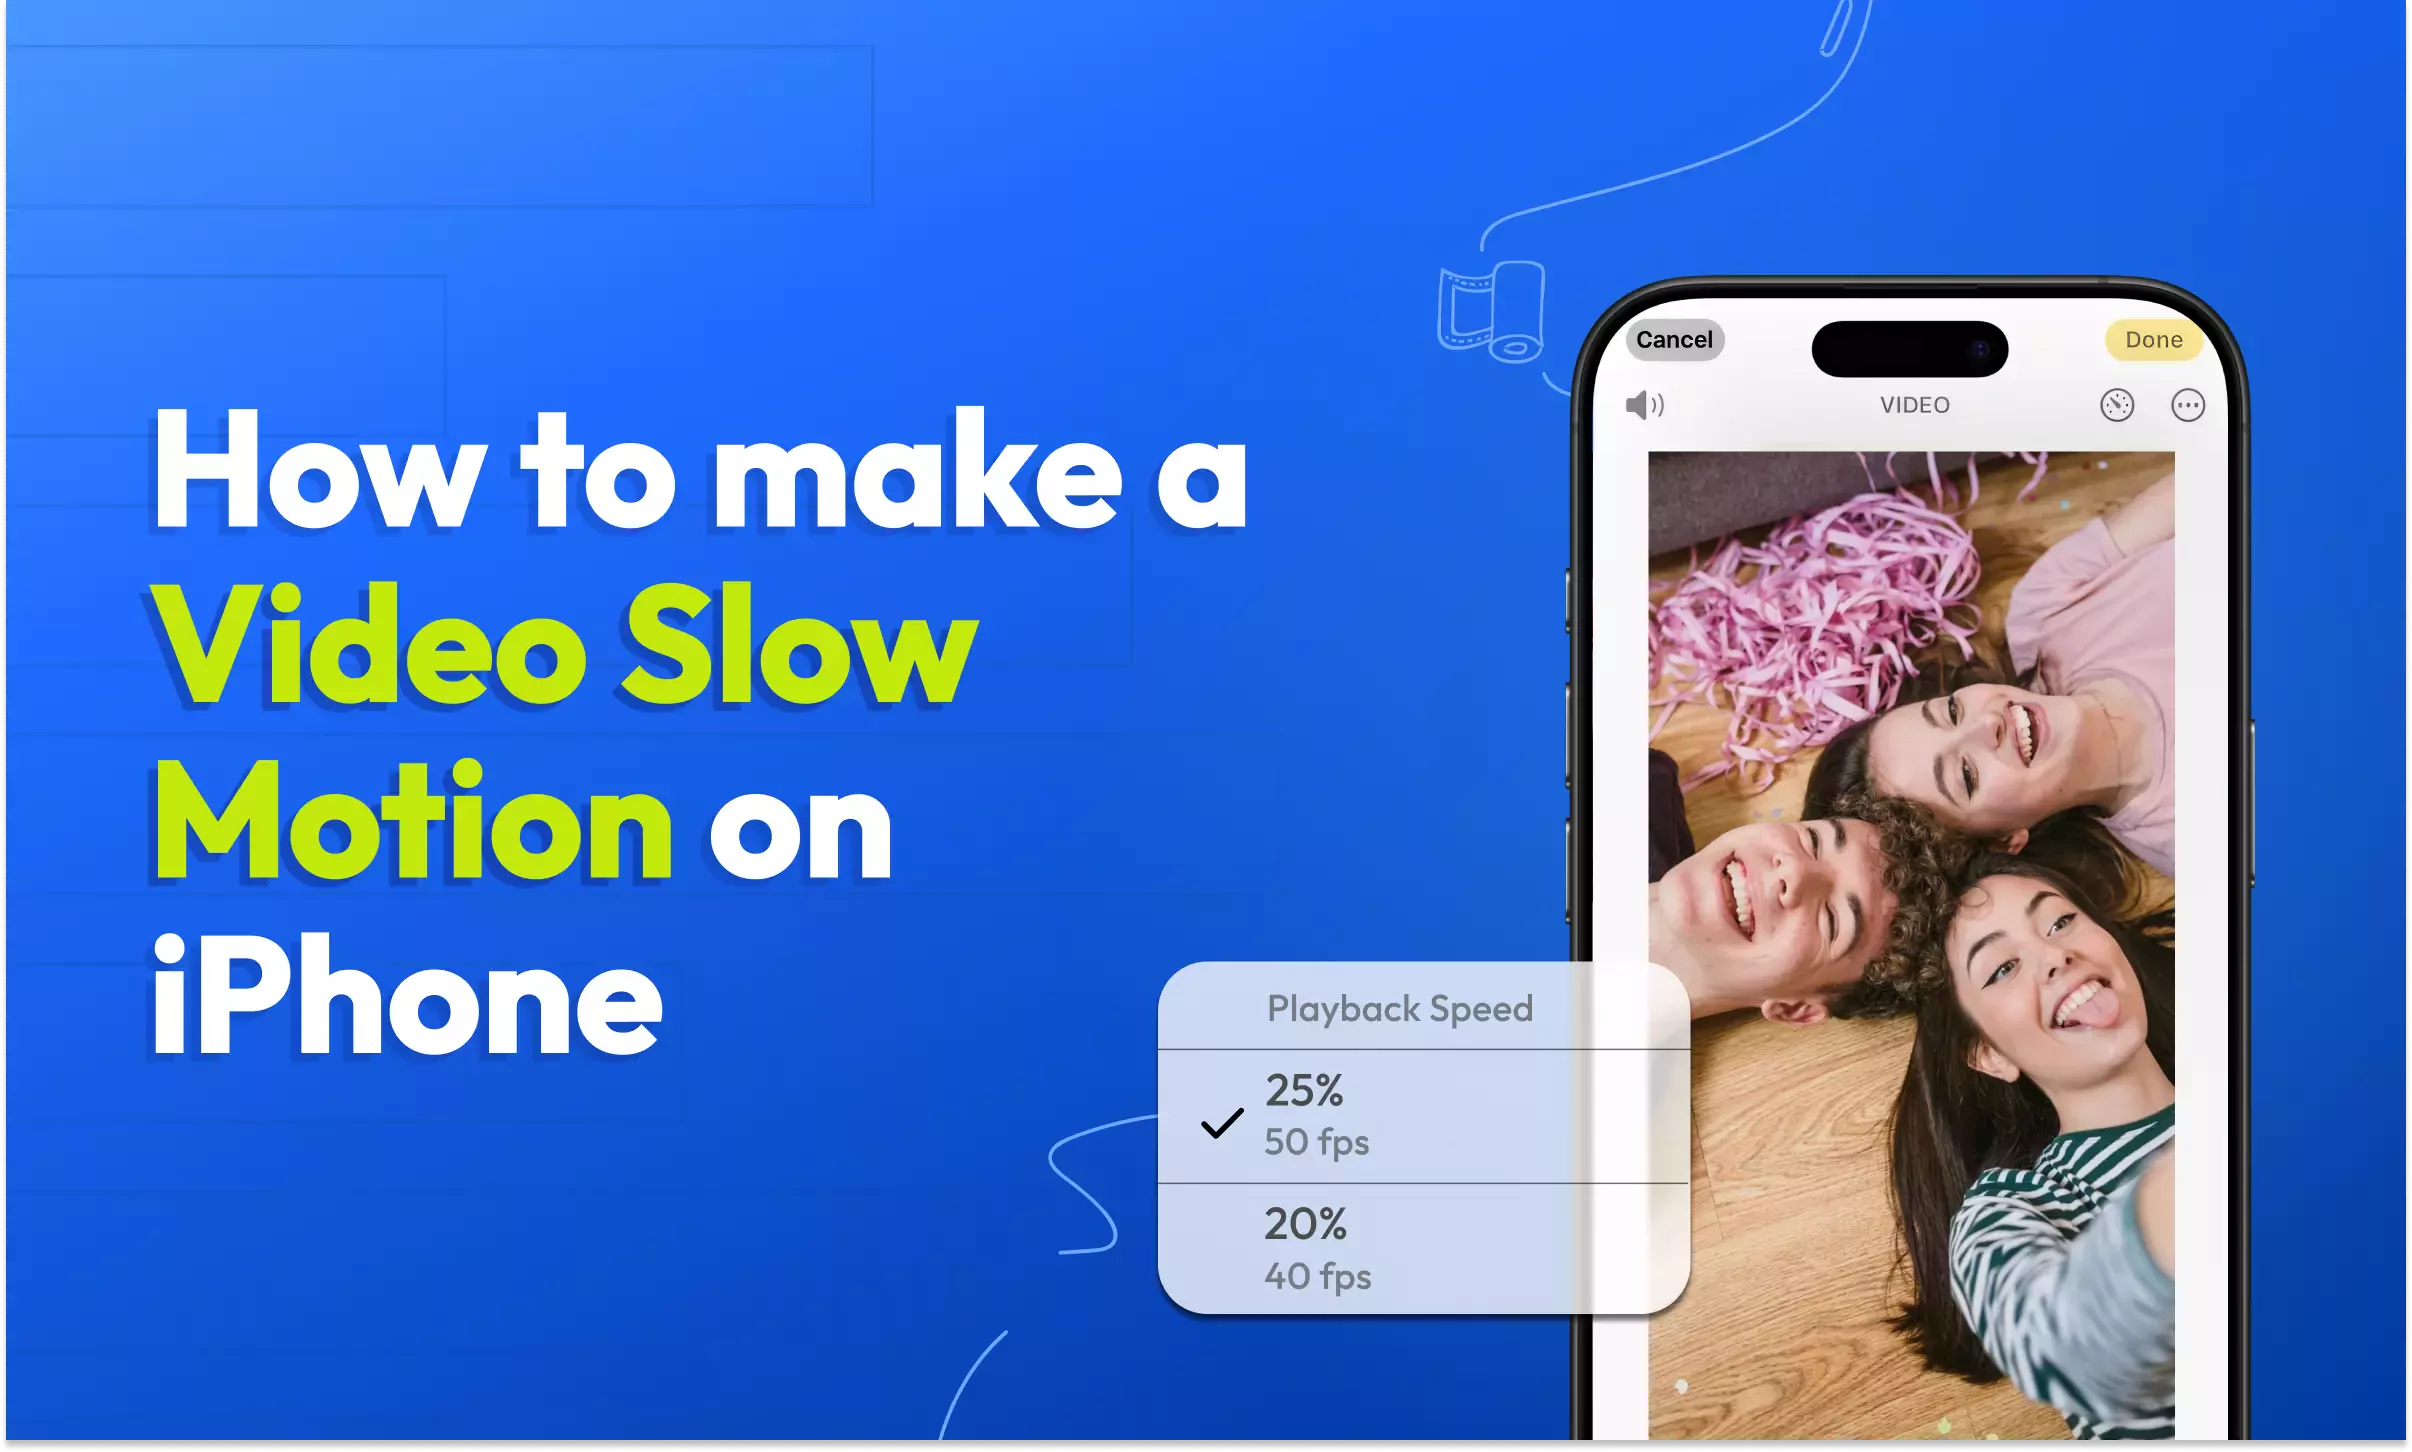
How to make a video slow motion on iPhone in 2025
Updated on October 1, 2025

Have you ever seen something so epic, you keep replaying it in slow motion in your mind? Well, thanks to slo-mo technology, you can do that with any video on any device. Whether it’s a jaw-dropping action shot, a deeply emotional moment or a once-in-a-lifetime experience, slow motion lets you literally slow down time and savor every second.
You might not be aware of it yet, but you already have the power to slow down time at your fingertips. Using an iPhone, you can easily record a slow-motion video, or better yet, turn a normal speed video into slo-mo after it’s been shot. If you don’t have an iPhone or prefer doing all your editing on your laptop, you can always count on video editors like Flixier to give you full creative control of your video speed (and much more!).
Ready to master the art of slow motion? Let’s dive in.
How to record a video in slow motion on an iPhone
Say you want to capture a moment in dramatic, slow-motion detail, like your pet doing an epic flip, a splash of water, or an action scene. Recording in slow motion on your iPhone is quick and easy.
1.Open your Camera app
Go to your Home Screen and open the Camera app as you normally would.

2.Switch to Slow Motion mode
Swipe through the shooting modes at the bottom until you reach Slo-Mo.

3.Check your settings
In the top-right corner, tap the frame rate (usually 120 fps or 240 fps) if you want to adjust the quality and smoothness of your slow-motion video.

4. Record
Press the red Record button to start capturing your slow-motion footage. Tap the Record button again when you’re done.

5.Review your video
Go to your Photos app to play it back and make sure you got the shot you wanted.
How to turn a regular video to slow motion on iPhone
Alright, so in this scenario, you’ve already captured a video on your iPhone – but there’s one standout moment you want to emphasize with slow motion. Here’s how you do it:
1.Select your video and open the Adjustments menu
Open your Photos app and choose the video you want to edit. Tap on the Adjustments icon at the bottom of the screen to bring up your photo adjustment options.

2.Change the playback speed
Tap the Playback Speed icon in the top right corner and set it to 50% (30fps).

3. Adjust slow-motion duration
Use the slider at the bottom to choose exactly which part of your video will be in slow motion (you also have the option to select the entire video). Drag the handles to adjust the duration of the effect, with the section inside the handles playing in slow motion and the areas outside remaining at normal speed.

4.Save your changes
Tap Done to save your edits and play your video to check if the slow-motion effect has been properly applied.
And that’s how you can turn a regular video (normal speed) into slow motion using your iPhone. This method is quick and handy, and removes the need to download or install any third-party app to achieve the same goal. The trade-off is that it offers limited control over how much you can adjust the video speed.
How to make a slow motion video fast on iPhone
In this scenario, you’ve recorded a video in slow motion on your iPhone using the Slow Motion Mode, but now you want to (partially or totally) restore it to normal speed. The process is just as simple, following almost the same steps as above, with a few tweaks.
1.Open your video and open Adjustments
Go to your Photo gallery and select your video as before. Tap on the Adjustments icon to access your photo editing options.
2.Choose a new playback speed
Tap on the Playback Speed icon and set it to 100% (200fps).

3.Use the slider to adjust duration
Just as before, use the slider at the bottom of the screen to select which part of the video you want to alter. 
4.Save your video
Tap on Done to save your changes and play the video to make sure everything is playing according to plan.
Quick note: When editing a slow-motion video, you have the freedom to choose from multiple playback speeds. Setting it to 100% will restore normal speed, but you can also experiment with lower speeds, going as slow as 10% (20fps) for dramatic effect (for those really epic shots).
Depending on your iPhone model, you might have different recording options available. To change your default settings, navigate to your iPhone’s Settings - Camera - Record Video / Record Slo-Mo, explore your options and choose the resolution and frame rate that best suits your needs.
Depending on the frame rate option you choose here, you will have different options in the editing stage.

How to make a video slow motion with Flixier
Editing videos directly on your iPhone might be quick and efficient, but it can feel a bit restrictive as it doesn’t leave much more for creative freedom. Being able to control video speed with absolute precision can do wonders for your storytelling, and can turn any regular video into a cinematic masterpiece.
For instance, you can speed up certain sections of your video to create a time-lapse effect, and then reduce the video speed to slow motion to highlight important details – like a facial expression, an epic jump, or a dramatic reveal.
A video editor like Flixier offers some much-needed creative freedom, while also sparing you the headache of having to download and install a third-party app for the singular task of changing the frame rate of your video.
With that in mind, let’s see how you can make a video slow motion after recording with Flixier in just a few simple steps:
1. Open the editor
From our homepage, click the blue Get Started button. This will take you straight to the editing dashboard, without having to create an account or download anything.
2. Add your video
Click the Import or Record button at the top left of the screen to bring up the import menu. Here you’ll find plenty of options for getting your videos in – whether it’s scanning a QR code to grab them from your phone, adding an external link, or pulling them straight from your cloud storage like Google Drive or Dropbox. The quickest way is to simply drag and drop them from your desktop.
After import, the video will be automatically placed in your media library on the left side panel. Click the little “+” symbol to add it to the timeline.
3. Change the video speed
Once the video has been loaded onto the timeline, you can properly start the editing process. Select your video, and take a look on the right side of the dashboard, under the Video tab. Scroll down to Video Speed, and you’ll see multiple speed options as well as a slider for granular customization. You can choose one of the speed presets (0.5 being the go-to option for standard slow motion videos), or move the slider to set a custom playback speed.
If you're looking to apply different speeds to different sections of your video, just drag the playhead to the part you want to change, use the Cut button to separate it from the rest, and then adjust the speed for that specific segment – leaving the rest of the video untouched.

4. Edit, save & export
With video speed all squared away, you can continue editing your video to your heart’s content. If you’ve only got a few minutes to do some quick (but potentially life-changing) changes, try adding auto-synced captions instantly with AI, getting an AI voice to narrate your video for you or reaching peak sound quality with our AI audio enhancer.
When you’re happy with your edits, hit Export and choose your desired format. You’ll also be asked to select any platforms you want to publish directly to. Once you hit Export Video, your video will not only be downloaded to your device but also go live on any platforms you selected – all with one single click.
Content writer with over 8 years of experience in digital marketing. When she's not deep in the writing zone, you'll find her on coffee dates with friends, writing poems, or taking photographs on film. Because all the best stories need a little caffeine, creativity, and color.

How to Start a YouTube Channel Using Your Mobile Phone
Who says you need expensive cameras and gear in order to start a YouTube channel? Nowadays, our smartphones can take better videos than most budget camcorders could 10 years ago. Nothing can stop you from "broadcasting yourself", so grab your phone, connect to the Wi-Fi and learn how to start a YouTube channel from your mobile phone!

Seven Tips That Will Make Your Microphone Sound Better When Recording
If you’re looking to improve the quality of your voice recordings, you don’t need to worry anymore! We’re here to give you some tips that will help you get better sound for your videos. These tips will work regardless of whether you’re using Flixier to record your voice or other programs like Audacity or Adobe Audition. For the most part, getting a high quality recording relies mostly on preparation, meaning most of the work gets done before you even press the Record button.
