- Home
- Blog
- Social Media
- How to Edit Your Twitch Streams Without Downloading Them
How to Edit Your Twitch Streams Without Downloading Them
Updated on June 1, 2025
If you're trying to make it big on Twitch, you probably already know that the key to reaching more people is to share your best content outside of the platform. Sadly enough, Twitch's algorithm isn't really good at promoting new streamers, so the best way to get more people to watch your streams is to share your content on YouTube, TikTok, or Instagram.
Twitch already saves your past streams as VODs (which stands for Video On Demand), so you can edit your Twitch videos and share them on other platforms. And thanks to Flixier's new Twitch integration, you'll be able to use the online video editor to quickly turn your past streams into new content without having to wait around for it to be downloaded to your computer first. You can add your Twitch videos to your Flixier library in minutes, edit them easily and then render them in a couple of minutes and have them sent straight to your YouTube, TikTok, Facebook or Instagram account.
In this article, we're going to provide in-depth instructions on how to do just that.
Step 1: Create a Flixier account and link it to your Twitch account
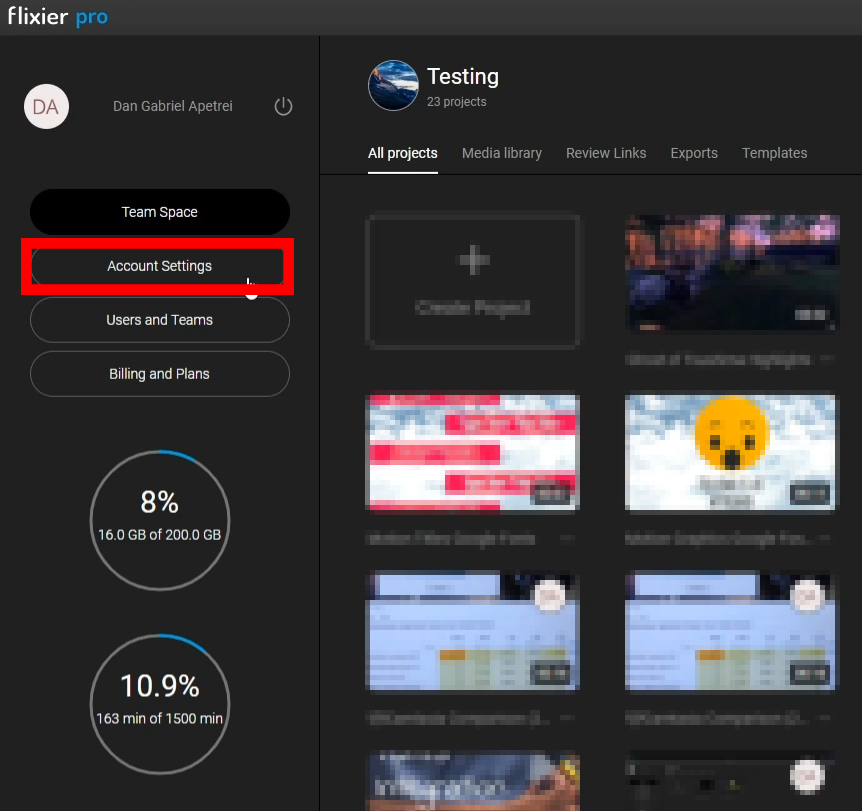
Start by going to Flixier and creating a free account. Then, open your Flixier dashboard and click on Account Settings:
Then, go to the Connected Apps tab and scroll down until you see the field that says Twitch.
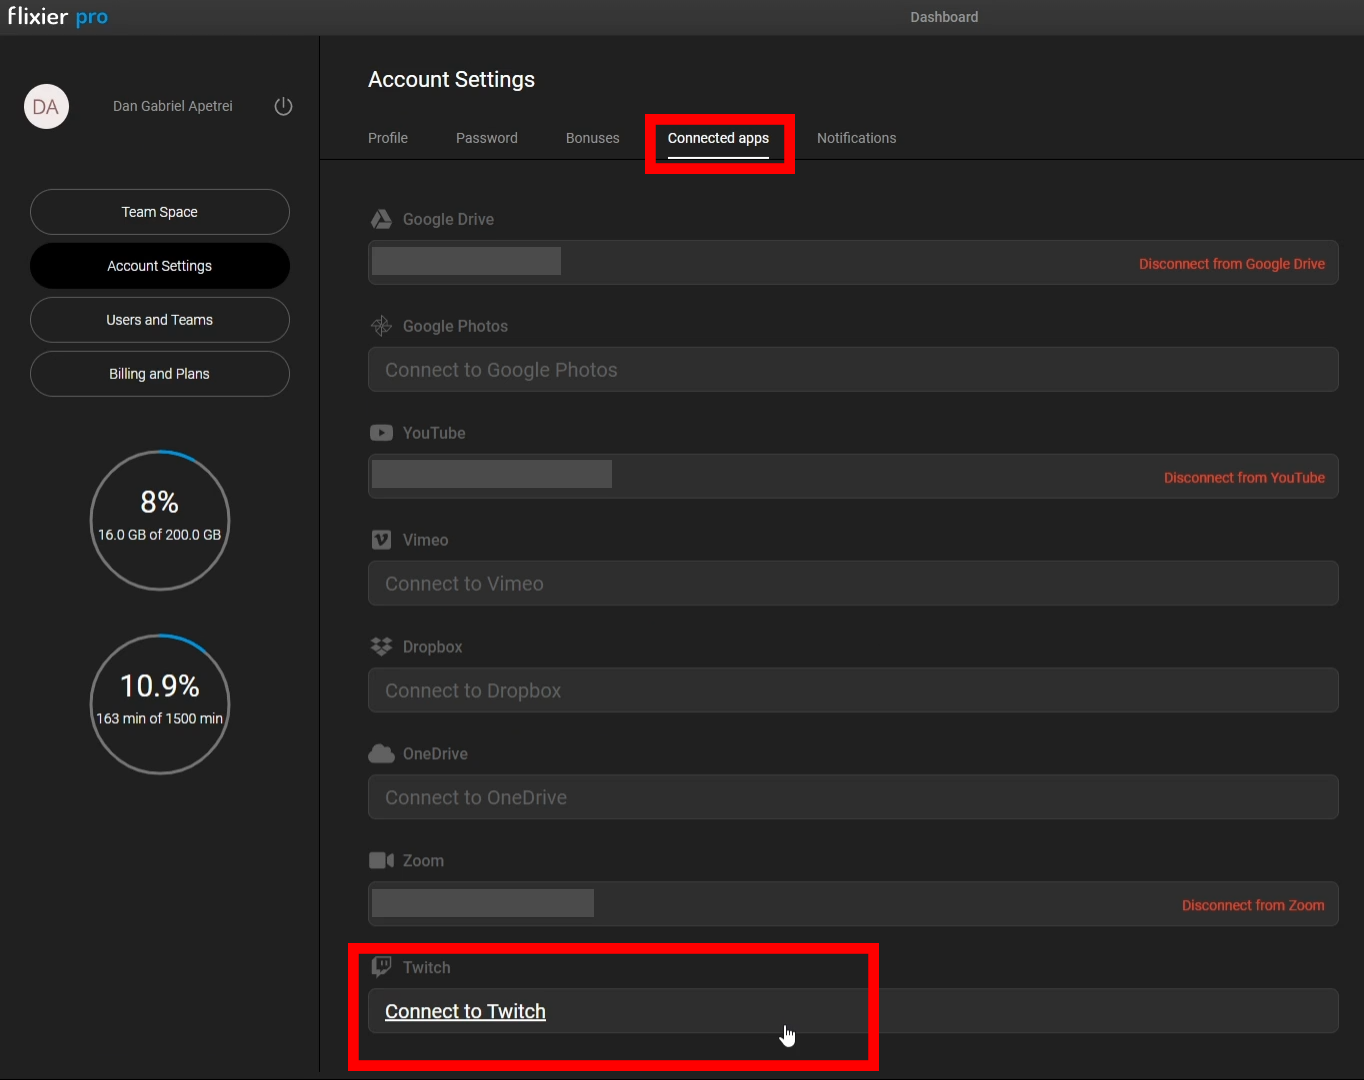
Click on Connect to Twitch, then log into your Twitch account. When asked to grant Flixier authorization, simply click on Authorize.
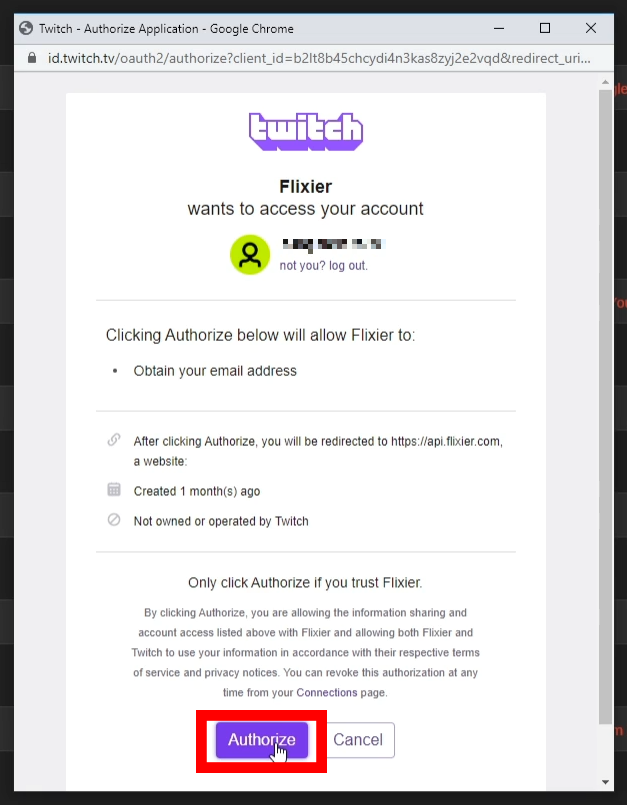
Your Flixier and Twitch accounts should now be successfully linked.
Importing and Editing your Twitch streams
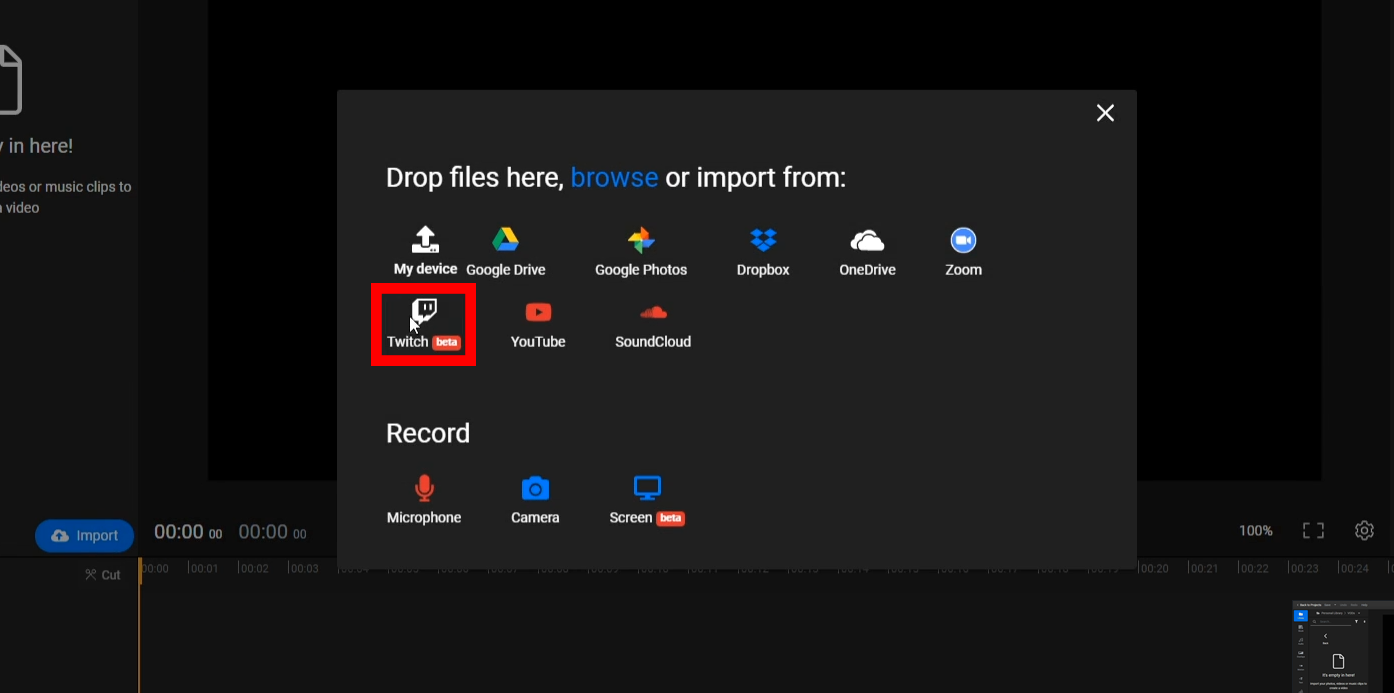
Now you can actually import your VODs into your library and start editing them. To do so, click on the Import button, then select Twitch.
You’ll see a list of your Twitch VODs, which you can sort by how recent they are, trending status or views.
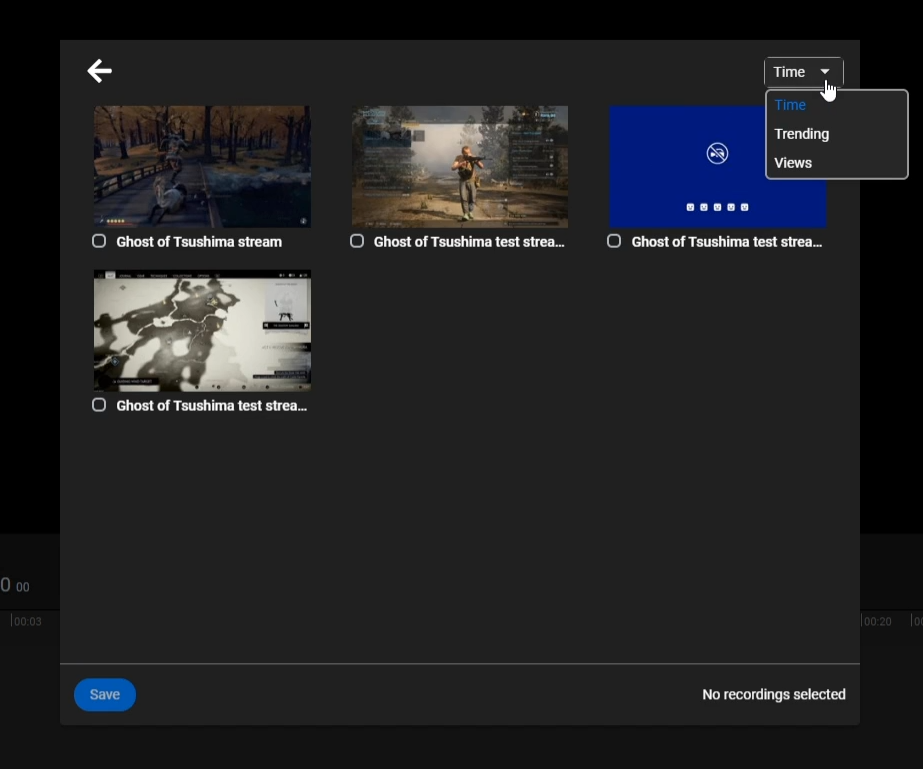
Select the ones you want to work on and click on Save and then Import All.
NOTE: If a VOD is longer than an hour, Flixier will automatically split it into one hour segments and save them all in a folder with the same name as the original video.
After your Twitch streams have been successfully imported to Flixier, you're free to edit them however you see fit. You can cut out unwanted parts like breaks or other dull moments, trim your VODs down to a shorter length, use transitions to tie different segments together in an engaging way and insert Motion Titles, text, or Like, Share and Subscribe animations for your YouTube viewers.
On top of that, you can take the most exciting parts of your streams, crop the videos easily to make them fit a vertical aspect ratio and then post them on TikTok, YouTube Shorts or Instagram Reels.
Exporting your streams to YouTube
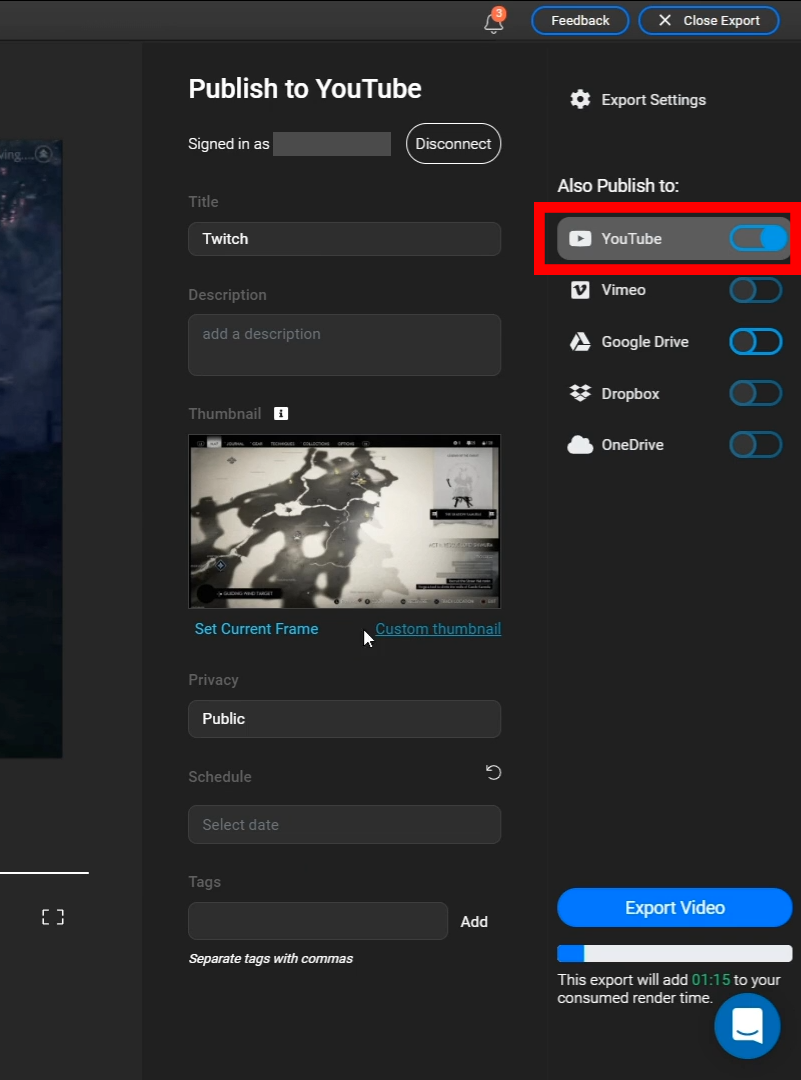
After you'er done editing your YouTube video, you can use our export menu to publish it directly to YouTube. Flixier gives plenty of options when doing so. Our export menu allows you to change your thumbnail (either by using a frame from your video or uploading a custom thumbnail) and give your video a title and description. You can also control the privacy settings of your video, so you can set it to public, unlisted, or private.
Closing Words
We hope this article managed to shed some light on how our new Twitch integration works and how it can benefit you as a streamer and content creator.
If you want to read more articles like this one and learn more about our upcoming updates and features, then please consider checking out the rest of our blog, subscribing to our YouTube channel and following us on Facebook and Twitter!
Dan is passionate about all things tech. He’s always curious about how things work and enjoys writing in-depth guides to help people on their content creation journey.

The Most Important YouTube Video Analytics Explained
Over the last 15 years, video analytics have improved a lot in order to accommodate this increased need for planning and strategy. Gone are the days when the number of views was the only metric you could use to determine whether or not a video was successful. Nowadays, all major video platforms, including YouTube, Vimeo and Flowplayer offer content creators access to stats such as Audience Retention, detailed demographics, top traffic sources and more.
Seven Tips That Will Make Your Microphone Sound Better When Recording
If you’re looking to improve the quality of your voice recordings, you don’t need to worry anymore! We’re here to give you some tips that will help you get better sound for your videos. These tips will work regardless of whether you’re using Flixier to record your voice or other programs like Audacity or Adobe Audition. For the most part, getting a high quality recording relies mostly on preparation, meaning most of the work gets done before you even press the Record button.
How Uploading Your Twitch VODs to YouTube Can Make You a More Successful Streamer
This article is going to help you achieve growth as a Twitch streamer by promoting your content on the YouTube platform. By reading it you will learn how to enable Twitch VODs, the benefits they bring and how you can edit and export Twitch VODs to YouTube. It also contains tips and tricks on how to edit your past stream recordings in order to turn them into proper gaming videos for YouTube.


